Join the beta

How-to guides · For suppliers

Get found by designers with the supplier portal

Get listed, add products, import your range, answer requests, read your stats and set up your page.

6 short how-tos. Screens show sample data.

How-to 1: Get listed

Claim your company with your work email.

Claim your listing

  1. On a computer, open the supplier portal and click “Claim your listing”.

  2. Enter your work email and company name. Personal addresses like Gmail are not accepted.

  3. Type the 6-digit code we email you. It works for 15 minutes.

Already on Swatchera? Don’t claim again. Sign in with your work email instead.
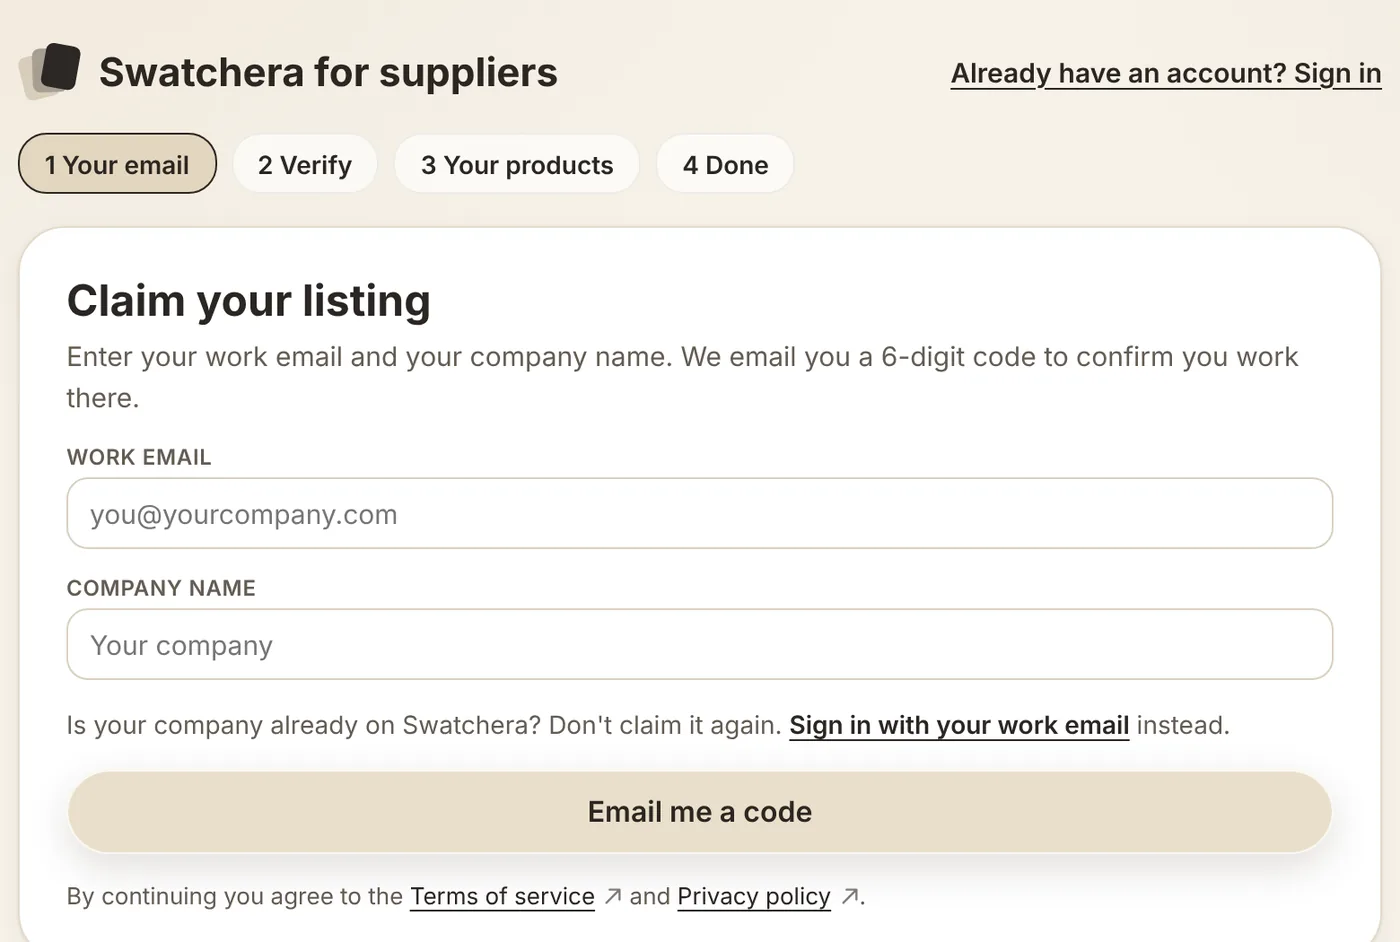
The Claim your listing form with work email and company name

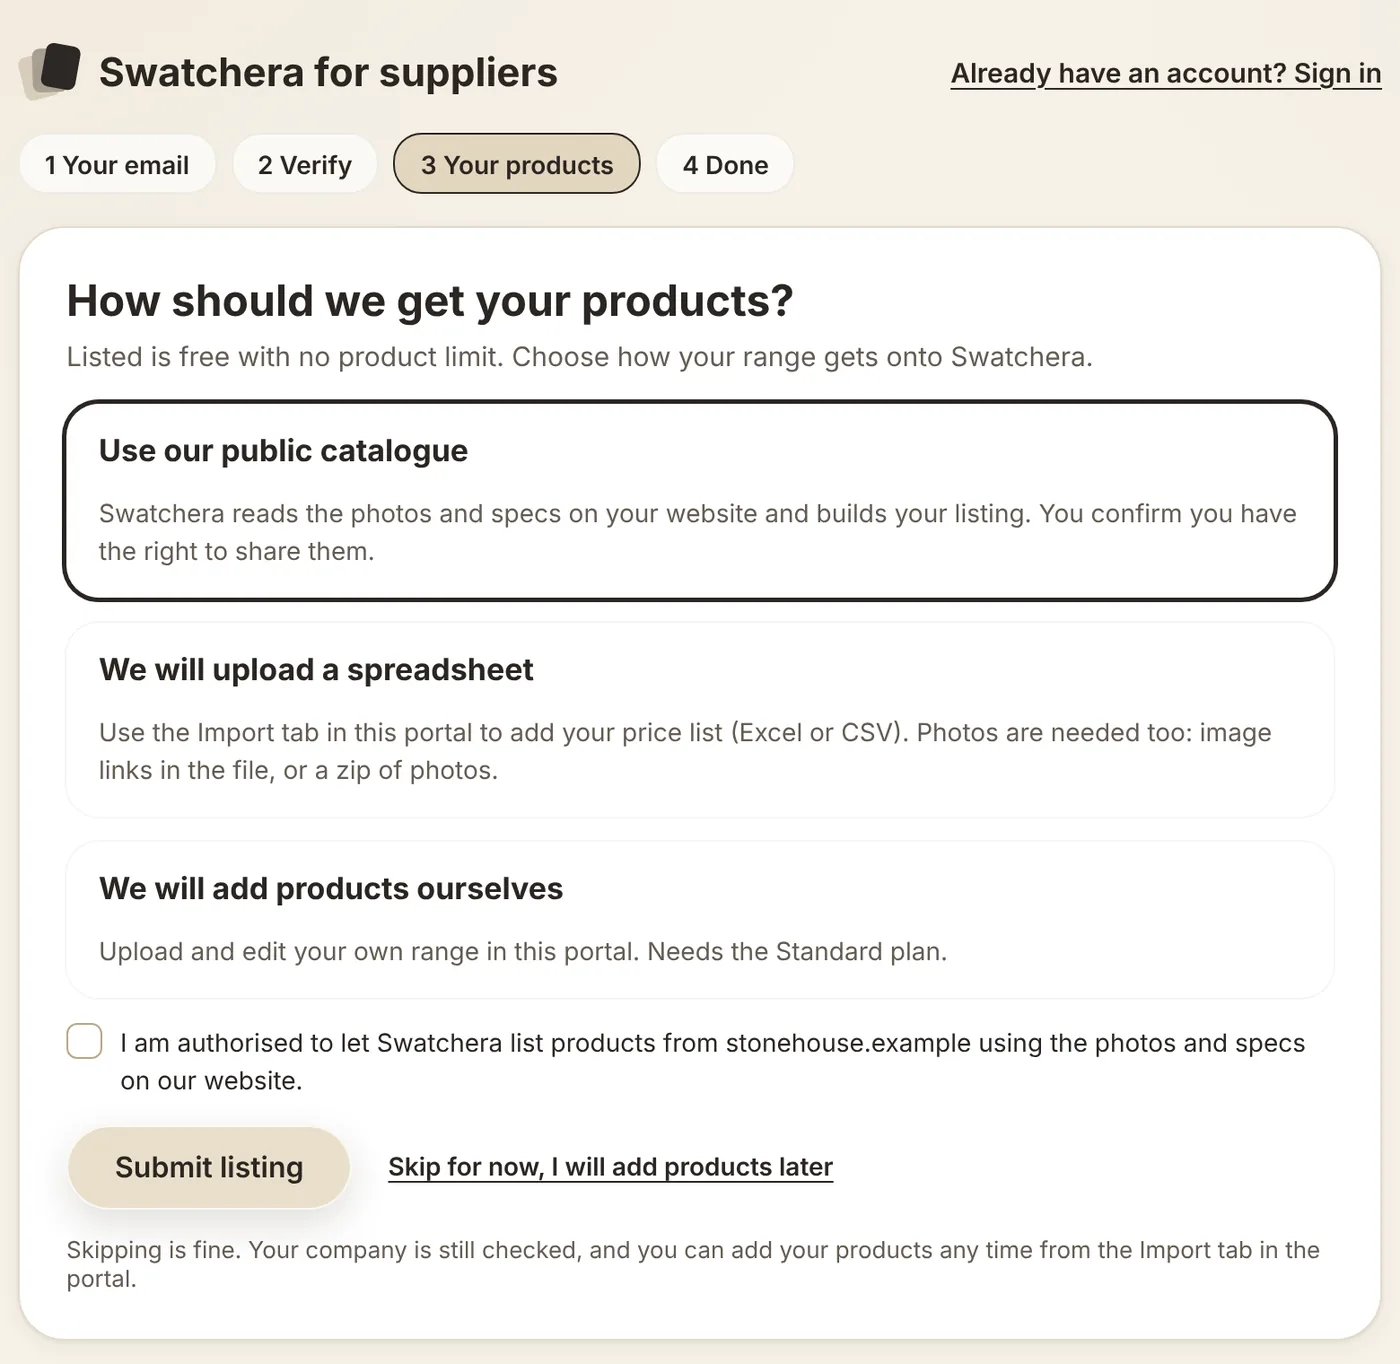
Choose how we get your products

  1. Public catalogue: we build your listing from your website. Tick the box to confirm you may share it.

  2. Spreadsheet: upload your price list from the Import page (How-to 3).

  3. Ourselves: add and edit products one by one in the portal (How-to 2).

  4. Click “Submit listing”, or “Skip for now” and add products later.

Our team checks new listings first, usually within 1 to 3 working days. We tell you when yours is live.

Step 3 of the claim: how should we get your products, with three options

How-to 2: Add products

One at a time, with photos the scan can match.

Find your products

  1. Open Products in the sidebar.

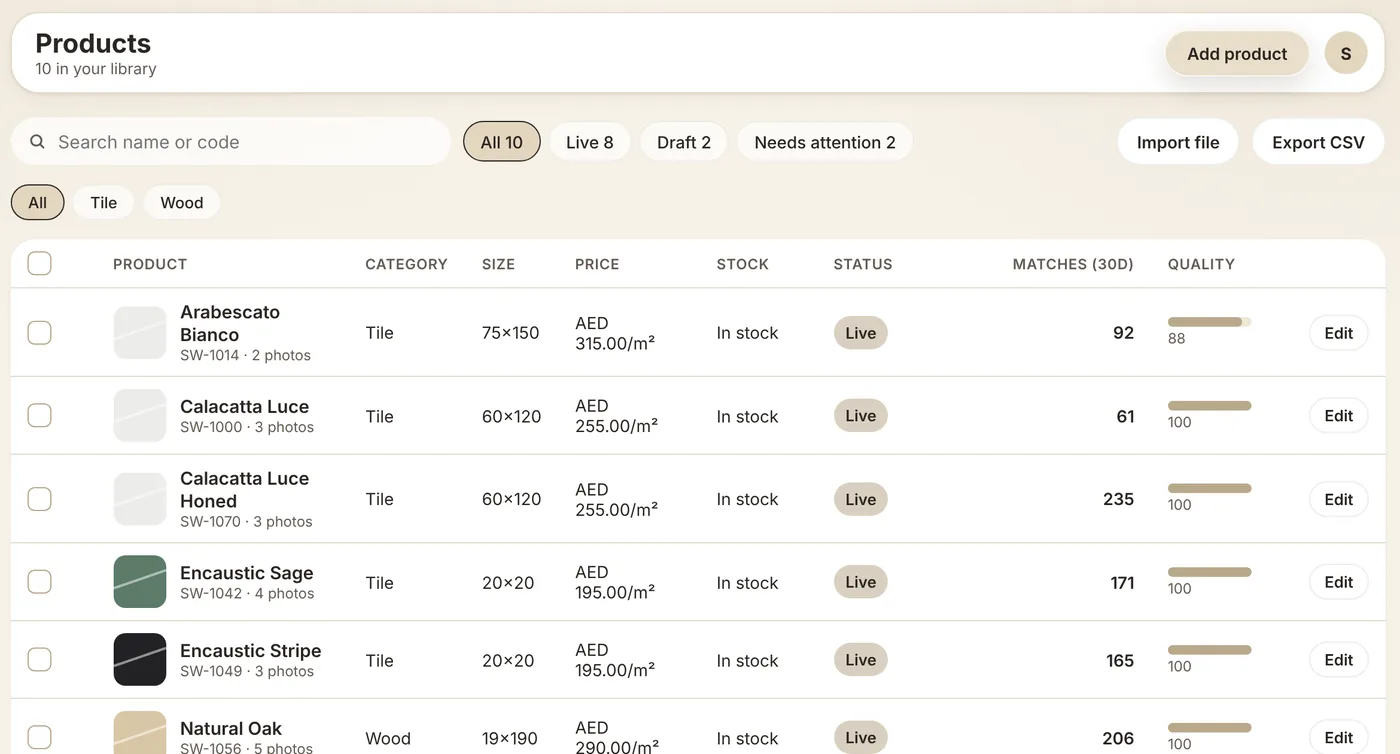
  2. Search, or filter by Live, Draft, Needs attention or category.

  3. Click “Add product”, or Edit on any row.

  4. Tick rows to publish, move to draft or delete many at once.

No product limit on any plan. Export CSV downloads your catalogue.

The Products list with search, filters, status and quality for each product

Fill in the details

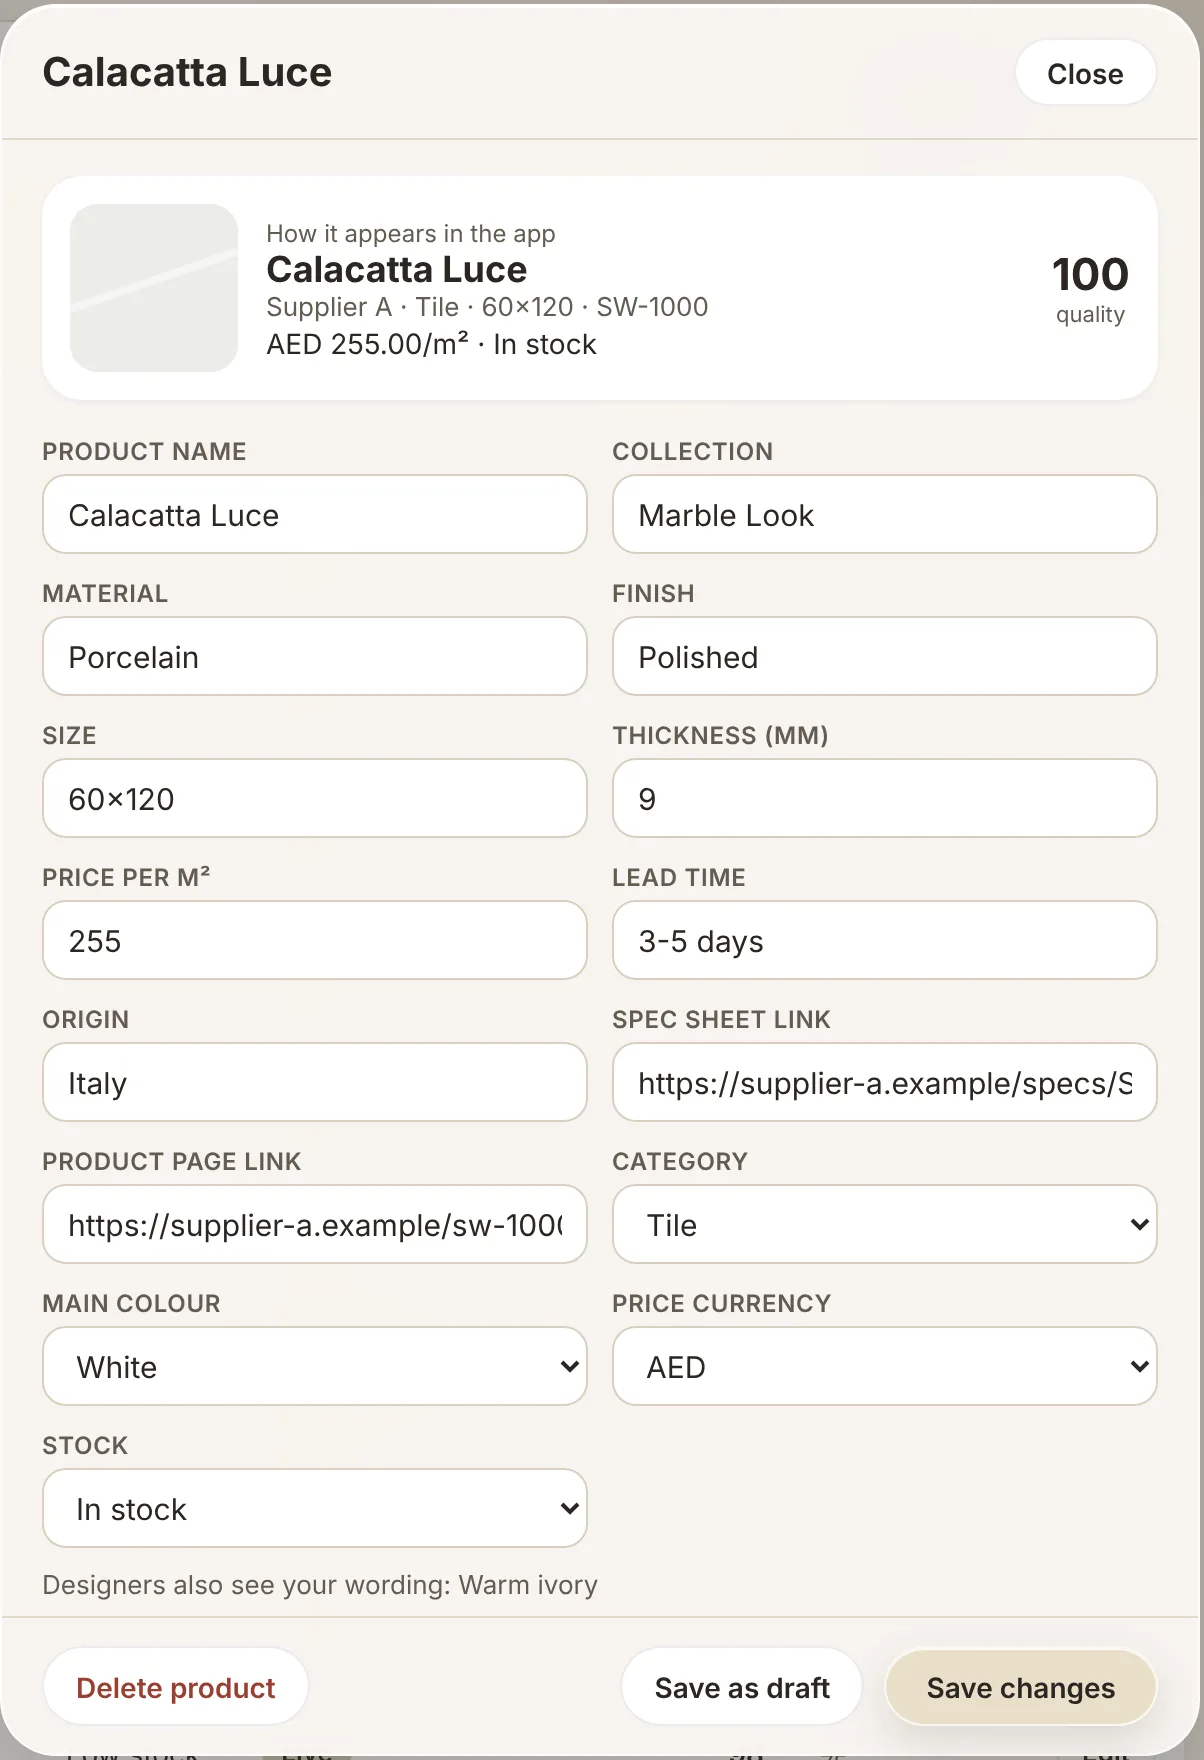
  1. Only the name is required. Add category, colour, finish, size and price where you can.

  2. Add photos. The first is the main one.

  3. Click Publish to go live, or “Save as draft” to finish later.

Photos the scan can match. A product needs at least one photo to show in scans. Shoot the flat face straight on, in even daylight, with a texture close-up if you have one. No room shots, logos or watermarks.

The product editor with name, material, finish, size, price and colour fields

How-to 3: Import your range

Your own price list, checked before it goes live.

Upload your price list

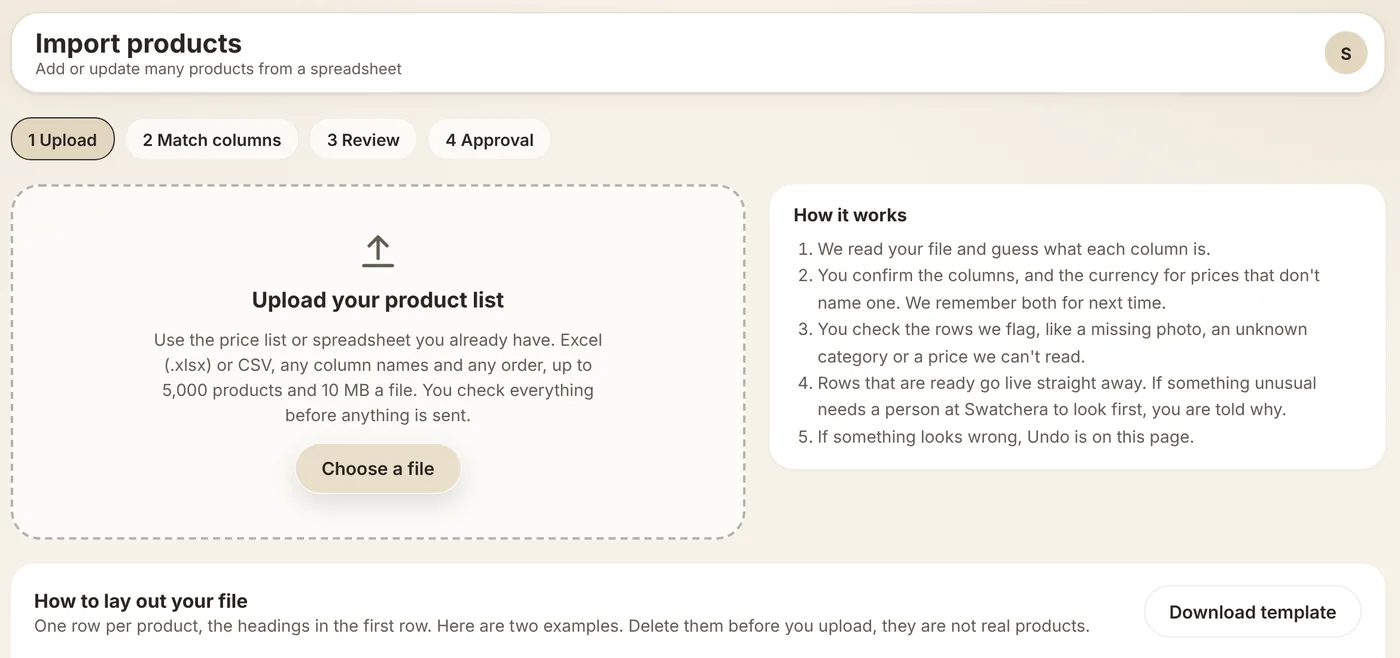
  1. Open Import on a computer.

  2. Click “Choose a file”. Use the spreadsheet you already have.

  3. Starting from scratch? “Download template” gives you a layout.

Excel or CSV, any column names in any order, up to 5,000 products and 10 MB a file.

The Import page with Upload your product list and How it works

Match your columns

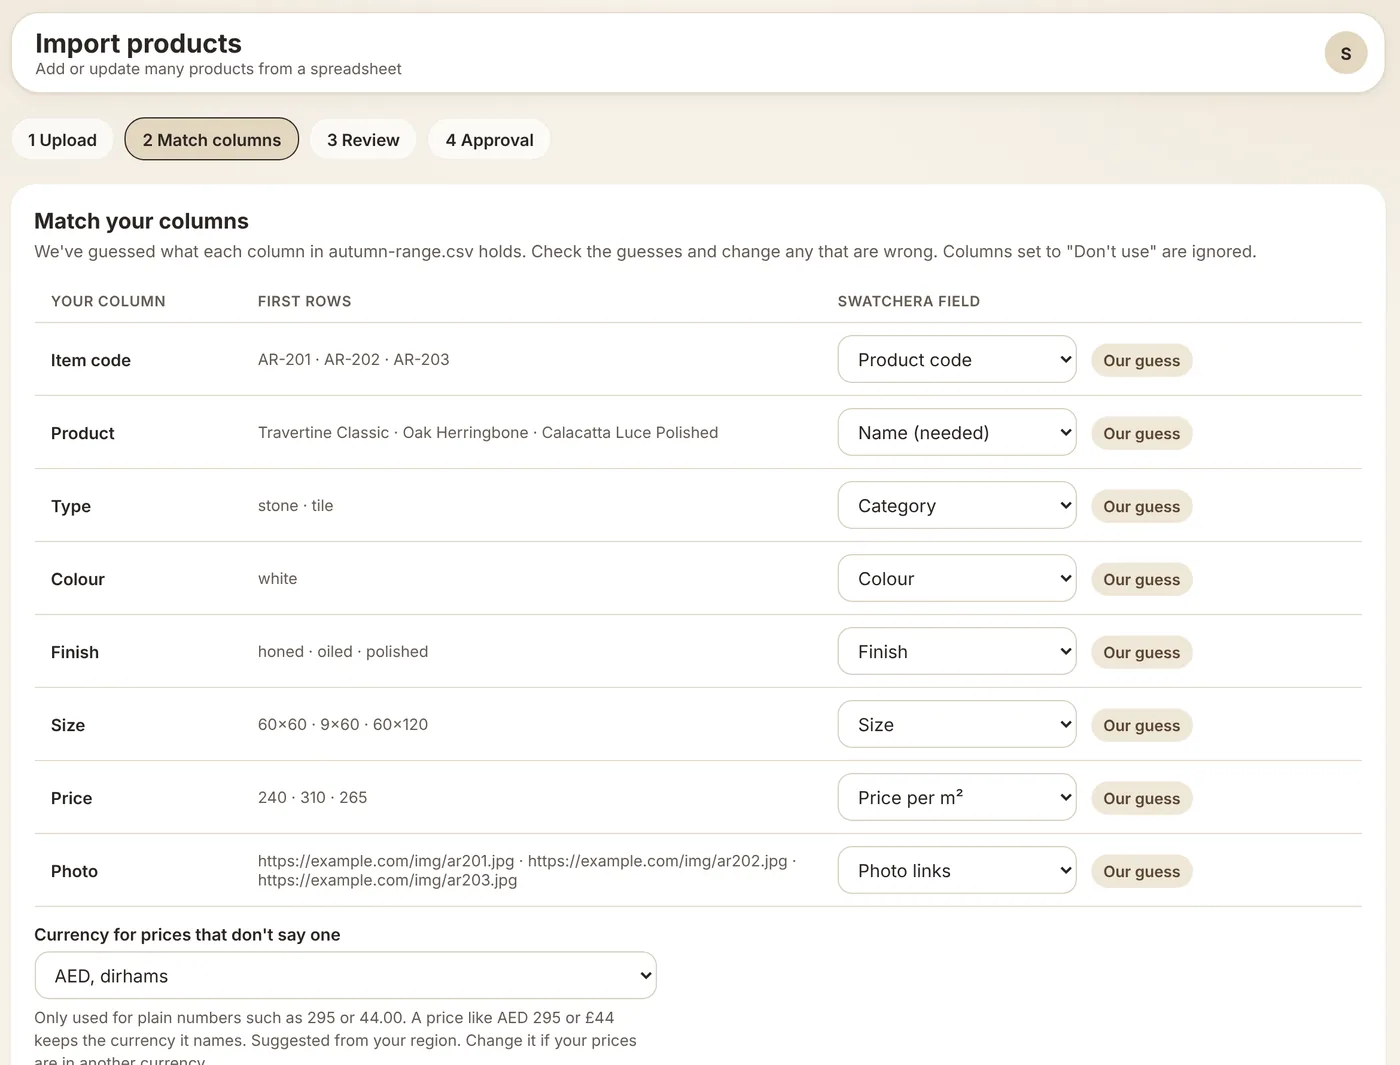
  1. Check each “Our guess”. Change any that are wrong, or set a column to “Don’t use”.

  2. Pick the currency for plain prices like 295. A price like £44 keeps its own.

  3. Tick “Remember these columns” to skip this next time.

  4. Click “Check my products”.

Match your columns, with Swatchera’s guess for each column of the file

Check the rows we flag

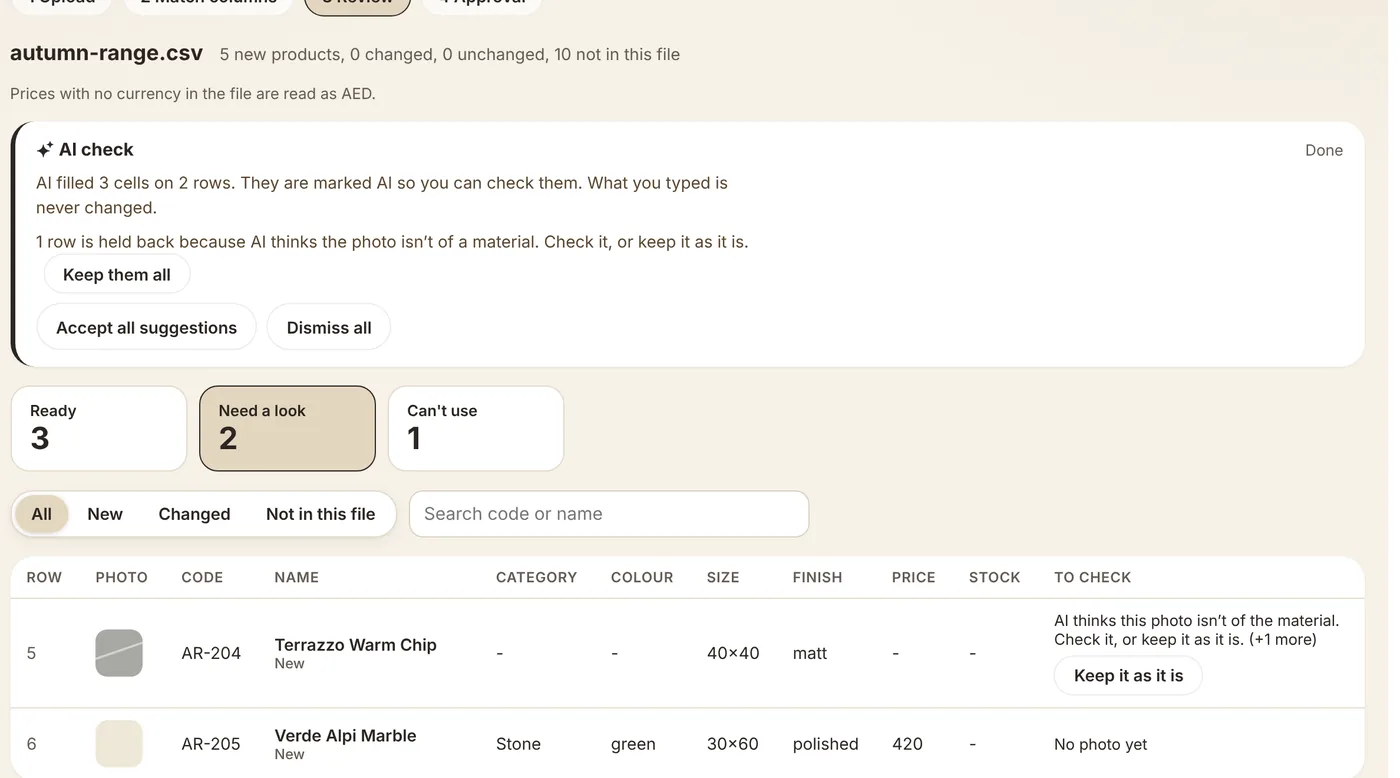
  1. Rows are sorted into Ready, Need a look and Can’t use.

  2. Edit a row in place, or use “Fix many at once”.

  3. AI check: AI fills empty details it is sure about and marks them. Accept, change or dismiss.

AI never changes what you typed. Switch it off any time in Company profile.

Import review with the AI check, counts of ready rows and the rows that need a look

Send it live

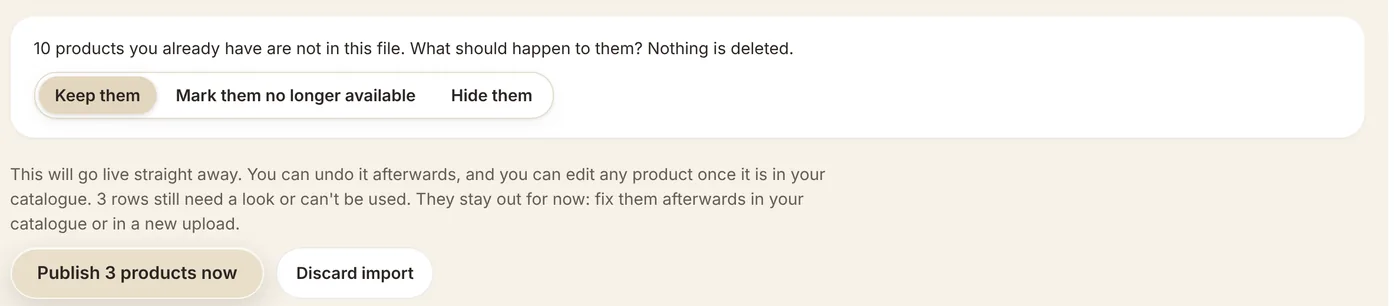
  1. Choose what happens to products missing from the file: keep, mark no longer available, or hide.

  2. Click Publish. Ready rows go live straight away.

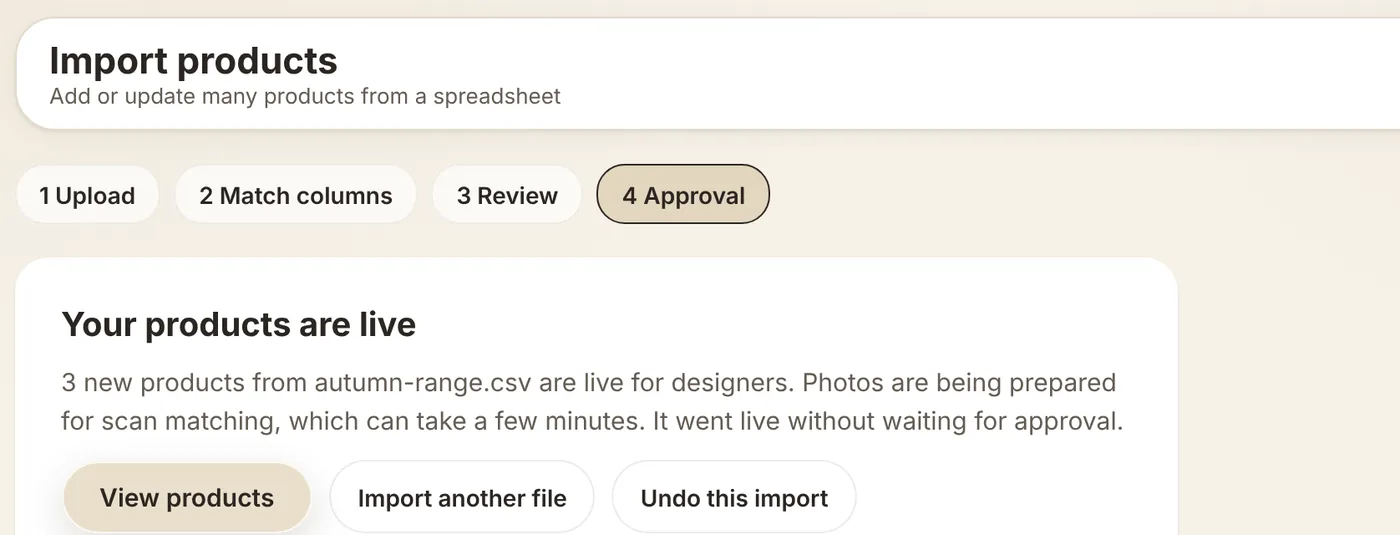
  3. Something wrong? “Undo this import” is on the same page.

Big price changes, or changes to much of your range at once, are checked by us first. The page says why.

Choice for products not in the file, and the Publish button
Your products are live, with View products and Undo this import

How-to 4: Answer requests

Samples, enquiries and reports from designers.

Reply to a designer

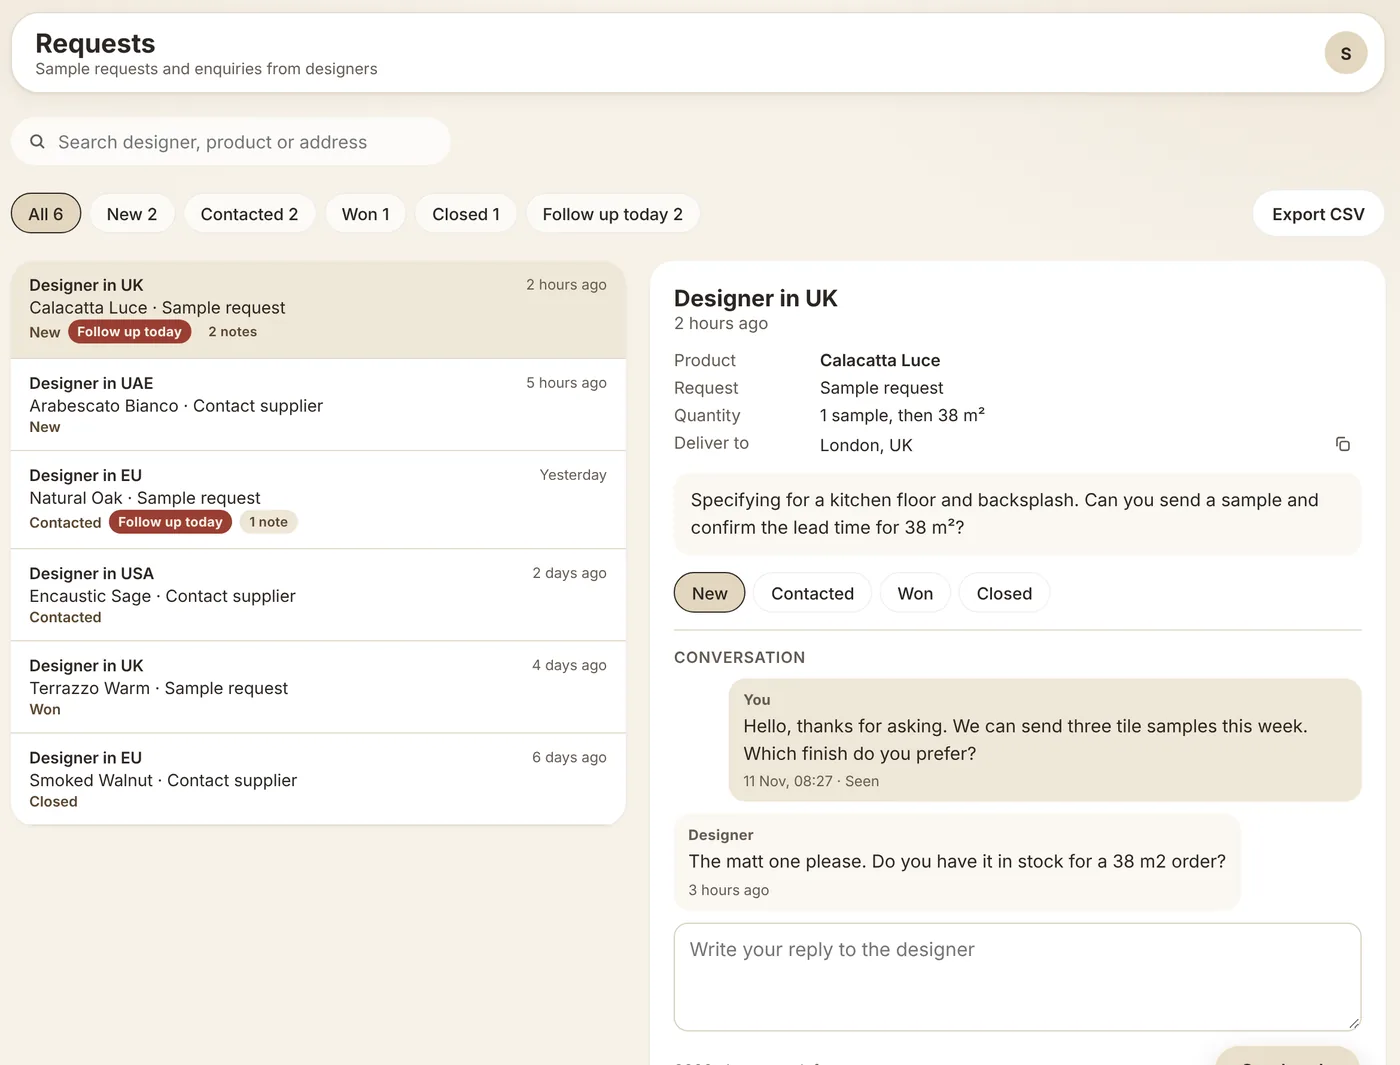
  1. Open Requests. New sample requests and enquiries show a count in the sidebar.

  2. Click a request to see the product, quantity, delivery place and message.

  3. Write your reply and click “Send reply”.

  4. Move the status on: New, Contacted, Won or Closed. The designer sees where it stands.

Replies go through Swatchera. Your email is not shown unless you type it.

Requests list with a sample request open, its status buttons and the conversation

Keep track with follow-ups and notes

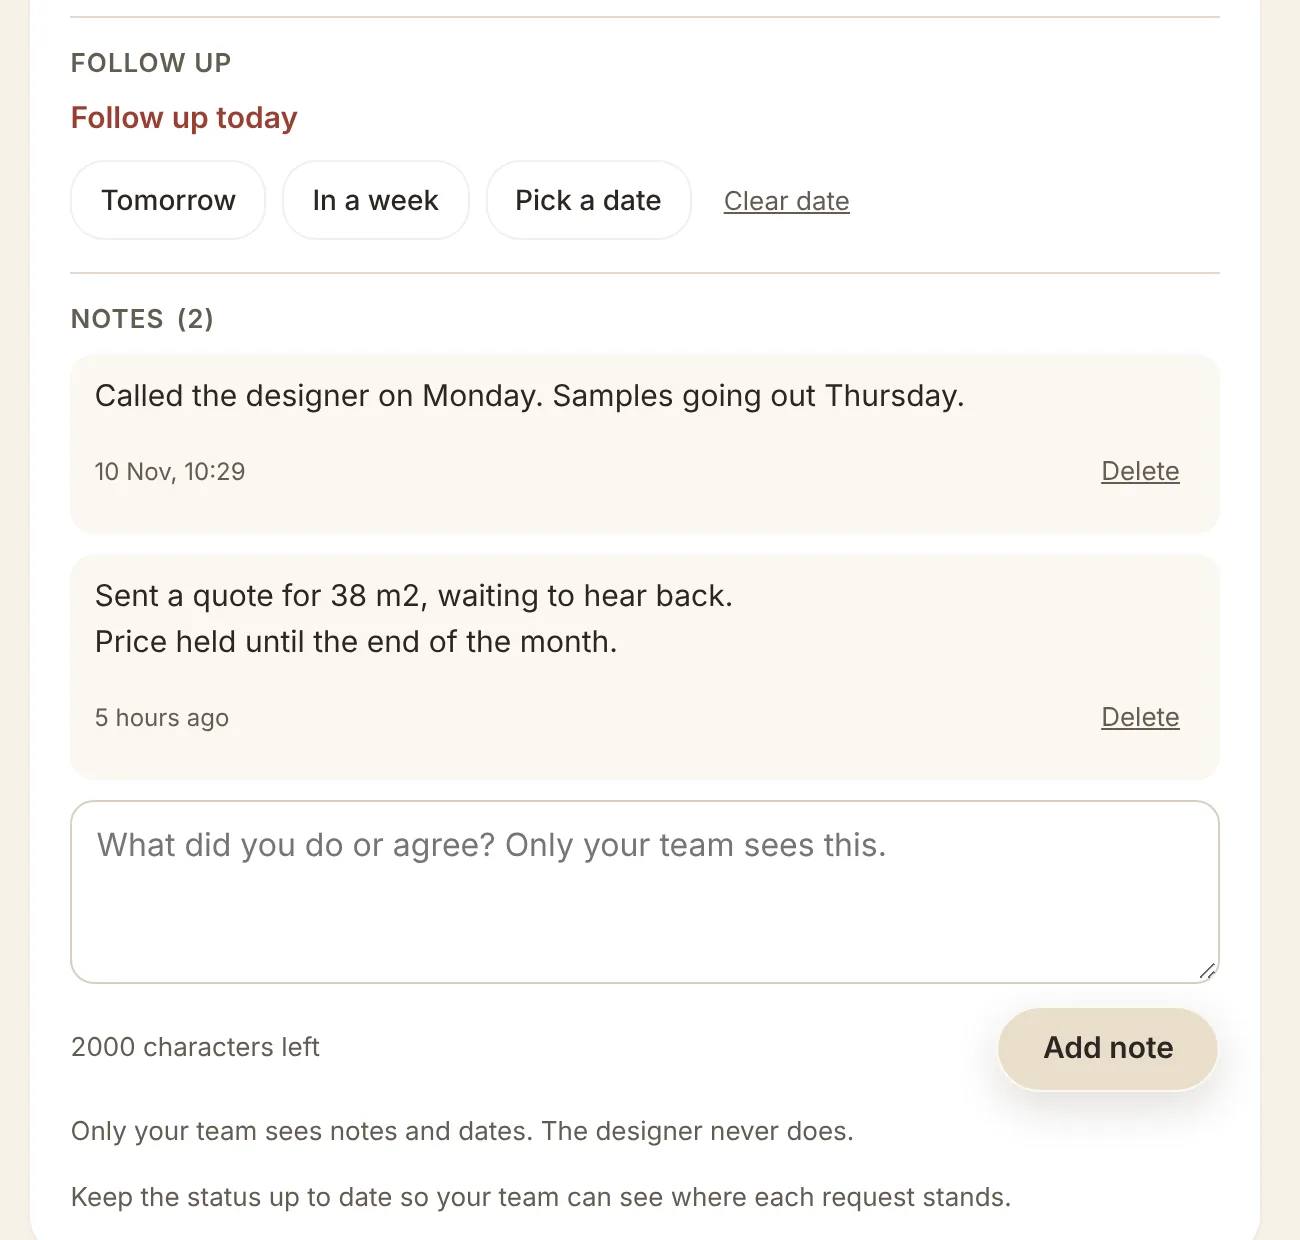
  1. Under Follow up, pick Tomorrow, In a week or a date.

  2. Use the “Follow up today” filter each morning.

  3. Write a note of what you did or agreed, and click “Add note”.

Only your team sees notes and dates. The designer never does. Part of Standard and Plus.

Follow up choices and two private notes on a request

Answer a report

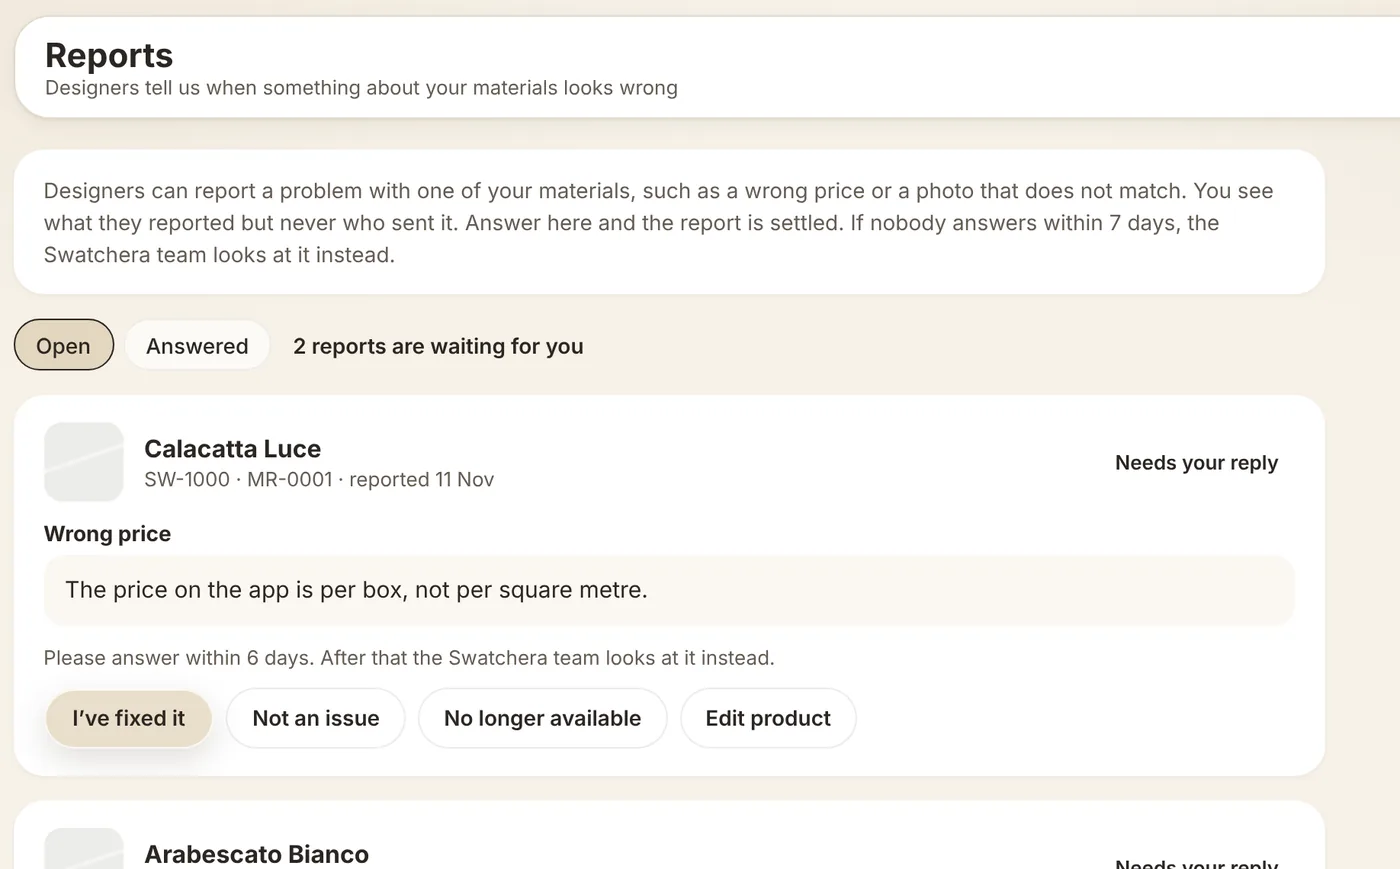
  1. Open Reports when its count shows. A designer has flagged something, like a wrong price.

  2. Click “Edit product” to fix it, then “I’ve fixed it”.

  3. Or choose “Not an issue” with a short reason, or “No longer available”.

Answer within 7 days, or the Swatchera team looks at it instead. You never see who reported.

Reports page with two reports waiting for a reply

How-to 5: Read your stats

What designers scan, save and look for.

See how designers find you

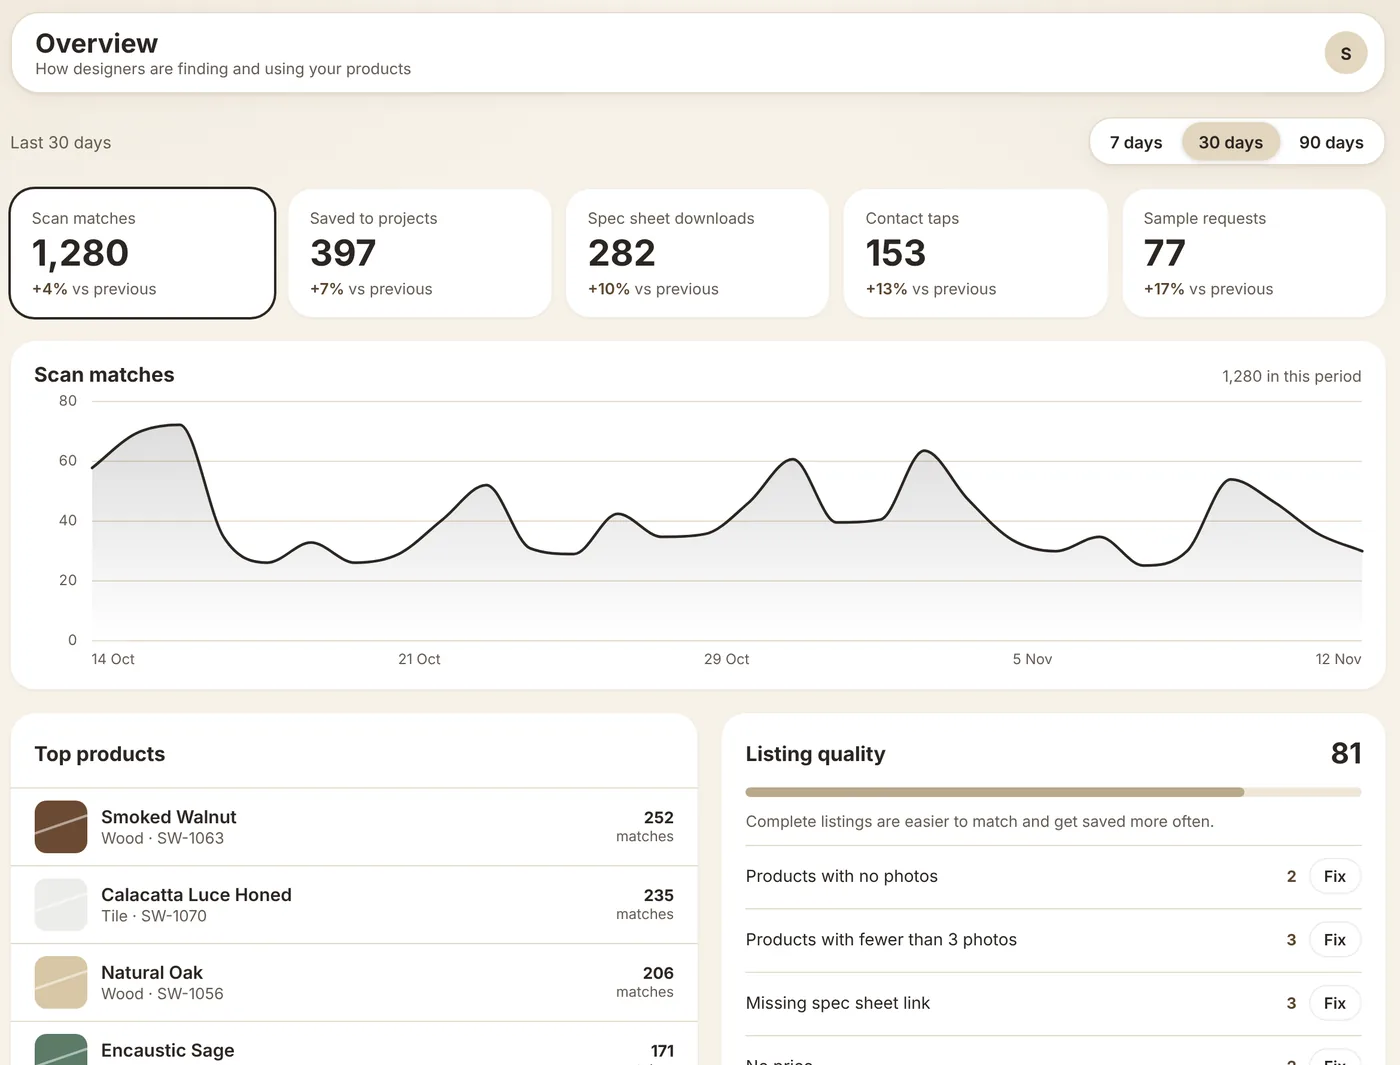
  1. Open Overview. Pick 7, 30 or 90 days.

  2. Read scan matches, saves, spec sheet downloads, contact taps and sample requests.

  3. Under Listing quality, click Fix to fill what’s missing.

Full stats and saves are part of Standard and Plus. Listing quality is on every plan.

Overview with stat cards, the scan matches chart, top products and listing quality

Find the demand you are missing

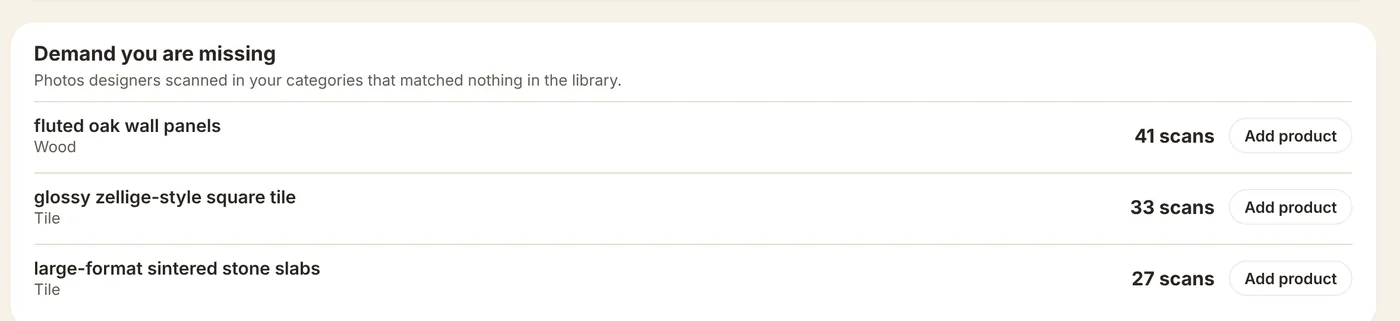
  1. Open Analytics and scroll to “Demand you are missing”.

  2. See what designers scanned in your categories that matched nothing.

  3. Stock it? Click “Add product” to list it straight away.

Part of Standard and Plus.

Demand you are missing: three scanned materials with no match and an Add product button for each

How-to 6: Your page and team

Profile, featured collection and who can sign in.

Set up your company profile

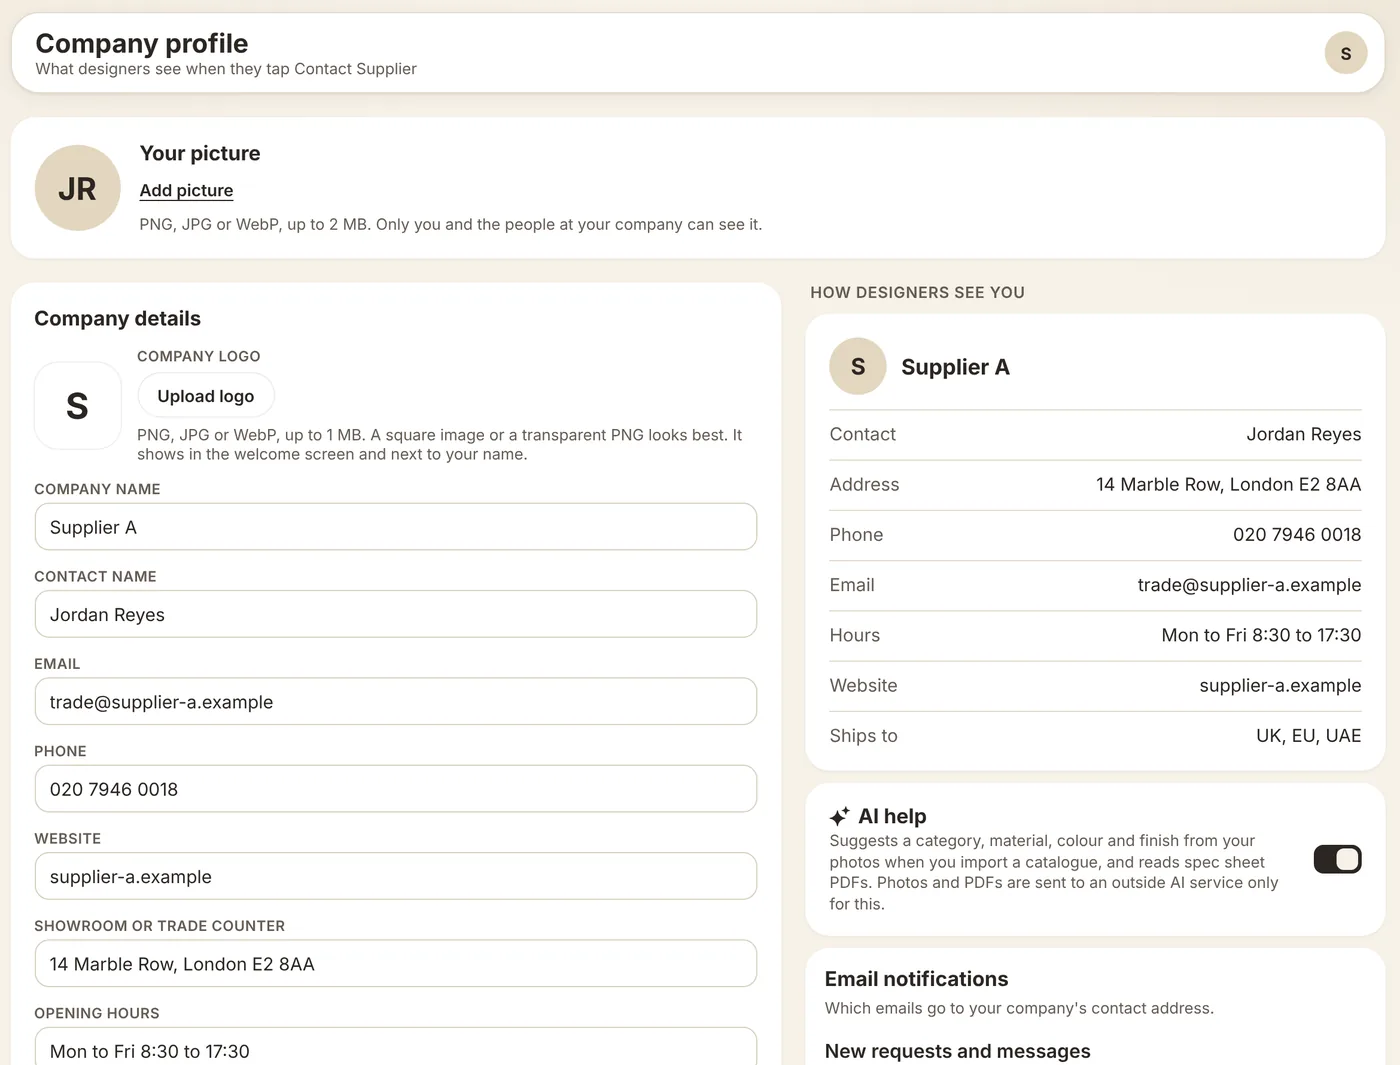
  1. Open Company profile and upload your logo.

  2. Fill in contacts, showroom, opening hours, a short About and where you ship to.

  3. Check “How designers see you” on the right, then “Save changes”.

AI help and your email choices are on this page too.

Company profile with logo, contact details, a preview of how designers see you, and the AI help switch

Feature a collection

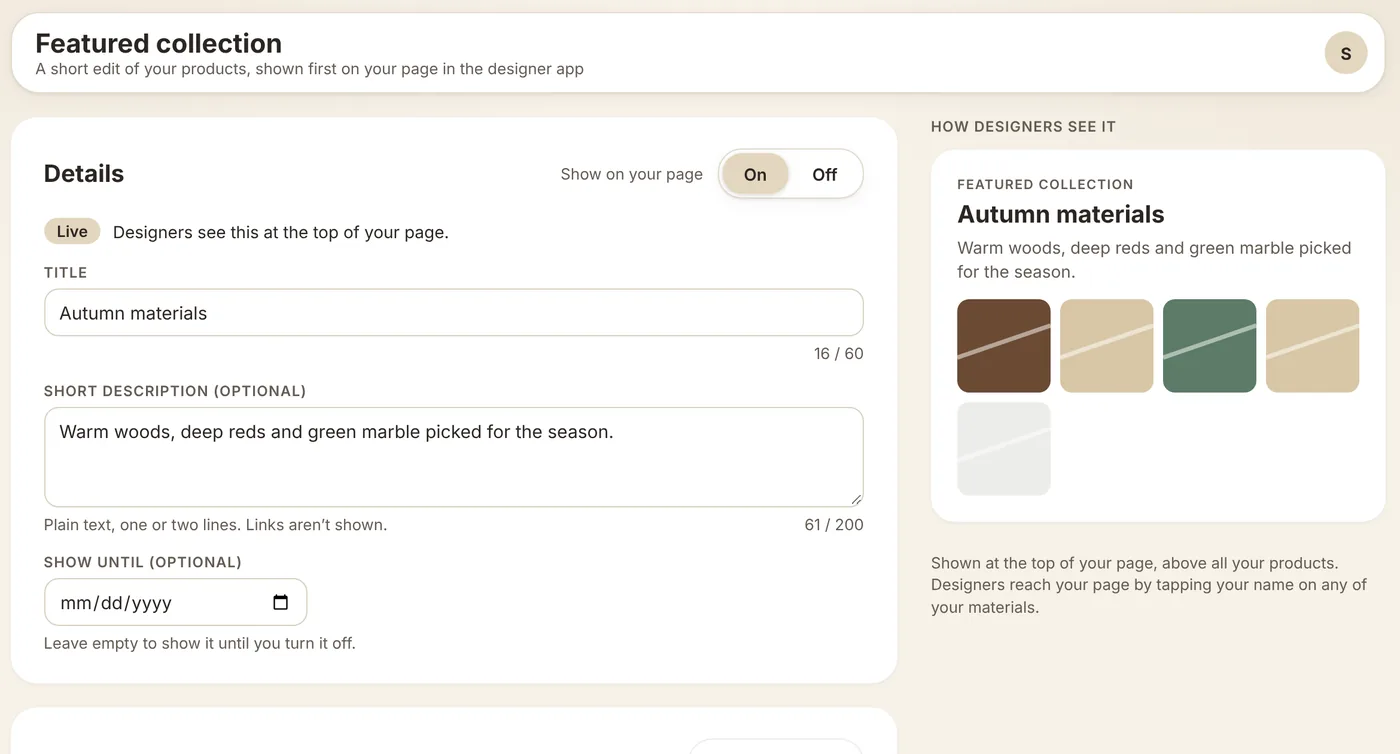
  1. Open Featured. Give it a title like “Autumn materials” and a short line.

  2. “Add products”: pick up to 12 live products, then drag to order them.

  3. Set “Show until”, or leave it empty. Turn it On and click Save.

Part of Plus. Designers see it at the top of your page.

Featured collection editor with title, description and five chosen products, and a preview

Choose who can sign in

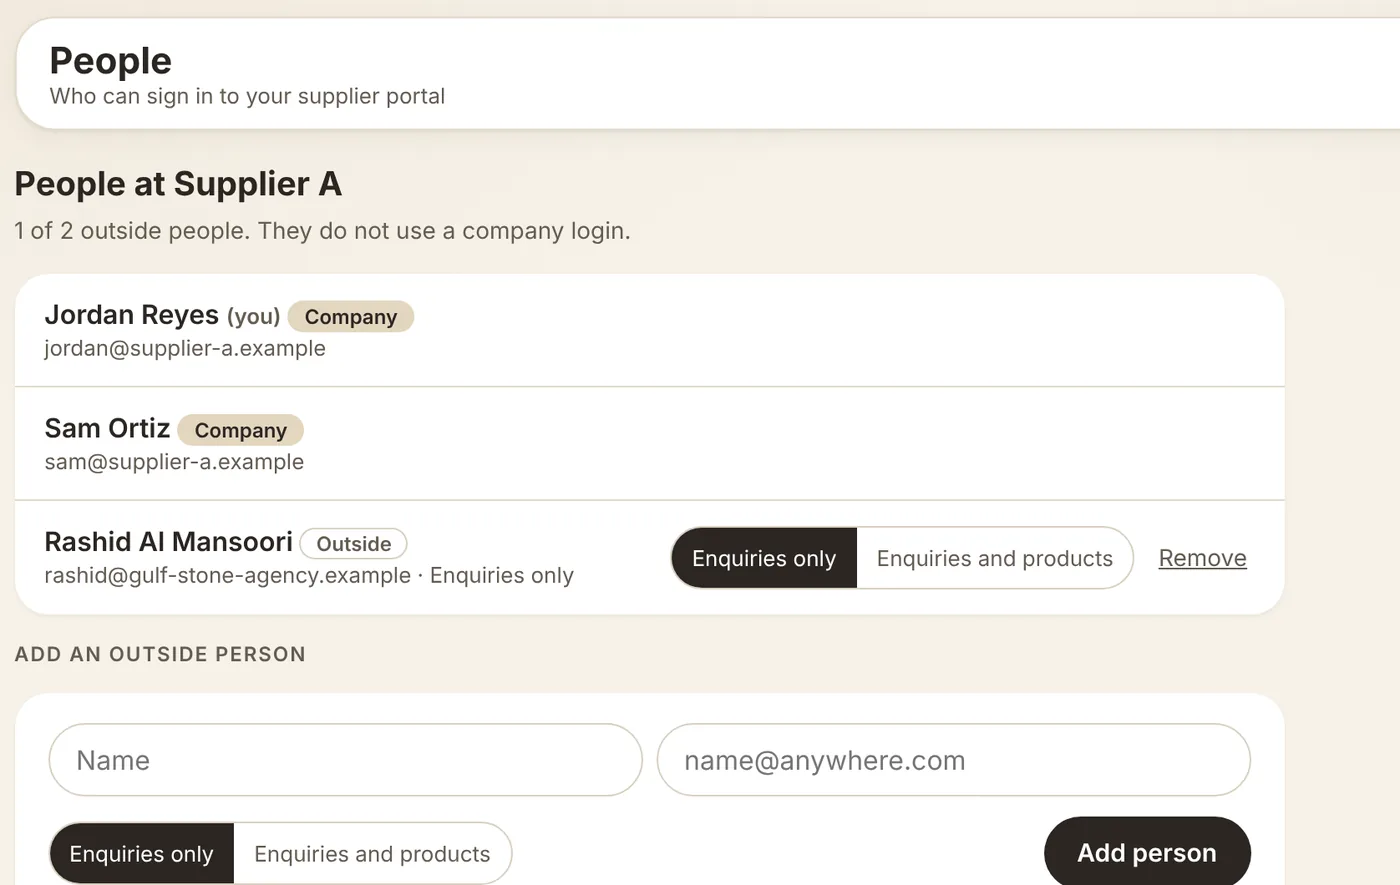
  1. Colleagues with your company email just sign in. No invite needed.

  2. For an agent or agency, open People and add an outside person.

  3. Pick “Enquiries only” or “Enquiries and products”, then “Add person”.

Outside people can’t see your plan, billing or the people list. Remove them any time.

People page with two company people and one outside person, and the Add an outside person form

Before you start

Good to know.

Where it works

Claiming, Import and the featured collection are on a computer. On your phone you can check requests, publish products and manage your account.

What designers share

Nothing automatically. You see what they send: the product, quantity, message, delivery place and region. Not their name or email.

AI is your choice

AI help is on by default. Switch it off any time in Company profile. Anything AI fills is marked so you can check it.

Help and updates

Ask us anything from Help, and replay the tour with “Take the guide”. Updates tells you when an import is approved or sent back.