Part 1 · Specify from catalogues
Search and filter the Library
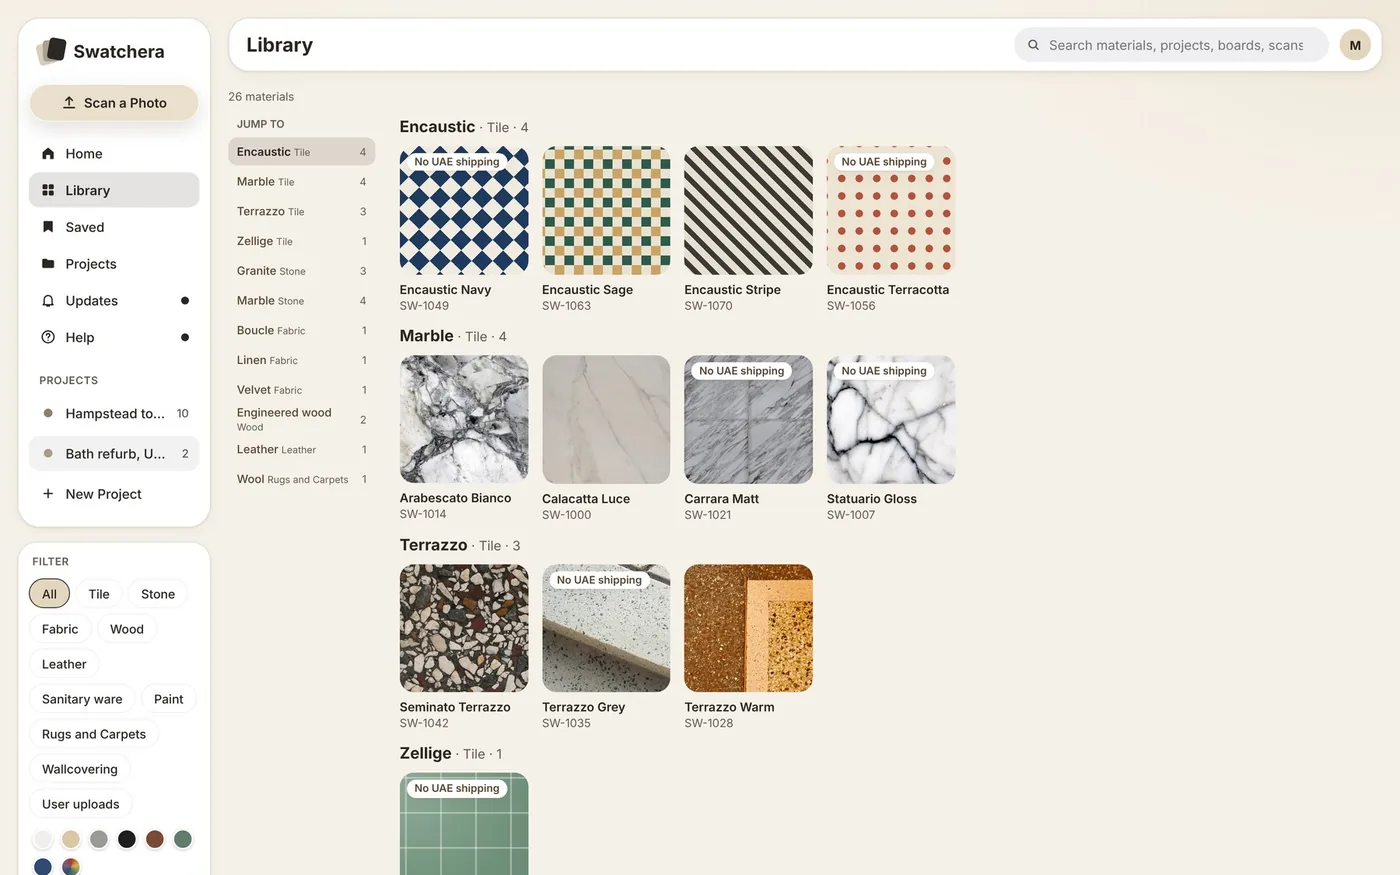
Open Library, or type in the search bar at the top of any screen.
Narrow it down with the category chips and colour dots, or Filters for material, size, brand and finish.
Turn on Ships to your region to hide what can’t reach your site.
Group by Look or Supplier, then use Jump to on the left.
Can’t find it? Scan a Photo matches a picture to the catalogue.
Browse a supplier’s catalogue
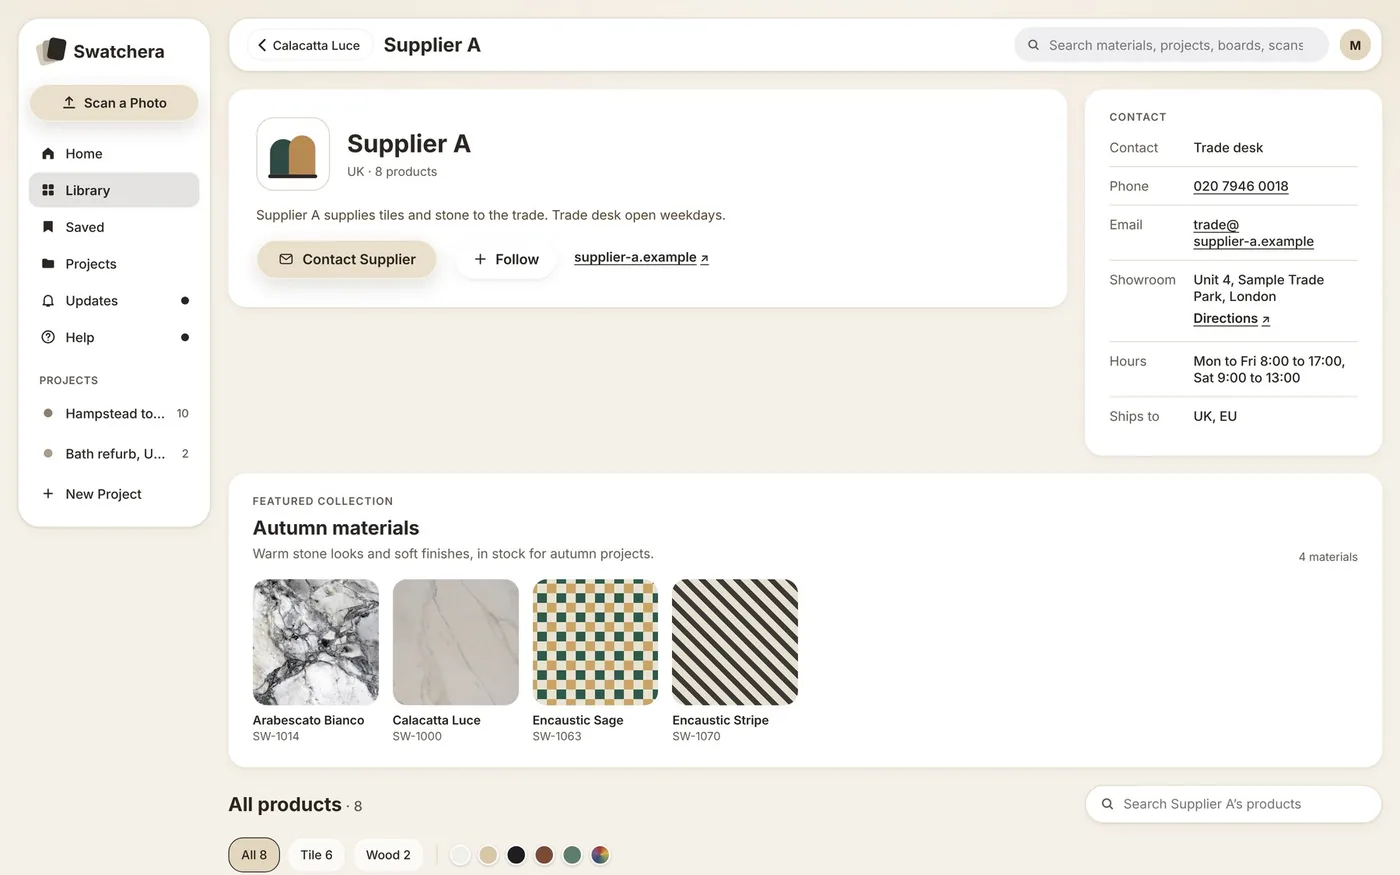
Open any material and click the supplier’s name at the top.
See their contact details, showroom, hours and where they ship.
Start with their Featured collection, then All products with its own search and filters.
Click Follow to hear about new materials and collections. The bell sets what you get.
Check the details
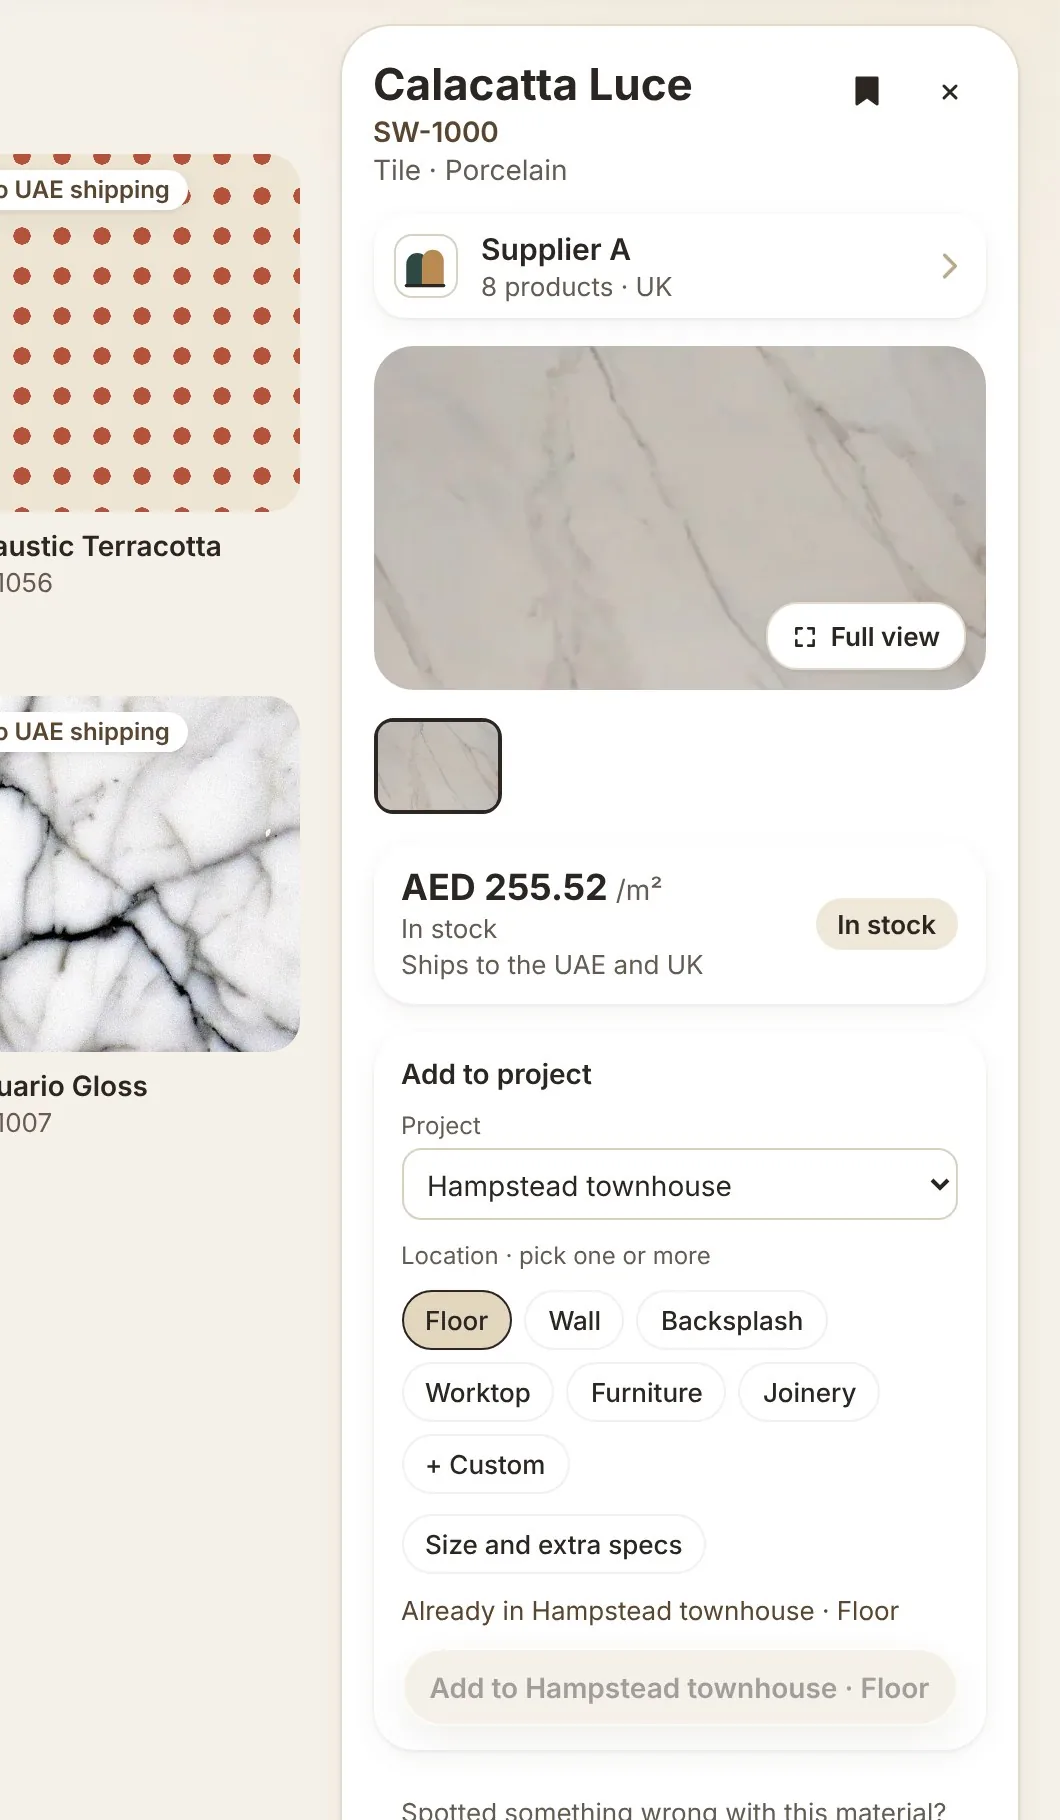
Click a material to open its panel. Use Full view for the photos.
Check the price per m², stock and whether it ships to your region.
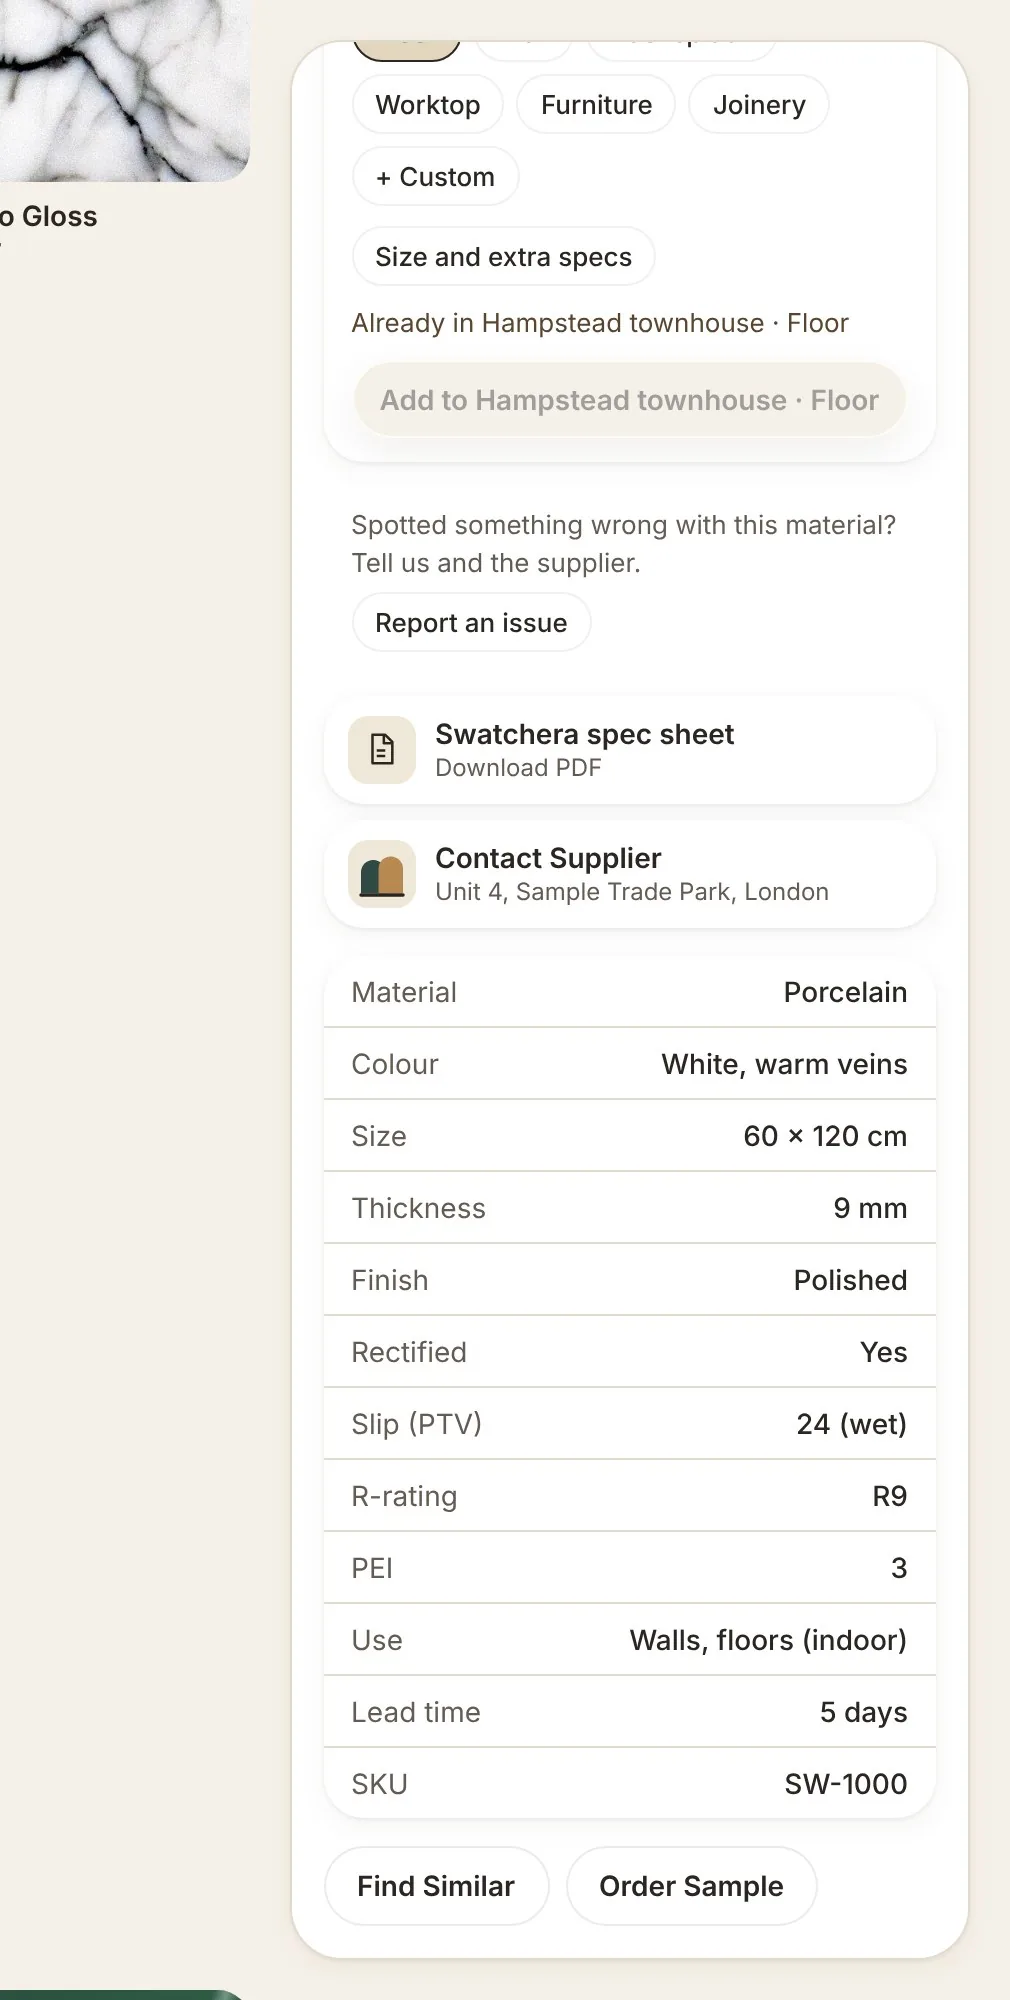
Read the specs: size, thickness, finish, slip, R-rating, PEI, lead time.
Download PDF for the Swatchera spec sheet, or Find Similar for alternatives.
Spot a mistake? Report an issue tells us and the supplier.
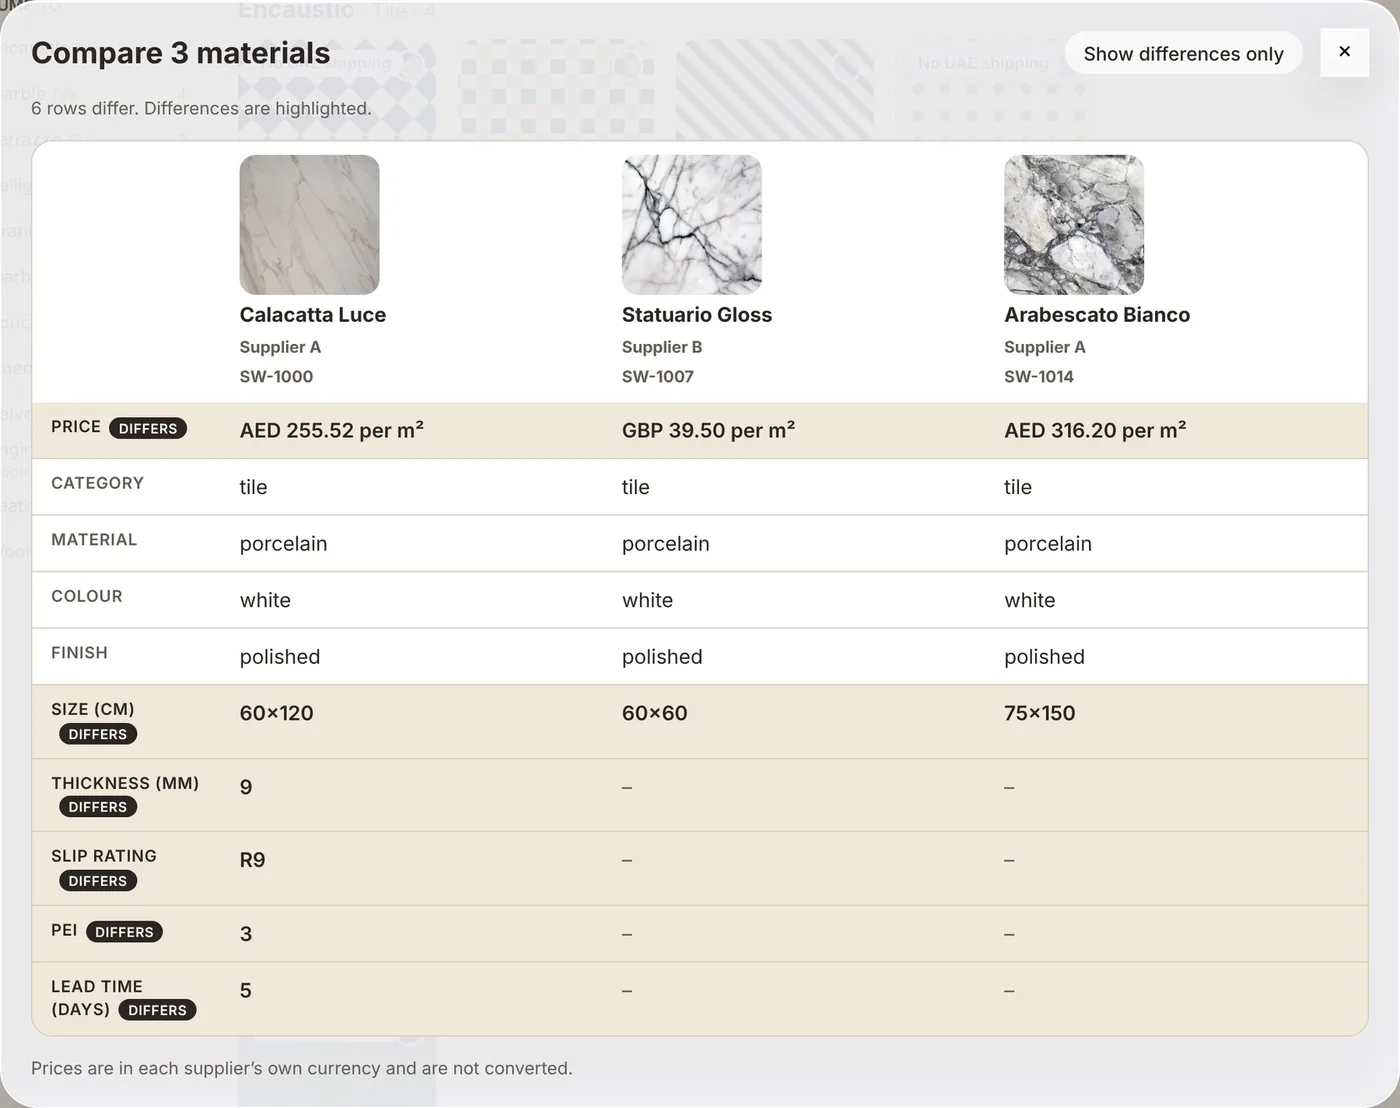
Compare up to five
In the Library, click Select and tick up to five materials.
Click Compare in the bar at the bottom.
Turn on Show differences only to see what sets them apart.
Happy? Add to project straight from the same bar.
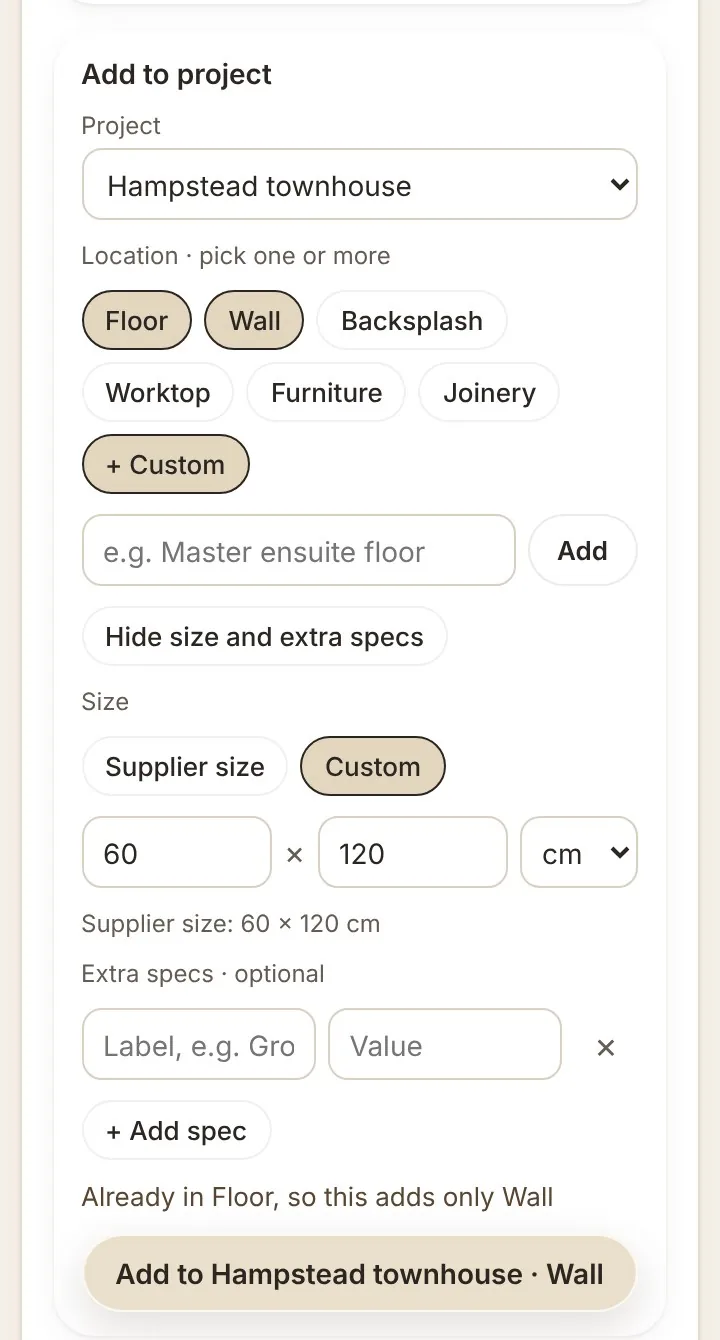
Add it to a project
In the panel, under Add to project, choose the project.
Pick one or more locations, or + Custom to type your own.
Open Size and extra specs: keep the supplier’s size or set a custom one in mm, cm or m.
+ Add spec for anything else, such as grout or edge, then click Add to…
Each material gets a tag, like TL-01 for the first tile, used on the schedule, sheets and board.
How-to 4: Ask the supplier
Samples and enquiries.
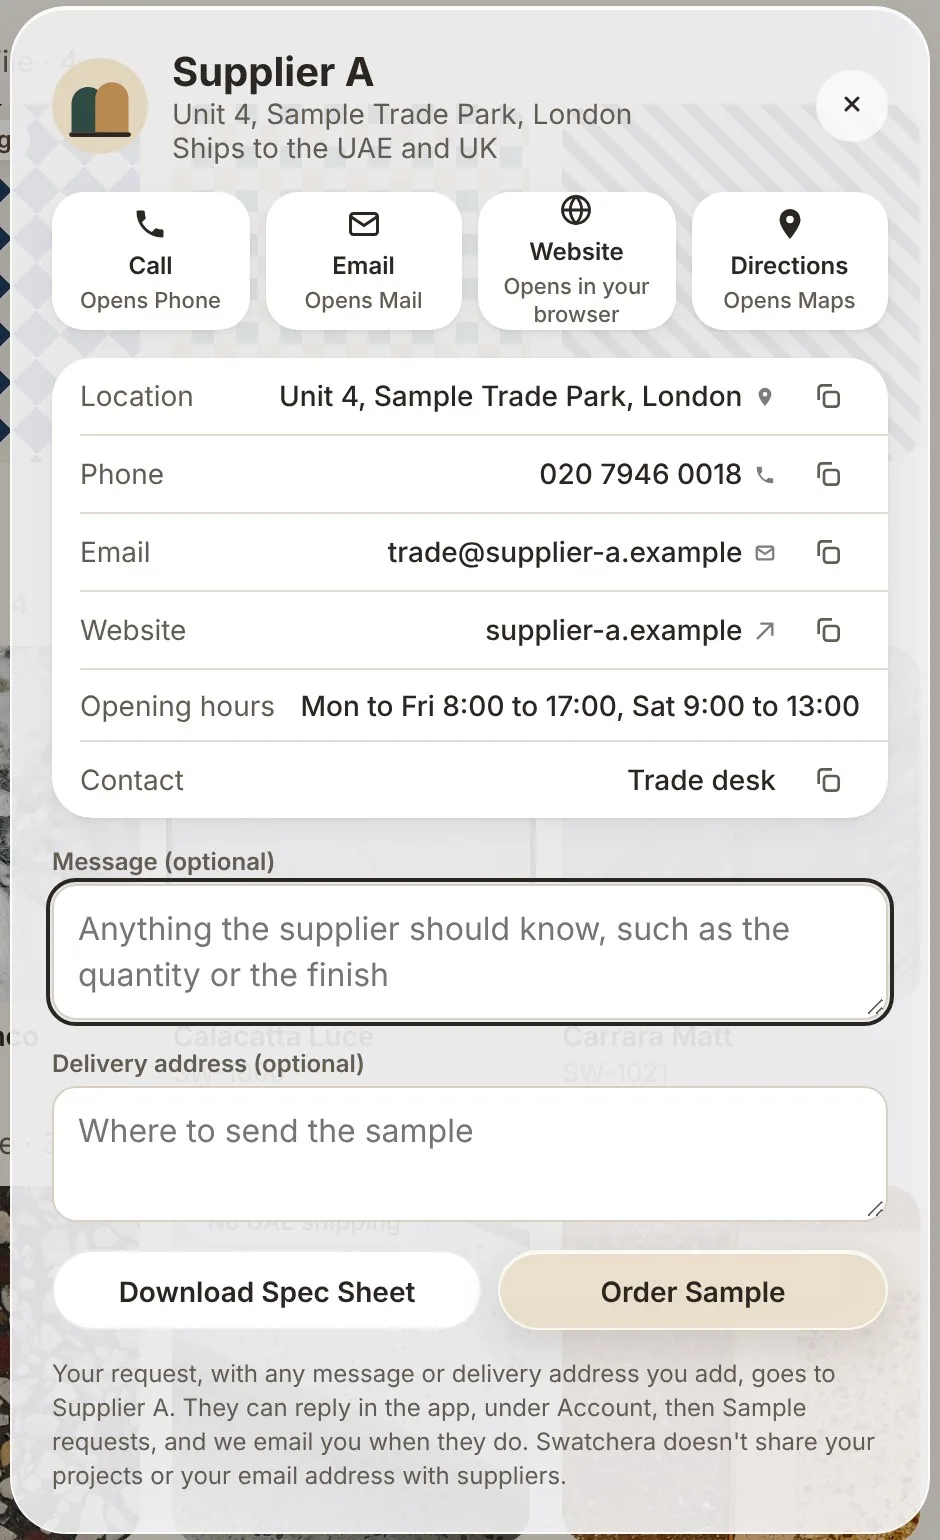
Order a sample or ask the supplier
In the panel, click Contact Supplier.
Call, email, open their website or get directions in one tap.
Add a message and a delivery address if you like. Both are optional.
Click Order Sample. Replies come in the app and we email you.
Suppliers see your request, message and address. Not your projects or your email address.
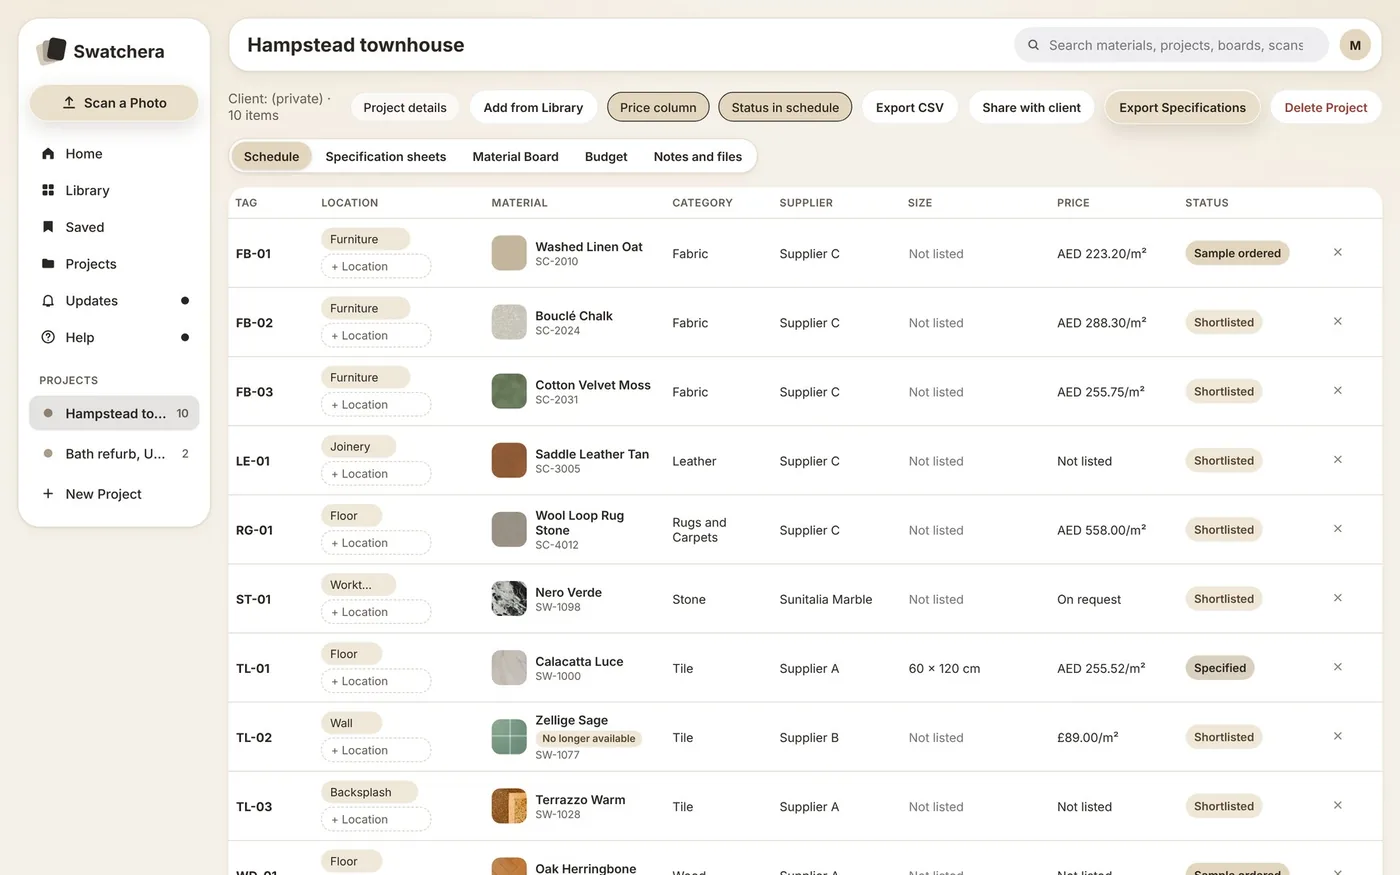
Run the project schedule
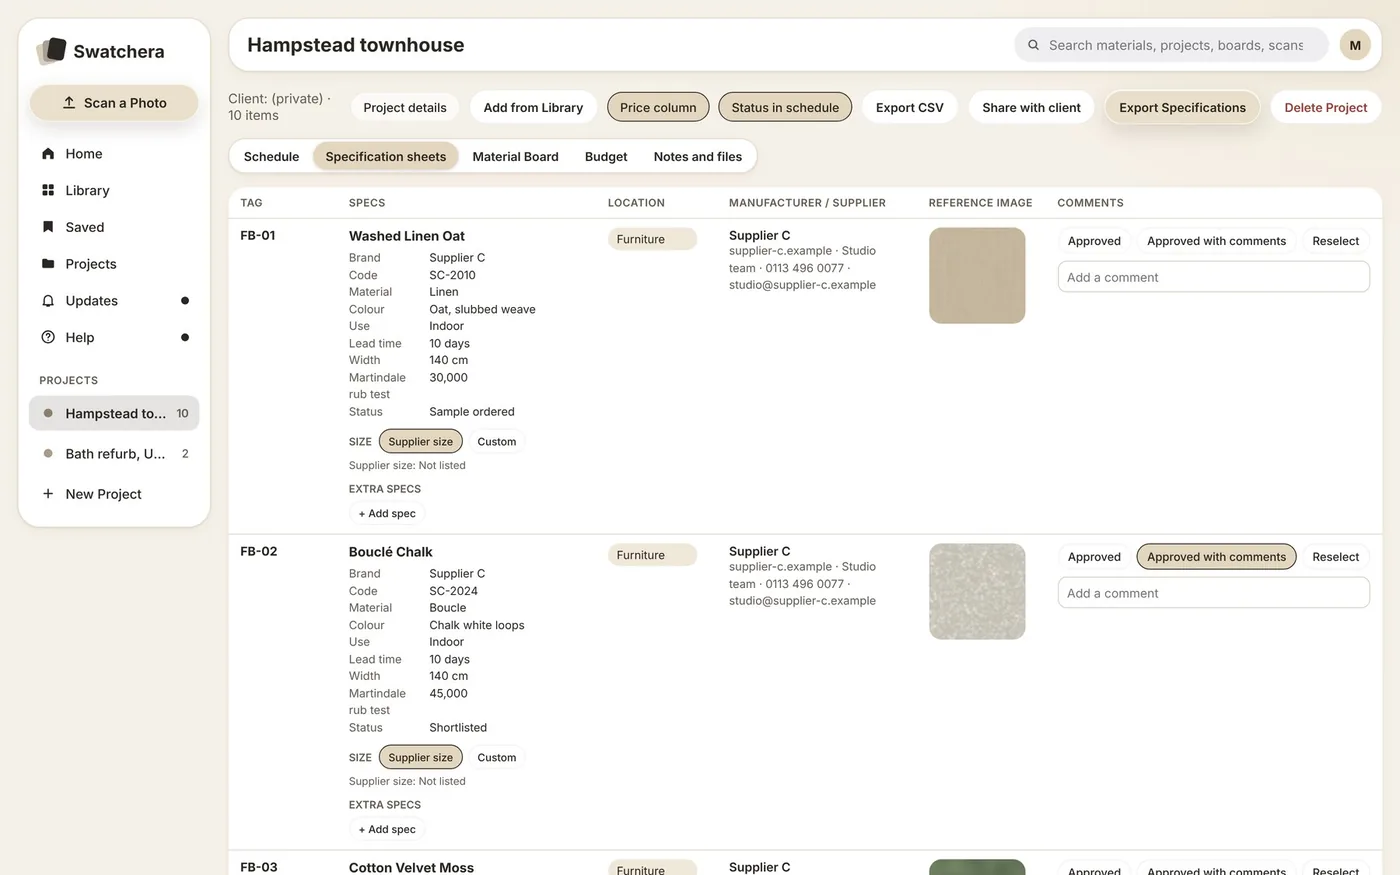
Open the project. Schedule lists every material with its tag, location, supplier, size and price.
Set each status: Shortlisted, Sample ordered or Specified.
Add locations with + Location. Show or hide the price and status columns.
Watch for No longer available and reselect before you issue.
Fill the specification sheets
Open the Specification sheets tab: one row per material with specs, supplier and photo.
Choose Supplier size or Custom, and add extra specs.
Mark each one Approved, Approved with comments or Reselect.
Write a comment for the client or contractor.
Export the spec pack
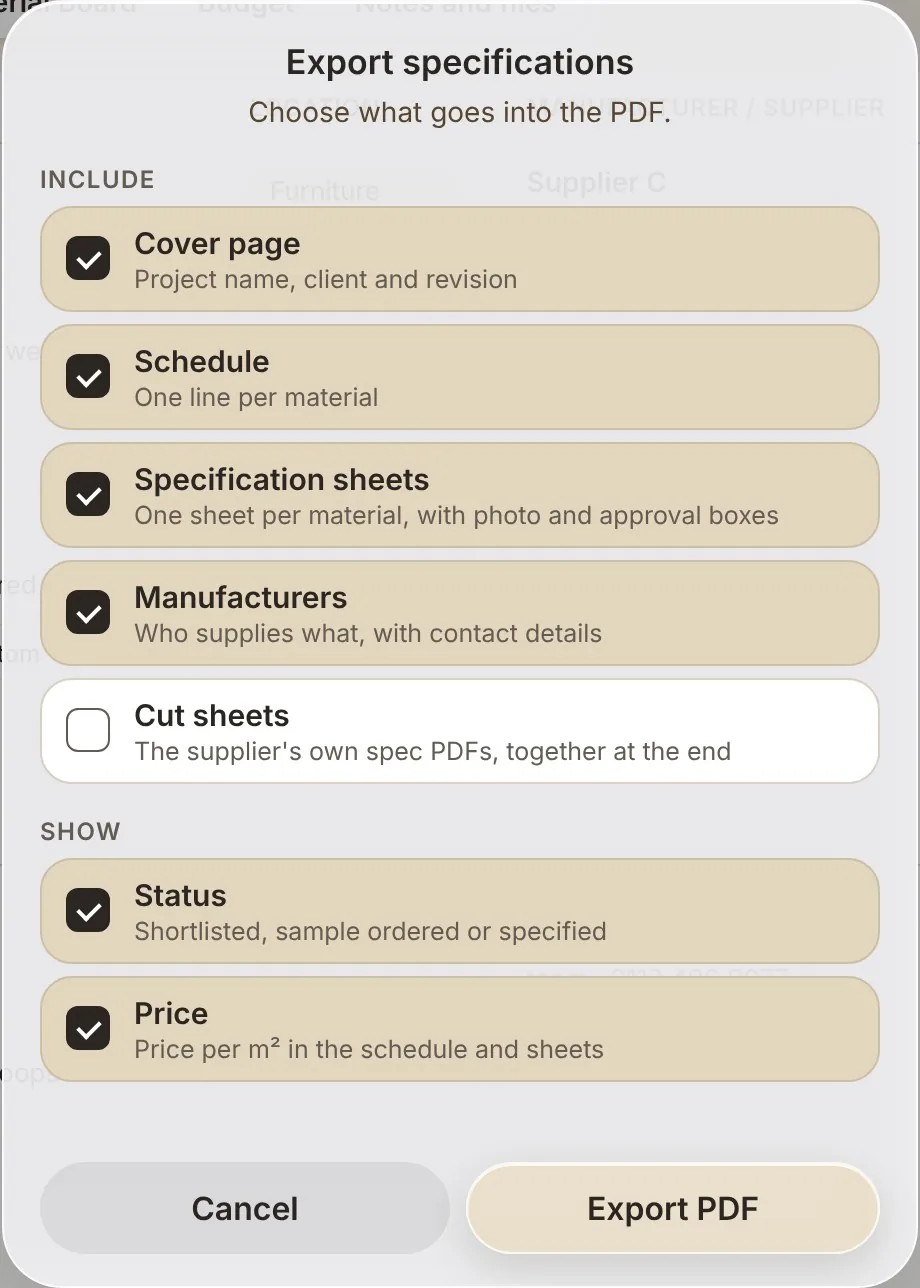
In the project, click Export Specifications.
Choose what goes in: cover page, schedule, specification sheets and manufacturers.
Tick Cut sheets to add the suppliers’ own spec PDFs at the end.
Show or hide status and price, then click Export PDF.
Need a spreadsheet instead? Export CSV is next to it.
Part 2 · The material board
Open the Material Board
In a project, click the Material Board tab.
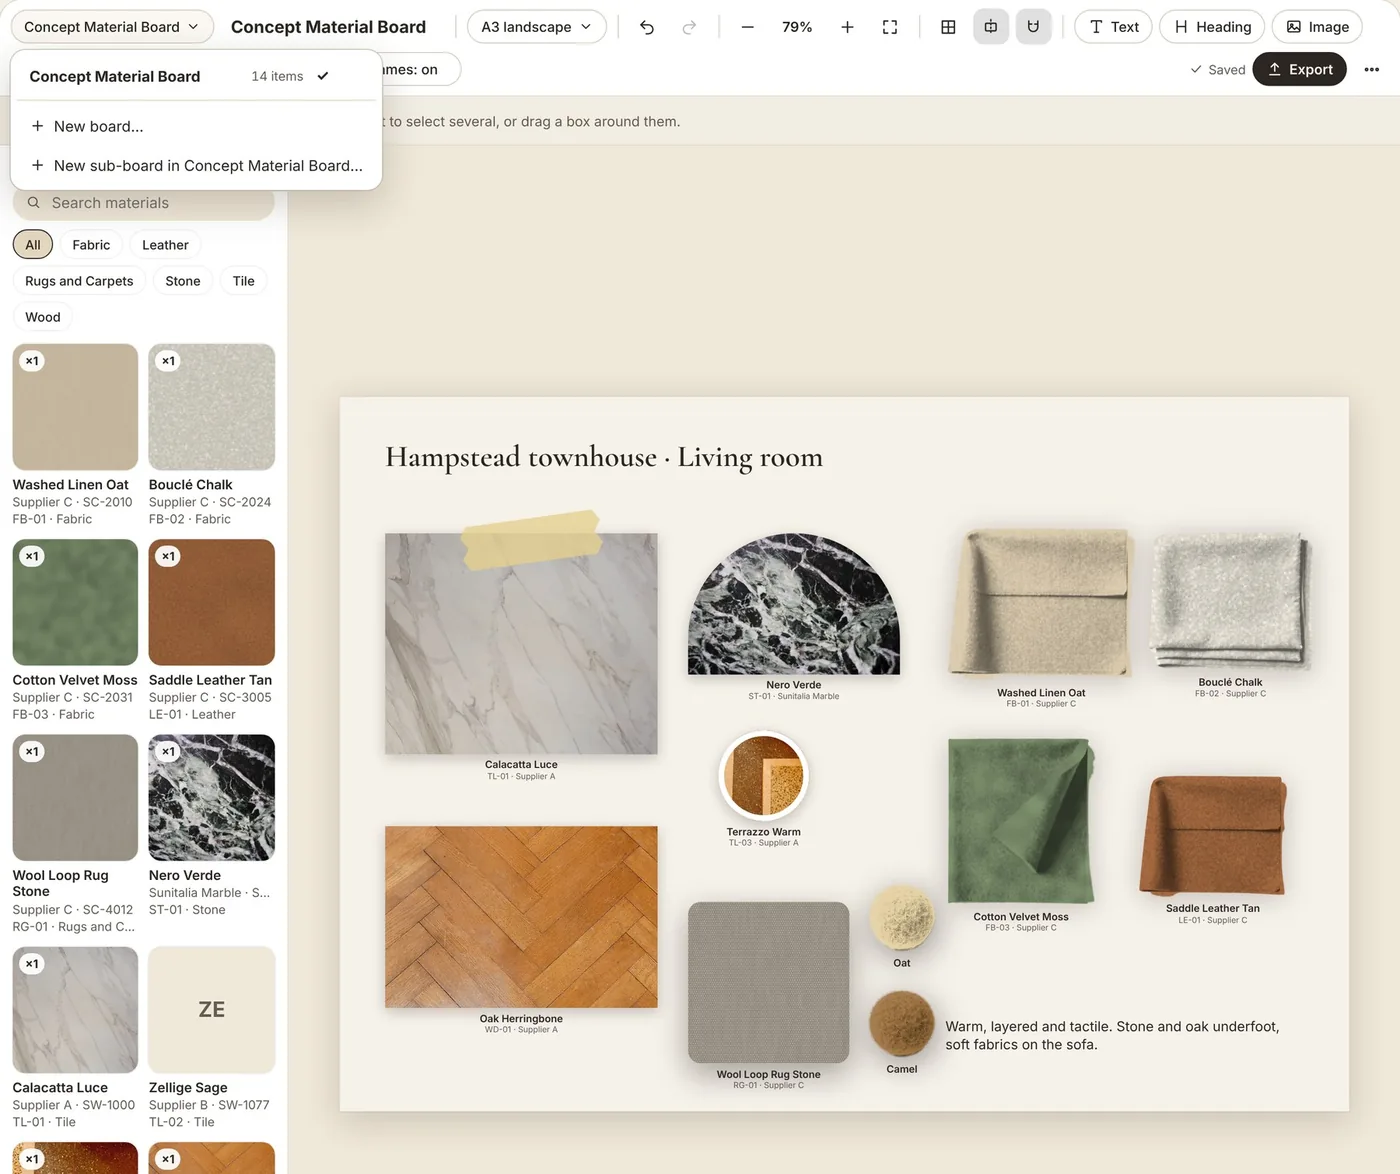
Use the switcher at the top left for New board or New sub-board.
Pick the canvas: A3 or A4 either way, 16:9, square or custom.
Work away. The board saves itself; Saved shows at the top right.
Add your materials
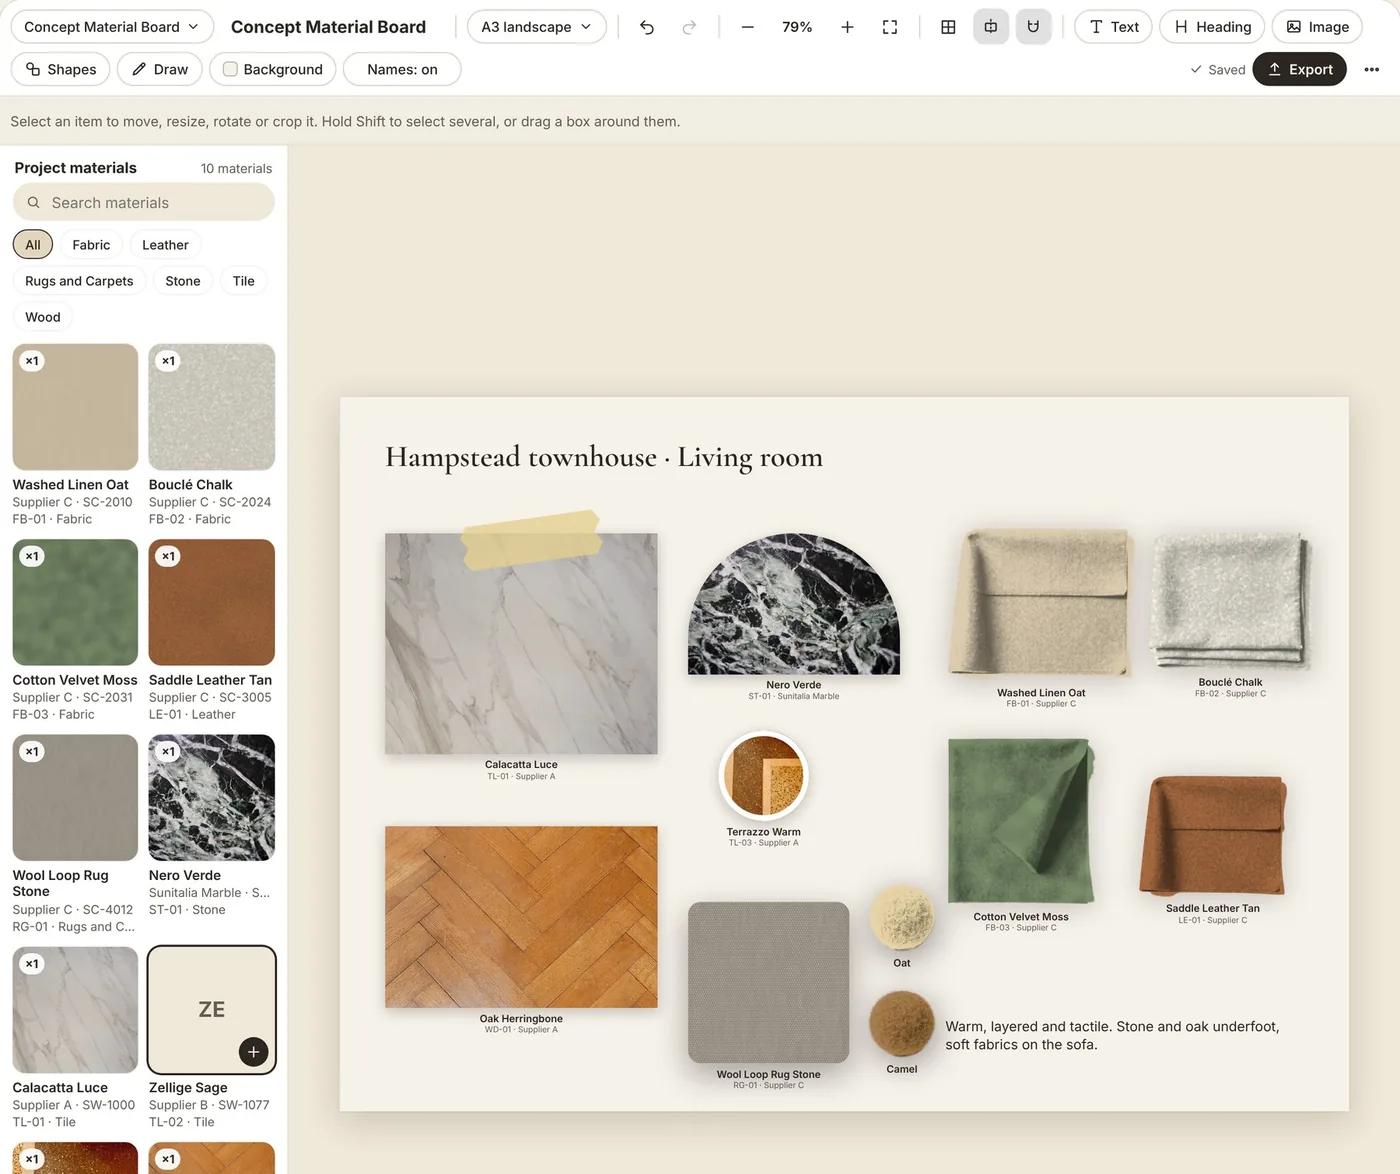
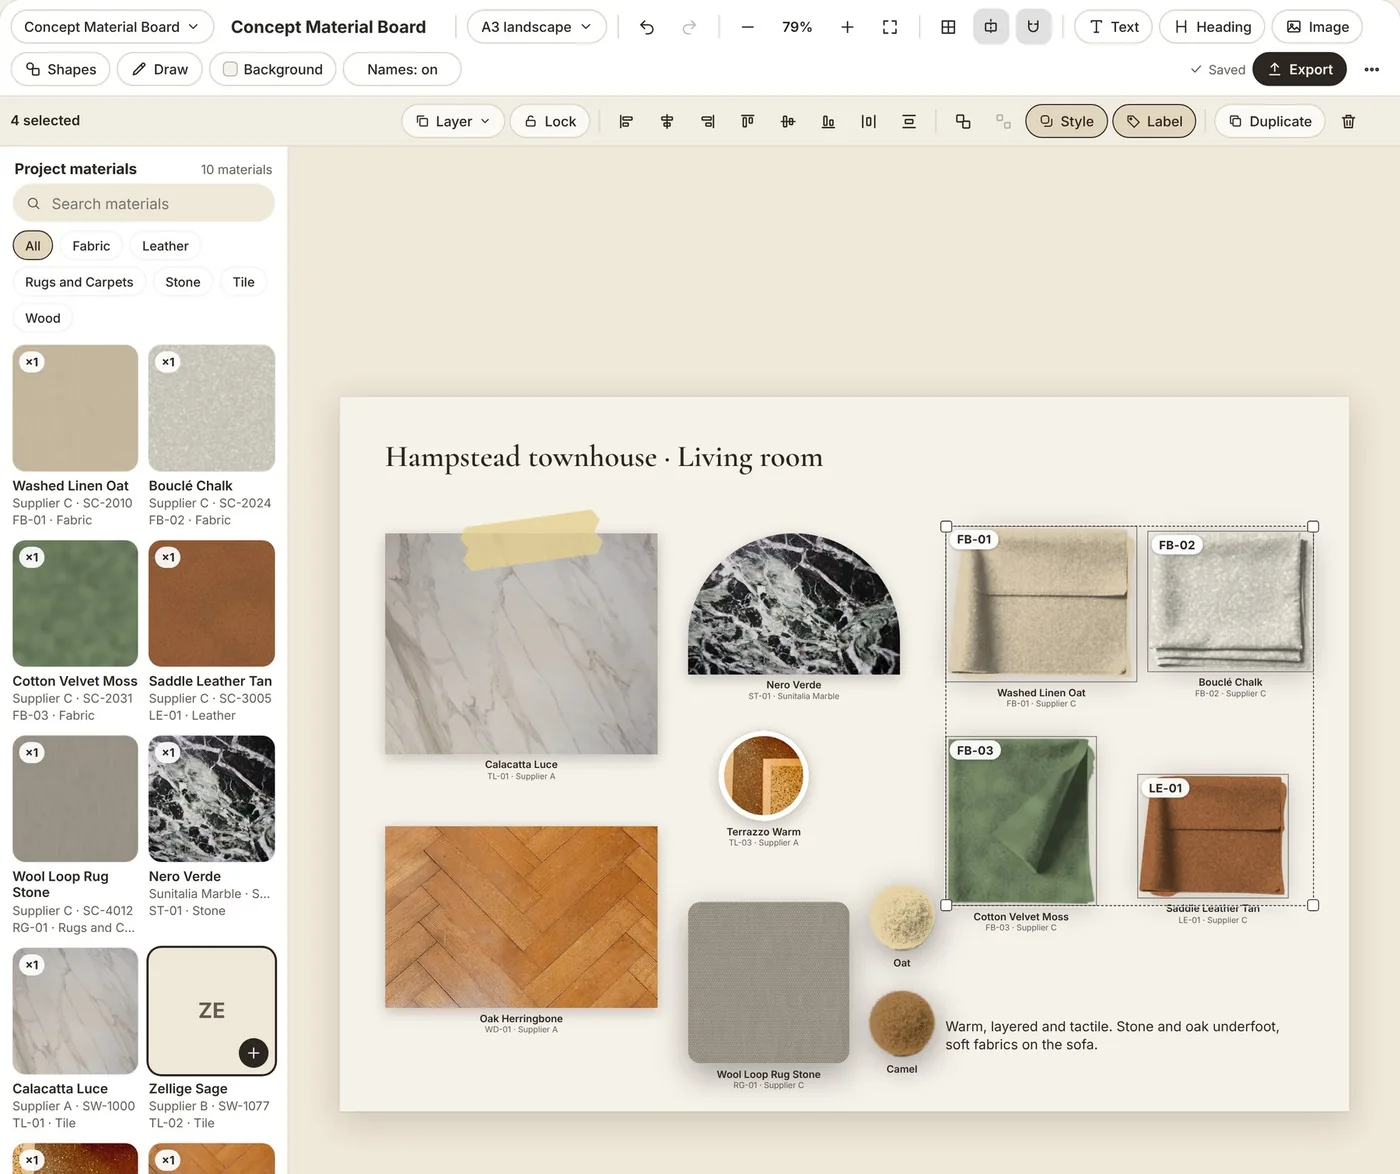
Project materials on the left lists everything in the project.
Drag a tile onto the board, press its +, or double-click it.
Select it to see its tag. Details opens the material.
Add your own pictures with Upload image, then Remove background if needed.
Arrange, crop and lock
Drag to move, use the handles to resize or turn. Shift-click or drag a box to select several.
Align, distribute and Group from the bar. Layer sets what sits on top.
Crop frames a picture: square, 4:3, 16:9, portrait and more.
Lock anything you don’t want moved by accident.
Style pictures in one click
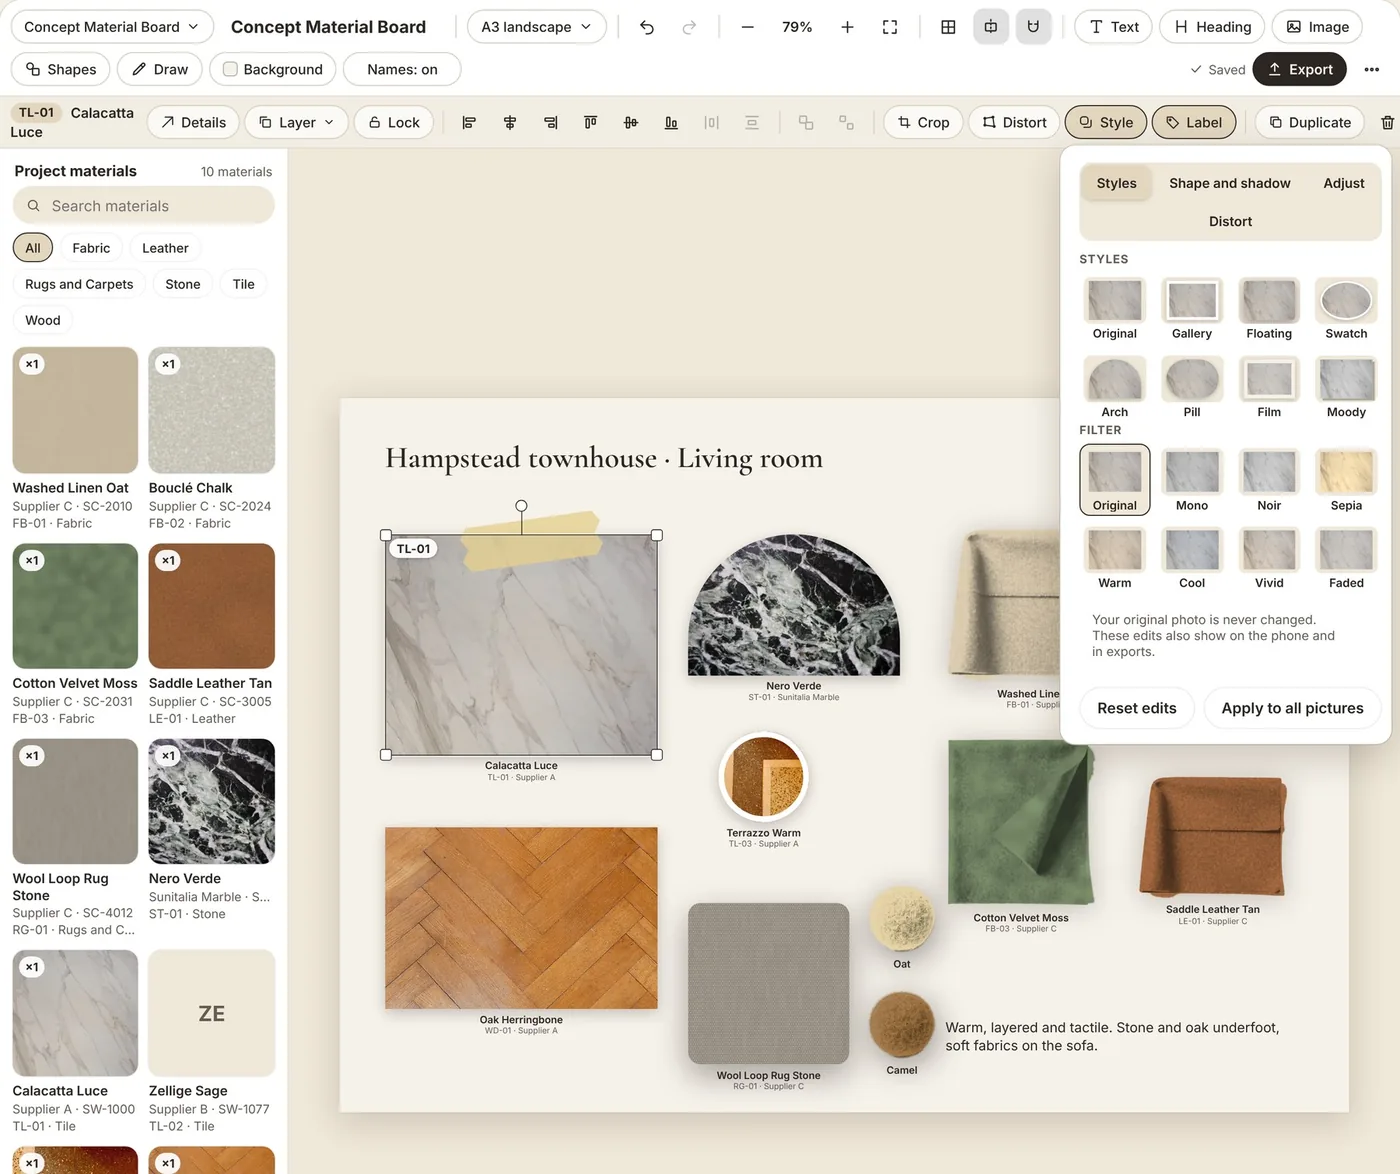
Select a picture and click Style.
Pick a Style: Gallery, Floating, Swatch, Arch, Pill, Film or Moody.
Add a Filter such as Warm, Mono or Faded, or fine-tune in Adjust.
Click Apply to all pictures for a consistent board.
Fold fabric and leather New
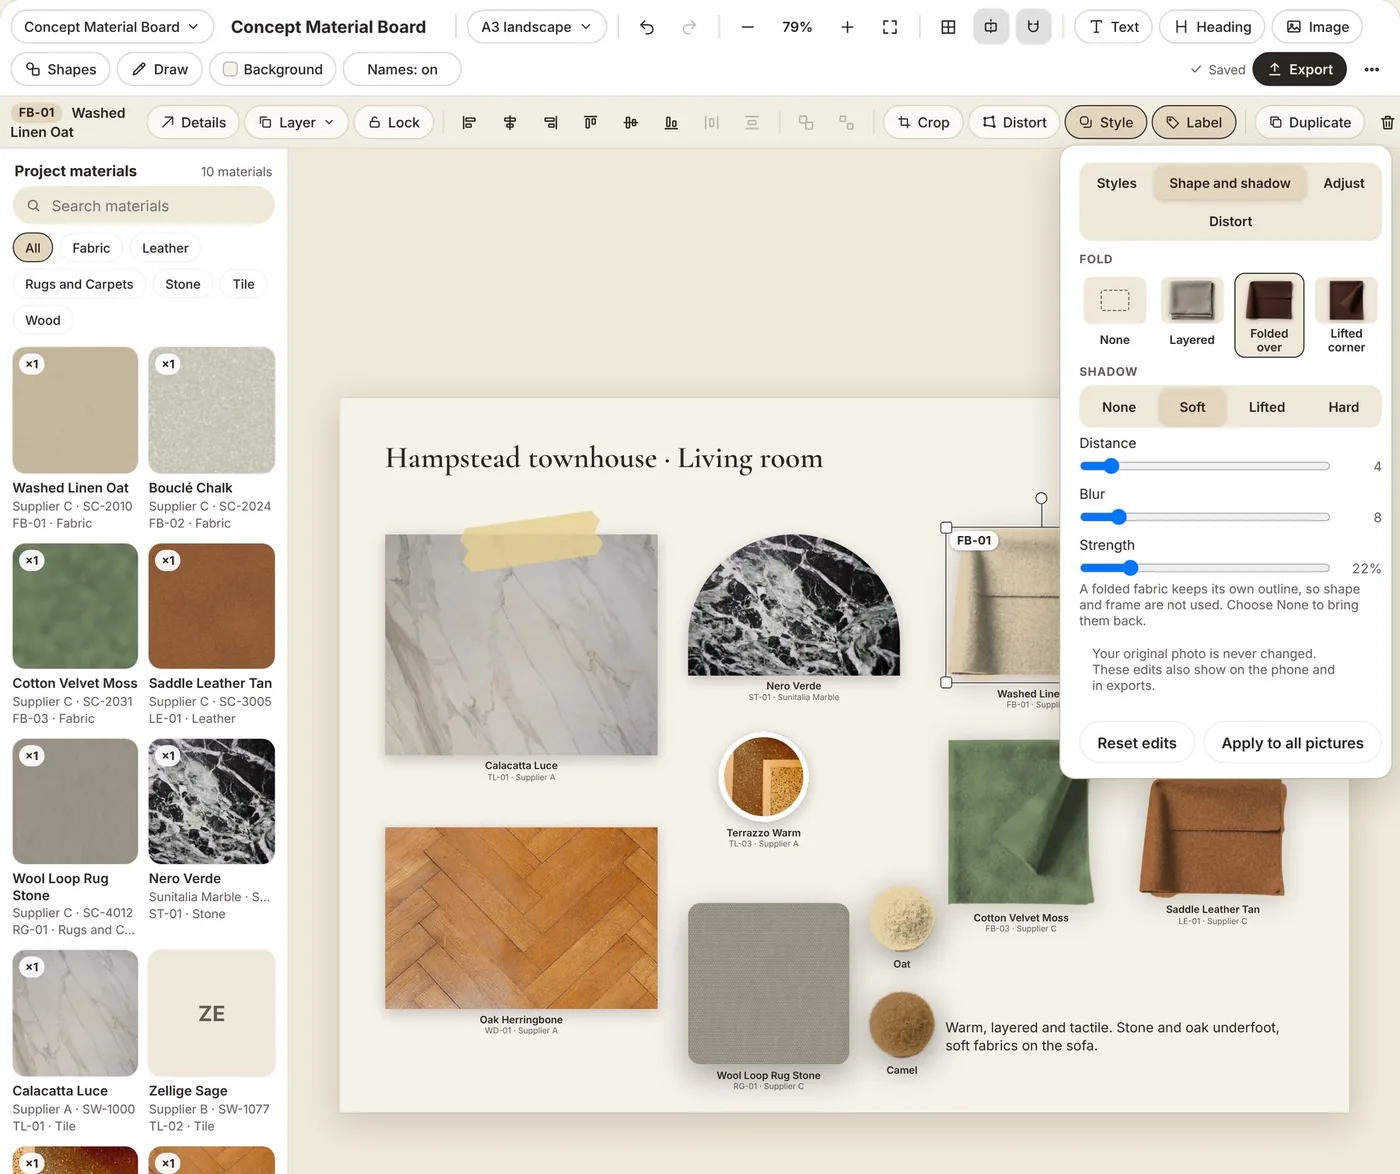
Select a fabric or leather and click Style, then Shape and shadow.
Under Fold, pick Layered, Folded over or Lifted corner.
Tune the shadow: soft, lifted or hard, with distance, blur and strength.
Choose None to lay it flat again.
Distort for perspective
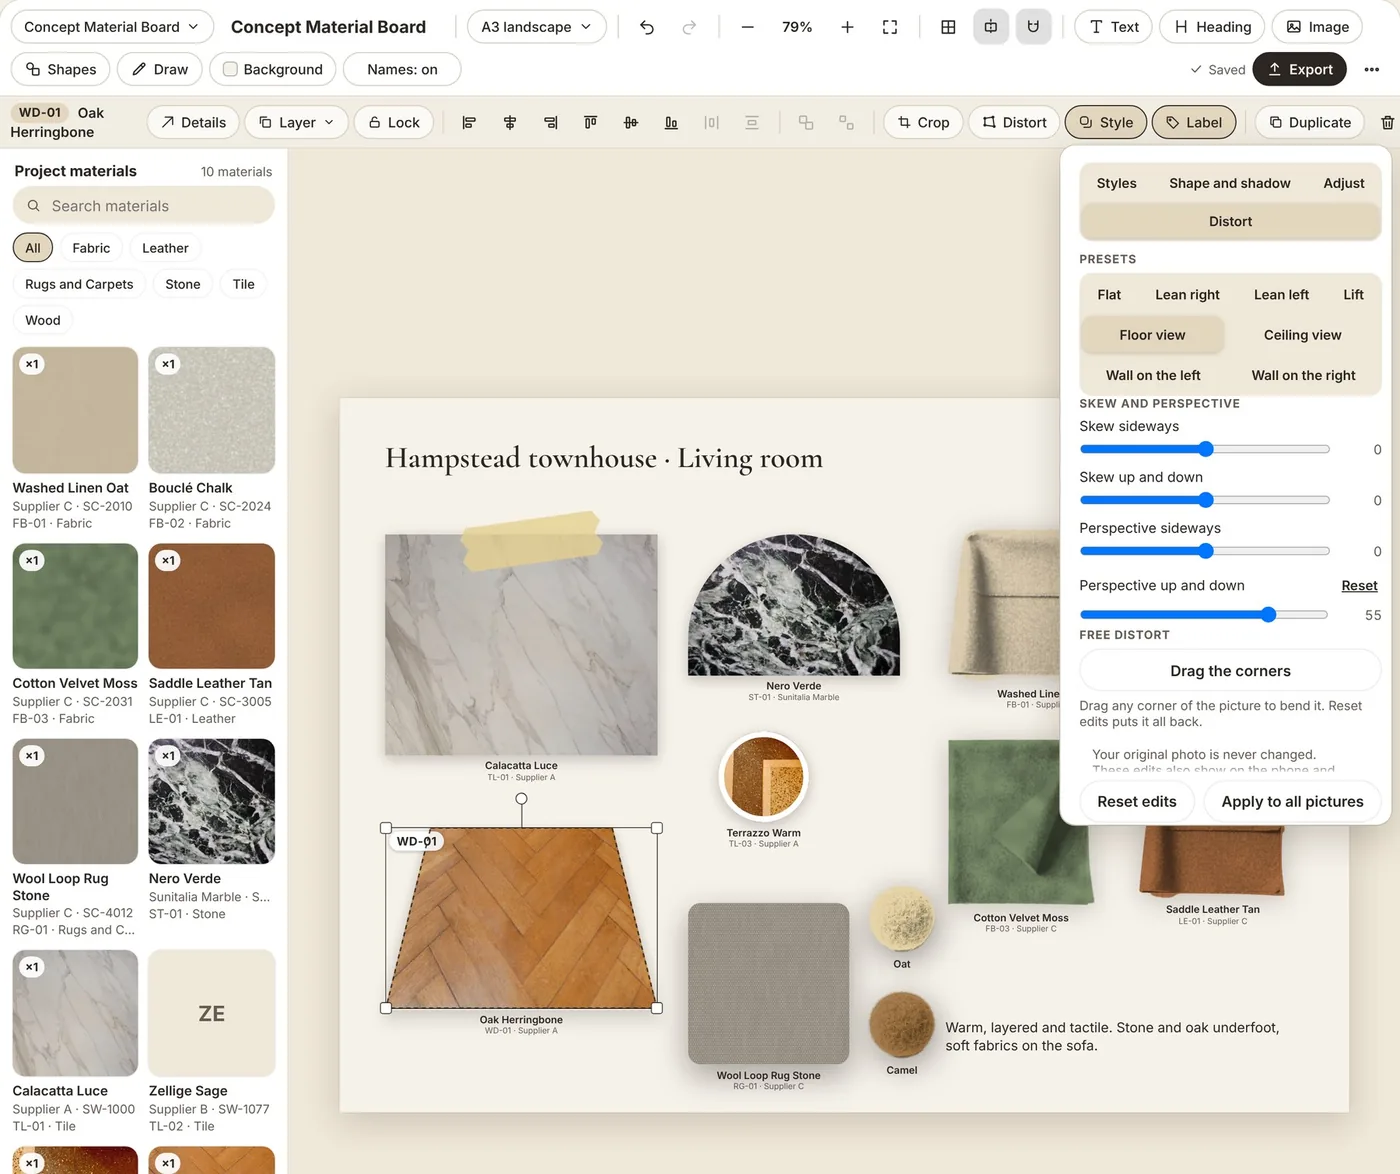
Select a picture, open Style, then Distort.
Try a preset: Floor view, Ceiling view, Wall on the left or right, Lean or Lift.
Fine-tune with the skew and perspective sliders.
Or click Drag the corners and bend it freely.
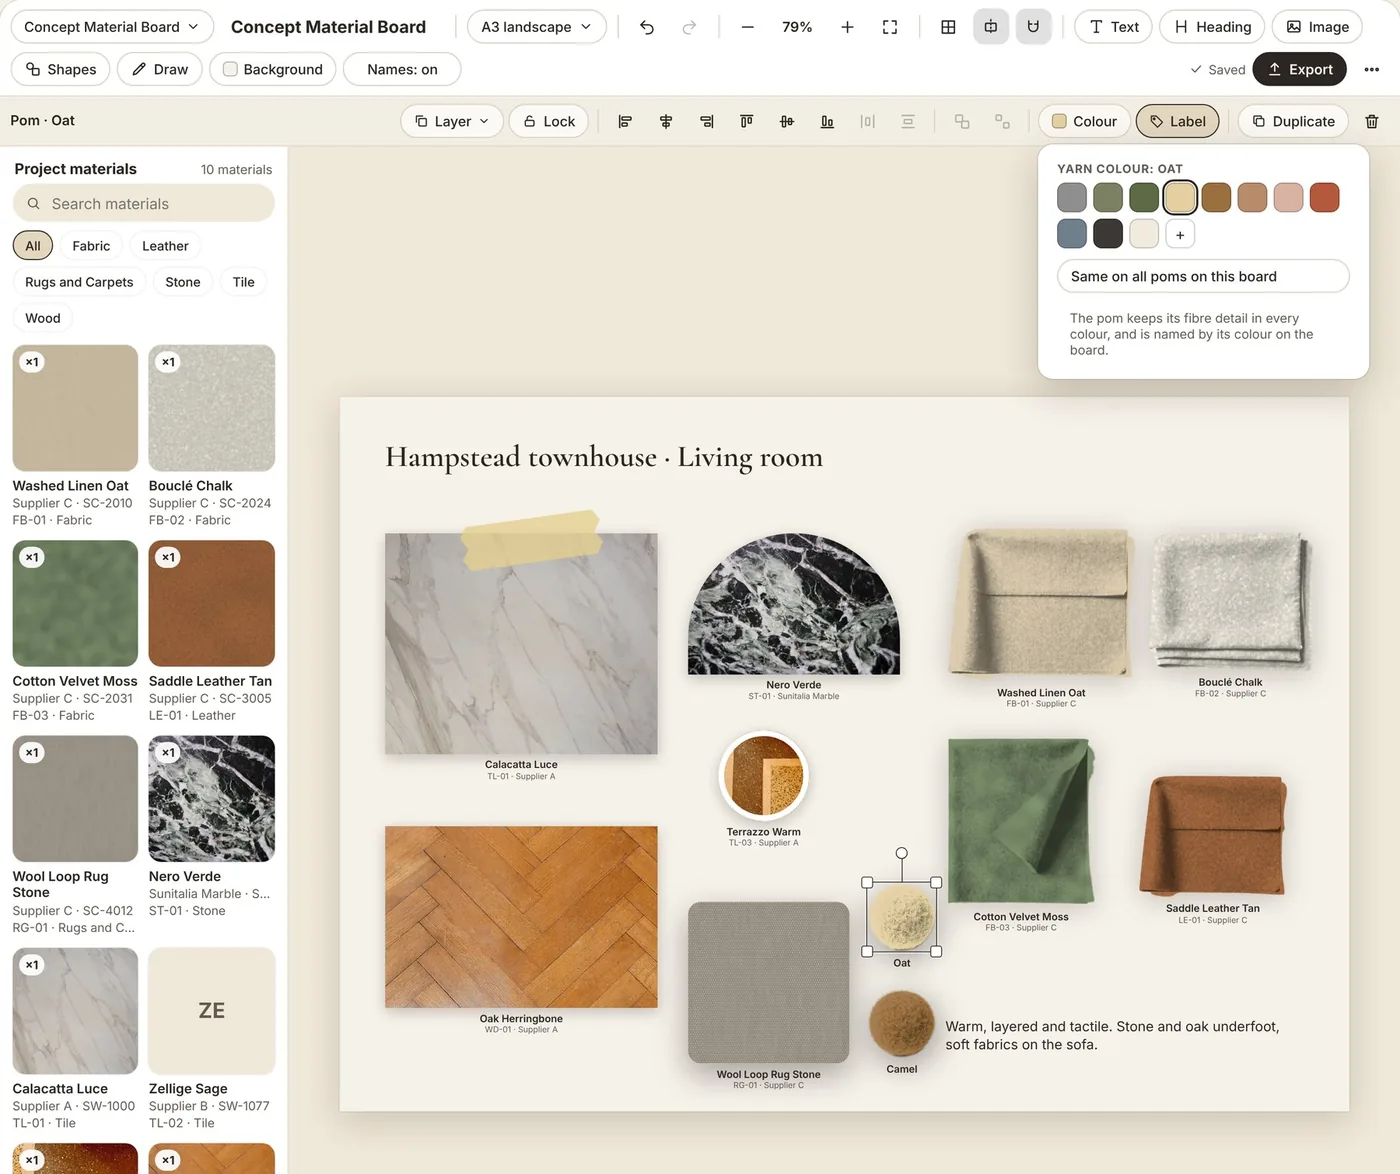
Add yarn poms to rug boards New
Click Shapes, then the Poms tab, and click the pom.
Select it and click Colour: Stone, Sage, Moss, Oat, Camel and more, or your own.
Each pom is named by its colour on the board.
Same on all poms recolours every pom at once.
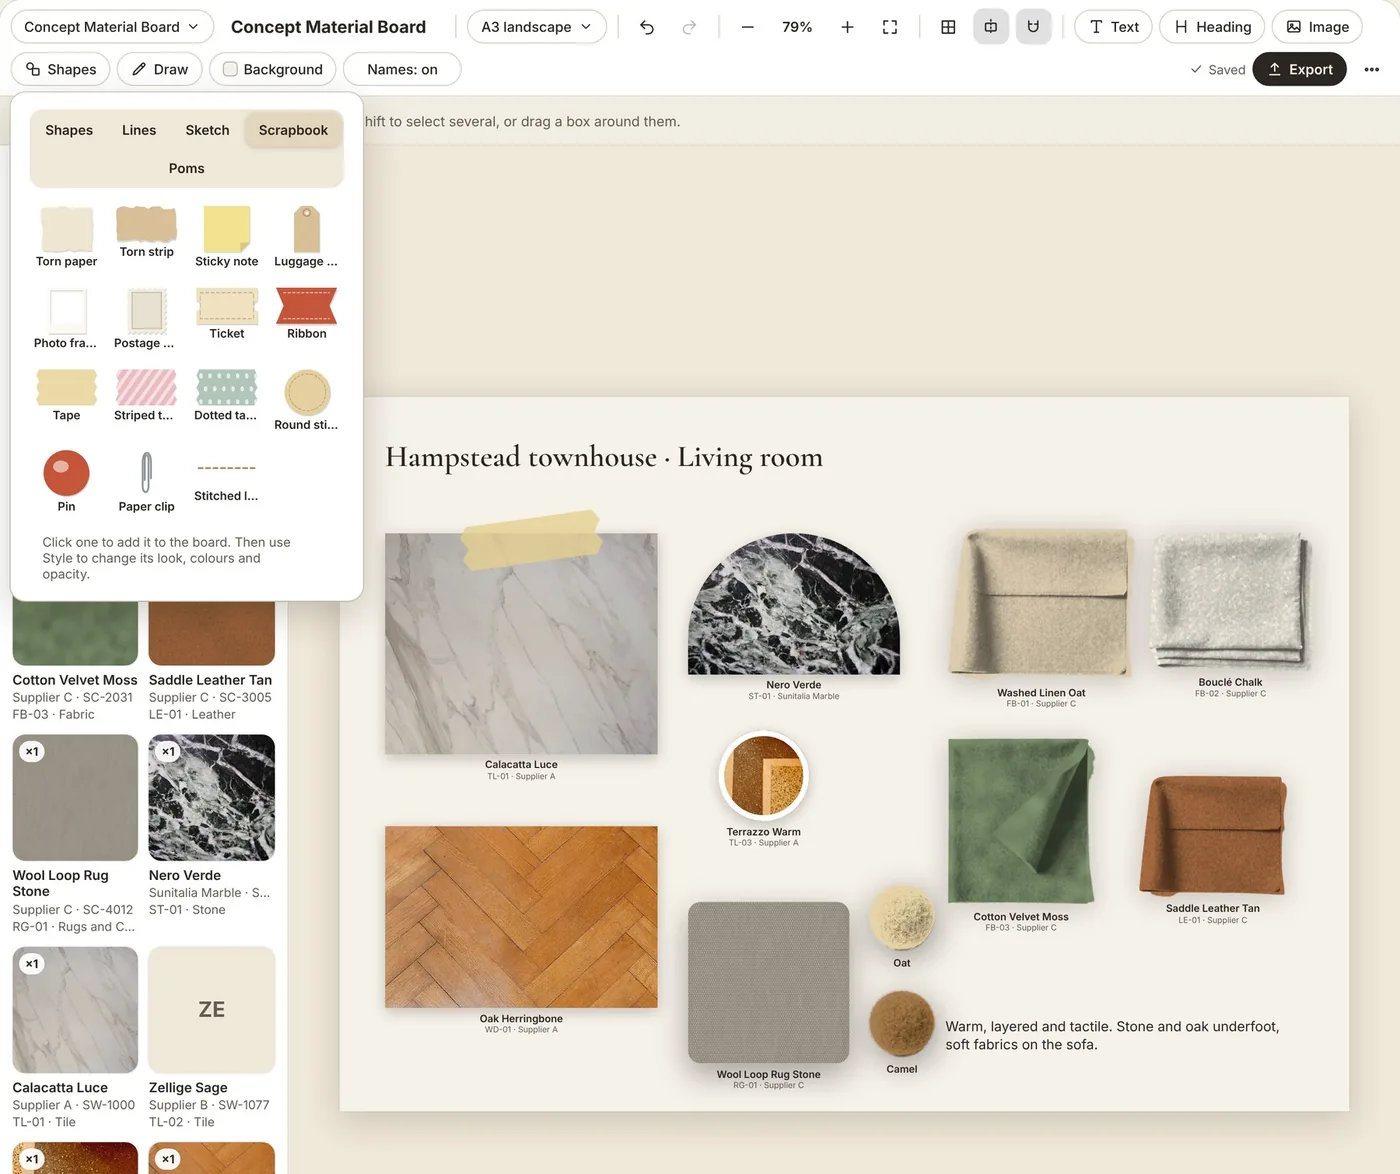
Shapes, sketches and scrapbook pieces
Shapes has four tabs: Shapes, Lines, Sketch and Scrapbook.
Scrapbook adds tape, torn paper, tags, stamps, pins and stitched lines.
Select one and click Style: Clean, Sketch, Hatched or Brush, plus colours and line style.
Draw lets you sketch freehand with a pen or marker.
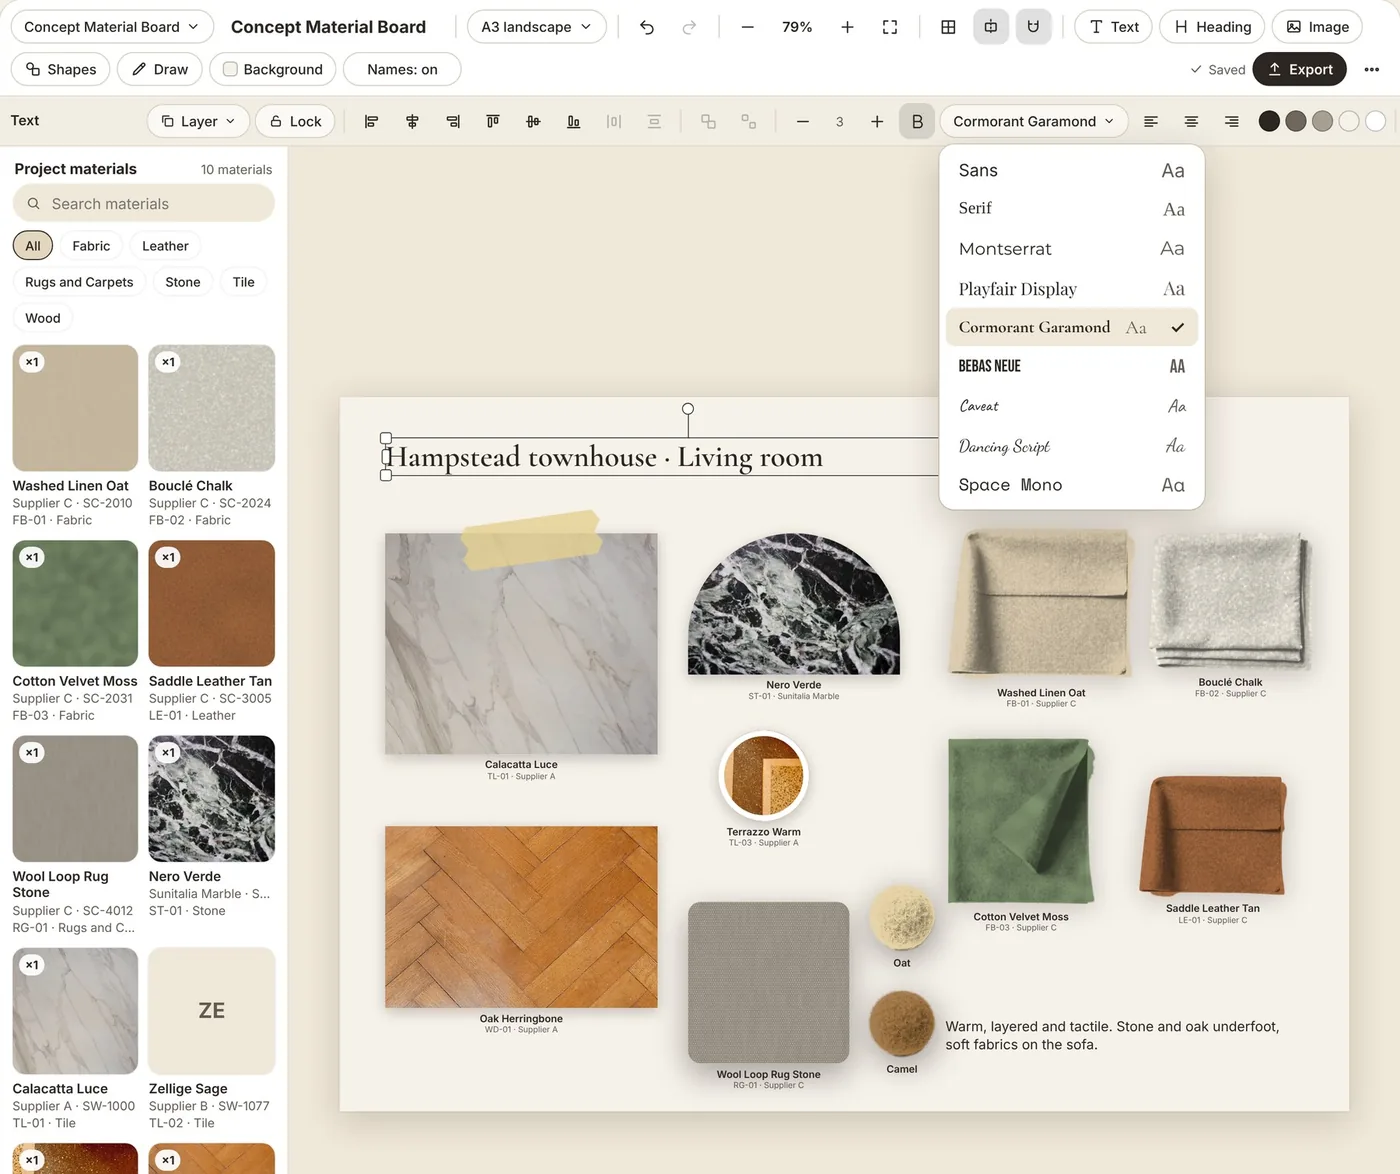
Headings and notes
Click Heading for a title or Text for a note.
Double-click to type. Pick a font: Sans, Serif, Playfair, Cormorant, Caveat and more.
Set size, weight, alignment and colour from the bar.
Text colours itself against the background for you.
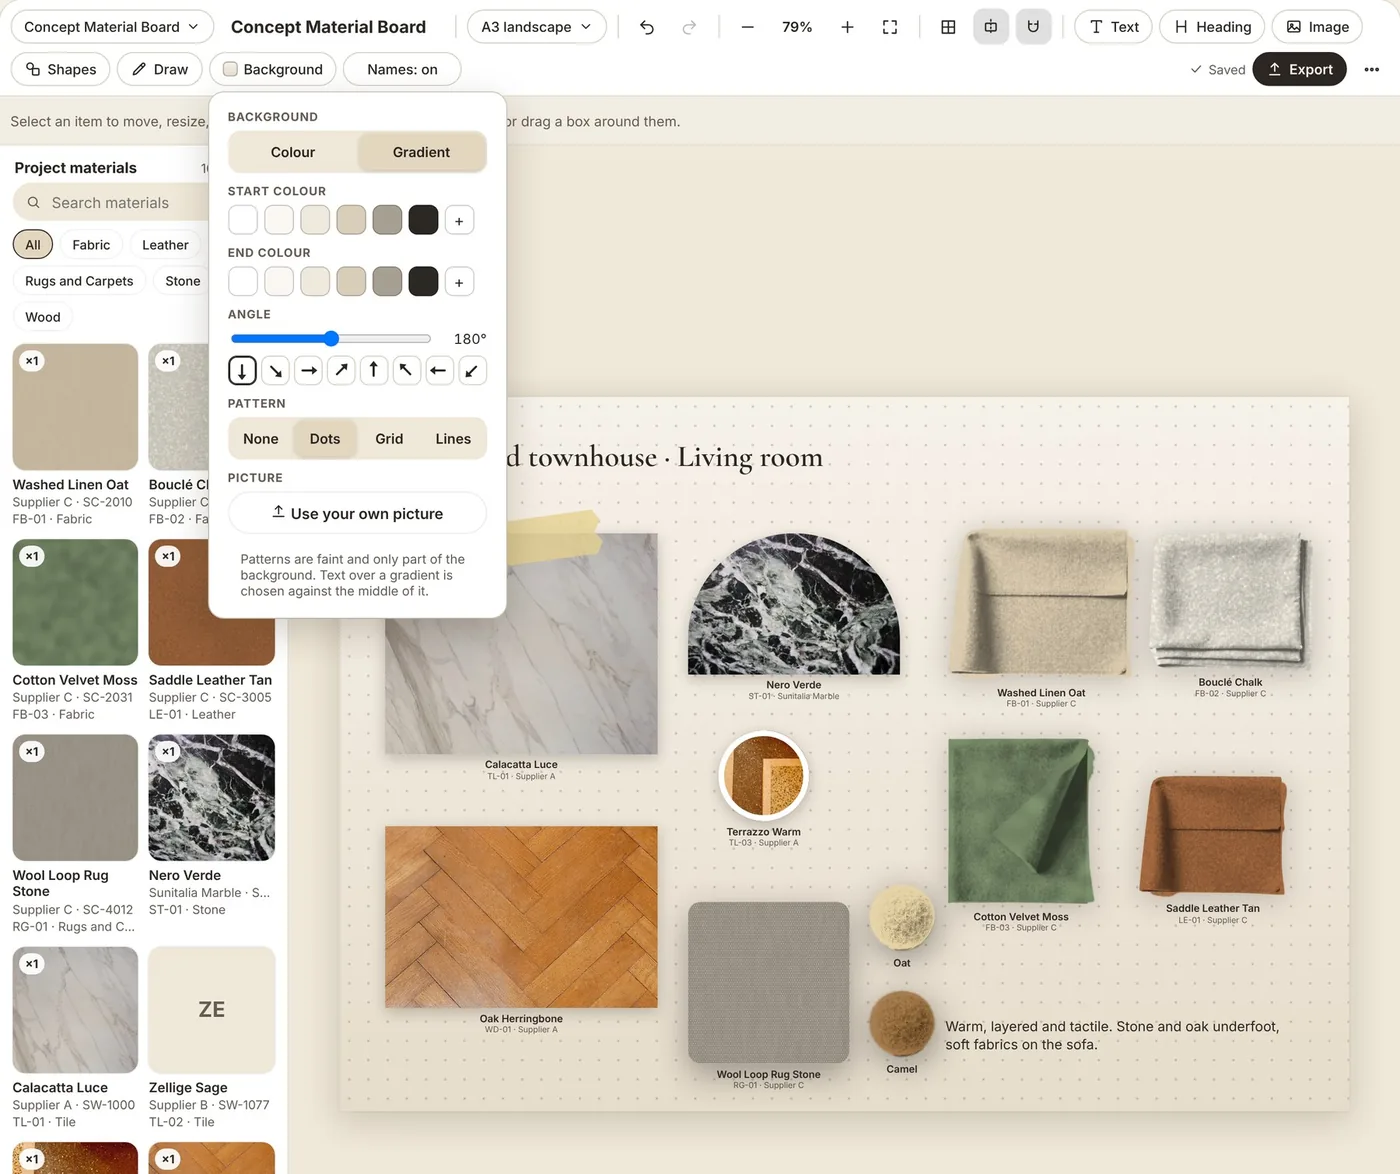
Set the background
Click Background.
Choose a Colour, or a Gradient with start, end and angle.
Add a faint Pattern: dots, grid or lines.
Or Use your own picture behind everything.
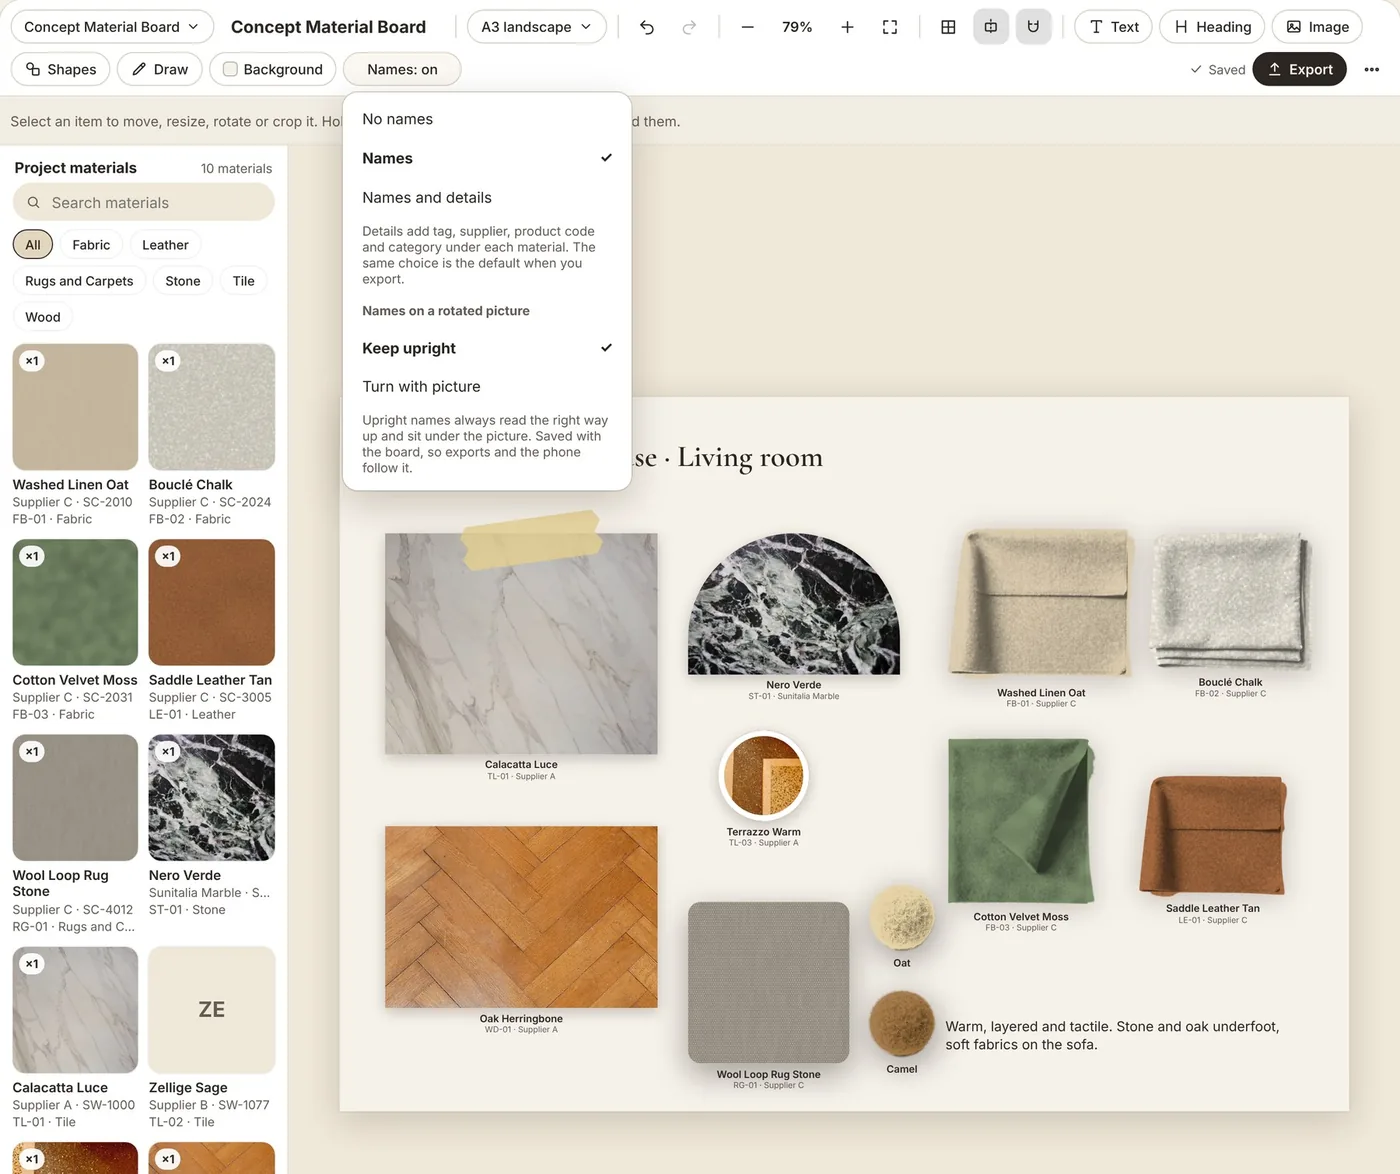
Show material names
Click Names in the top bar.
Choose No names, Names, or Names and details: tag, supplier, code and category.
On turned pictures, keep names upright or let them turn.
Hide one name with Label in the selection bar.
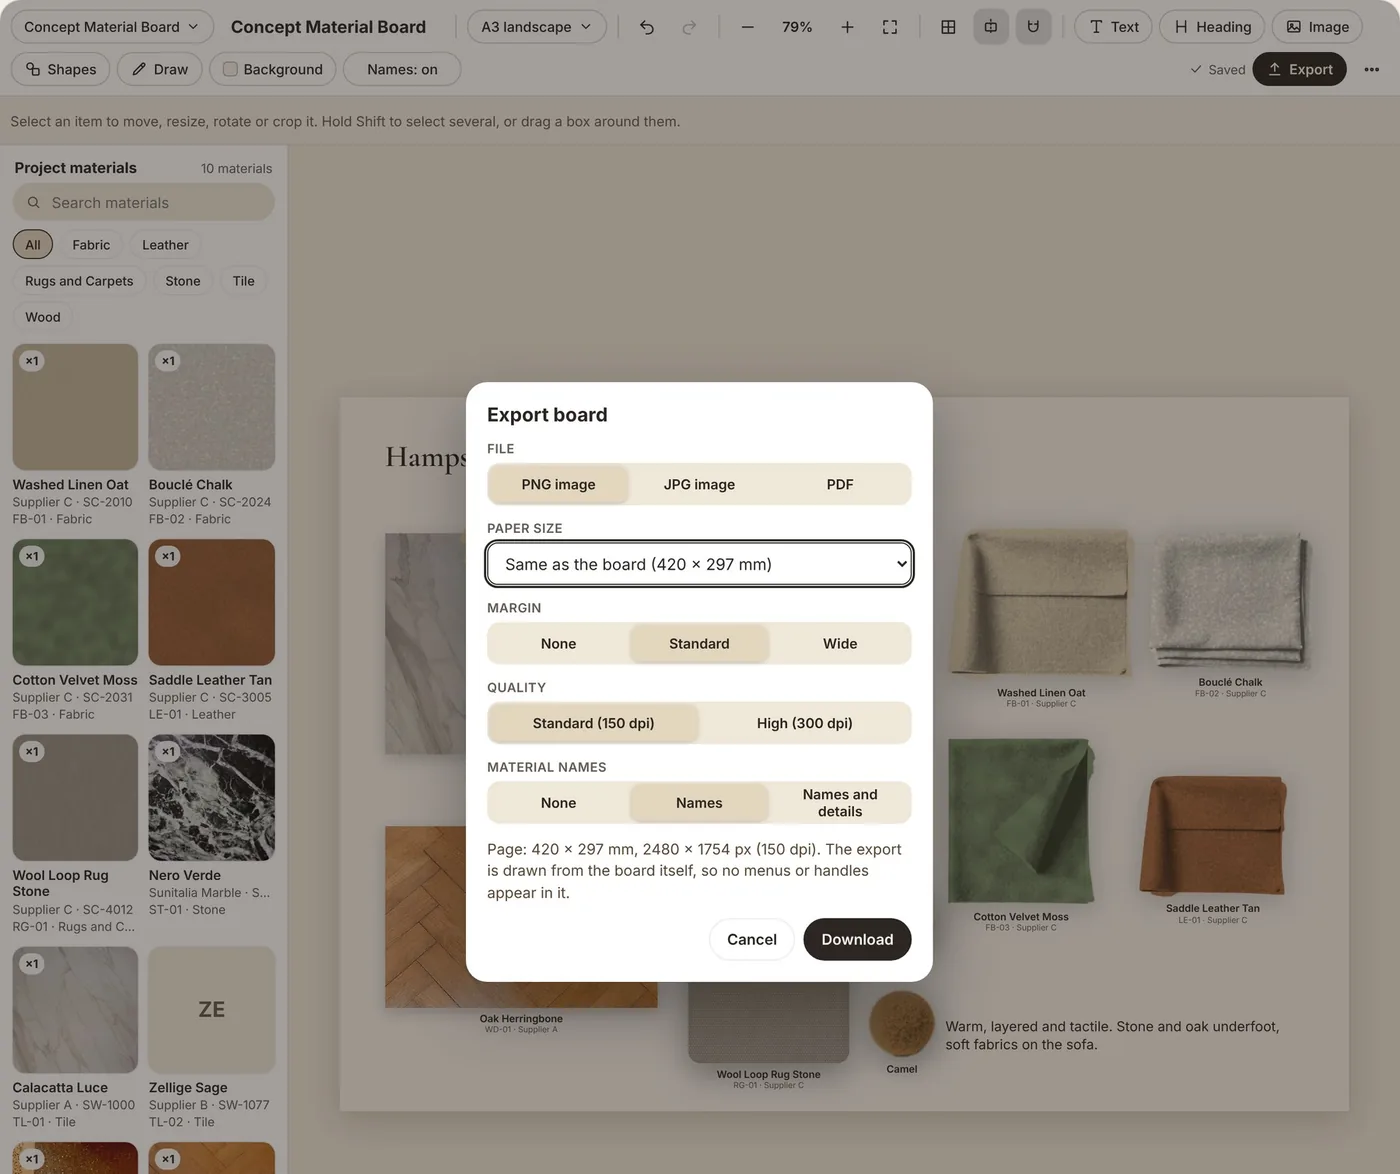
Export and share the board
Click Export.
Pick PNG, JPG or PDF, the paper size and margin.
Choose Standard (150 dpi) or High (300 dpi), and the names to show.
Click Download. You can also open the board on your phone to show it.
Before you start
Good to know.
Boards on each plan
Basic has 1 board with up to 5 sub-boards. Freelancer has 5 boards per project, each with up to 5 sub-boards. Studio has unlimited boards.
Where it works
Specify on a computer or phone. Edit boards on a computer or tablet. On a phone, boards open view-only.
Always linked
Board items stay linked to the specification. Remove a material from the project and its picture says Not in specification.
Saving
Boards save as you work. If the board was changed in another window, the bar asks you to reload first.
 Swatchera