 Swatchera
Open the form
In the Library
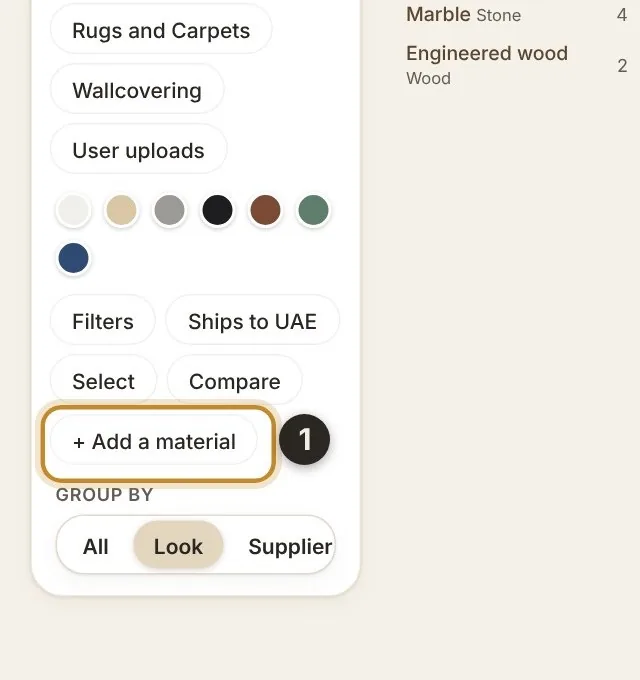
Click “+ Add a material” under the filters.
In the form
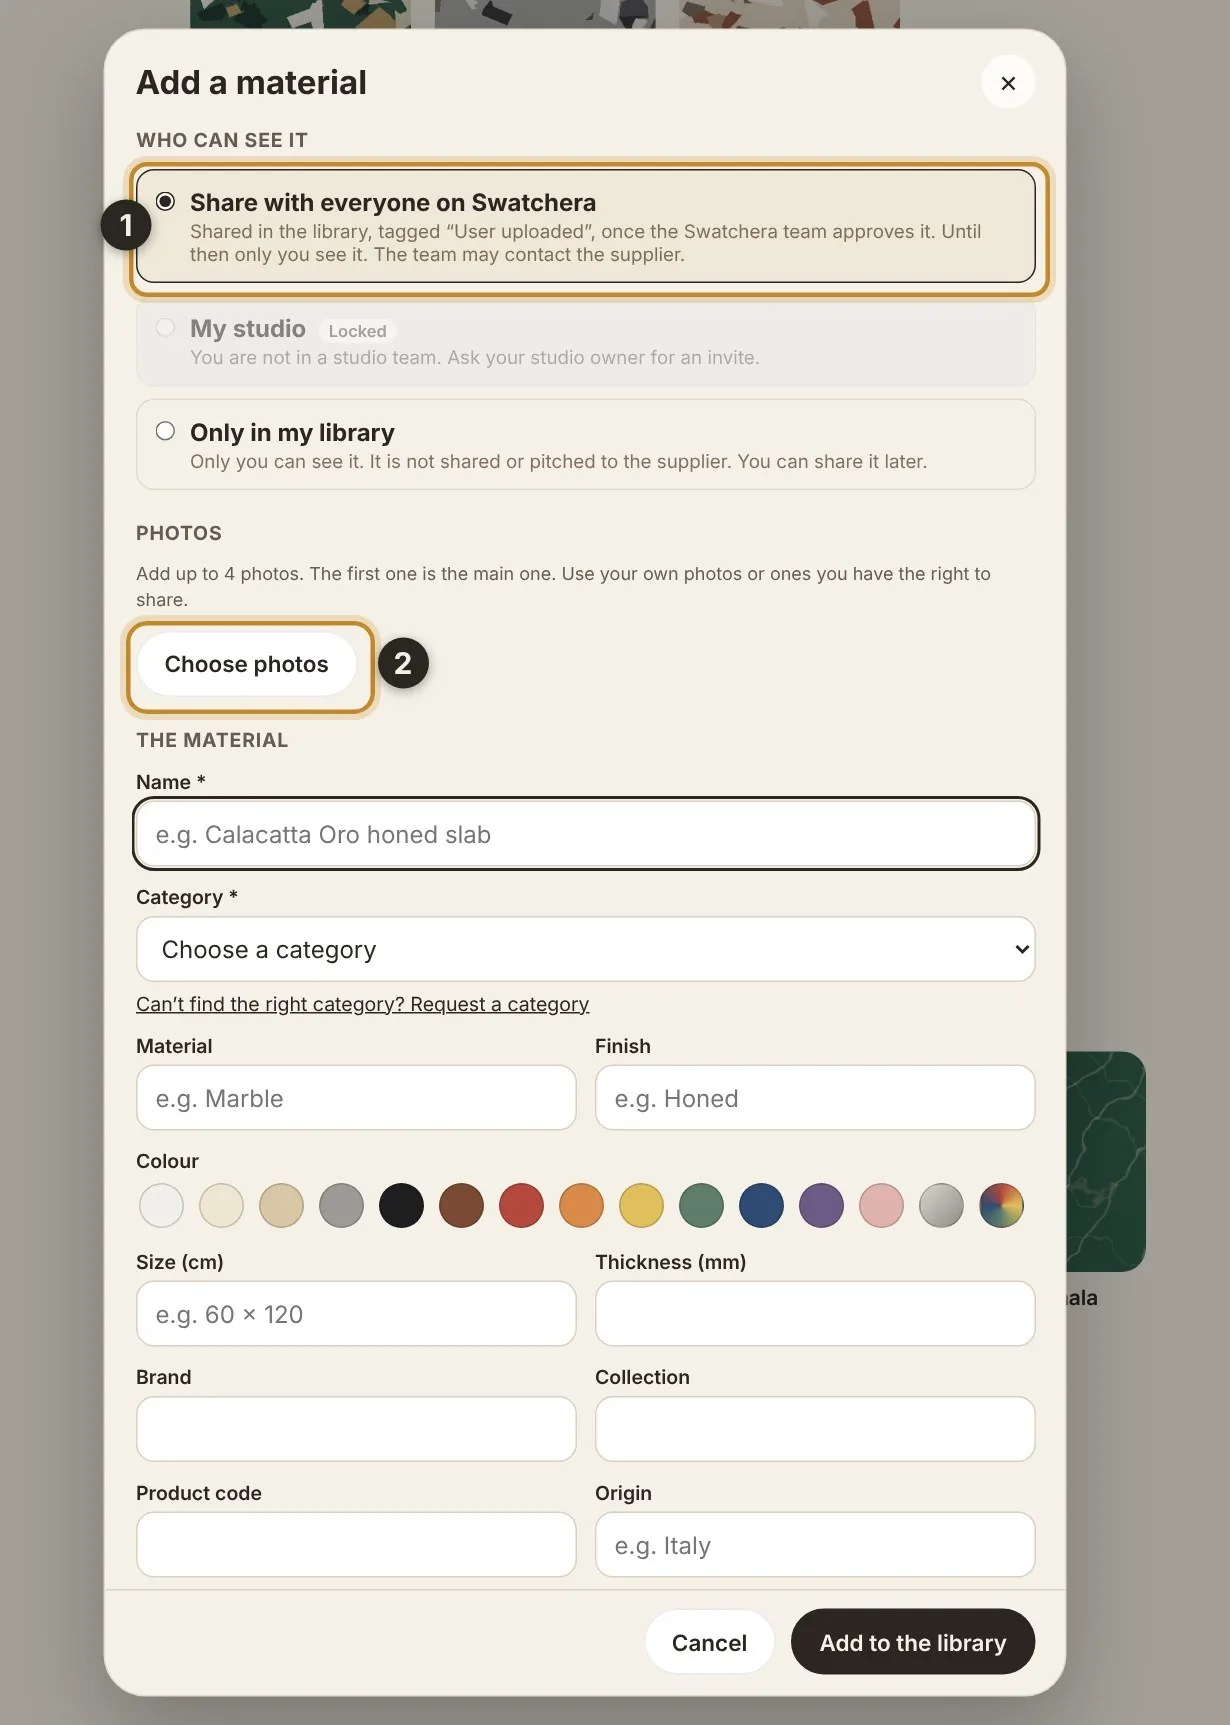
Pick who can see it: everyone on Swatchera (the team approves it first) or only you.
Choose up to four photos. The first one is the main photo.
How-to guides · For designers
Add a material you sourced yourself, specify it, place it on the board, export the PDFs and share a client link.
5 short how-tos. Screens show sample data.
Photo, details and who can see it.
In the Library
Click “+ Add a material” under the filters.
In the form
Pick who can see it: everyone on Swatchera (the team approves it first) or only you.
Choose up to four photos. The first one is the main photo.
Photo and basics
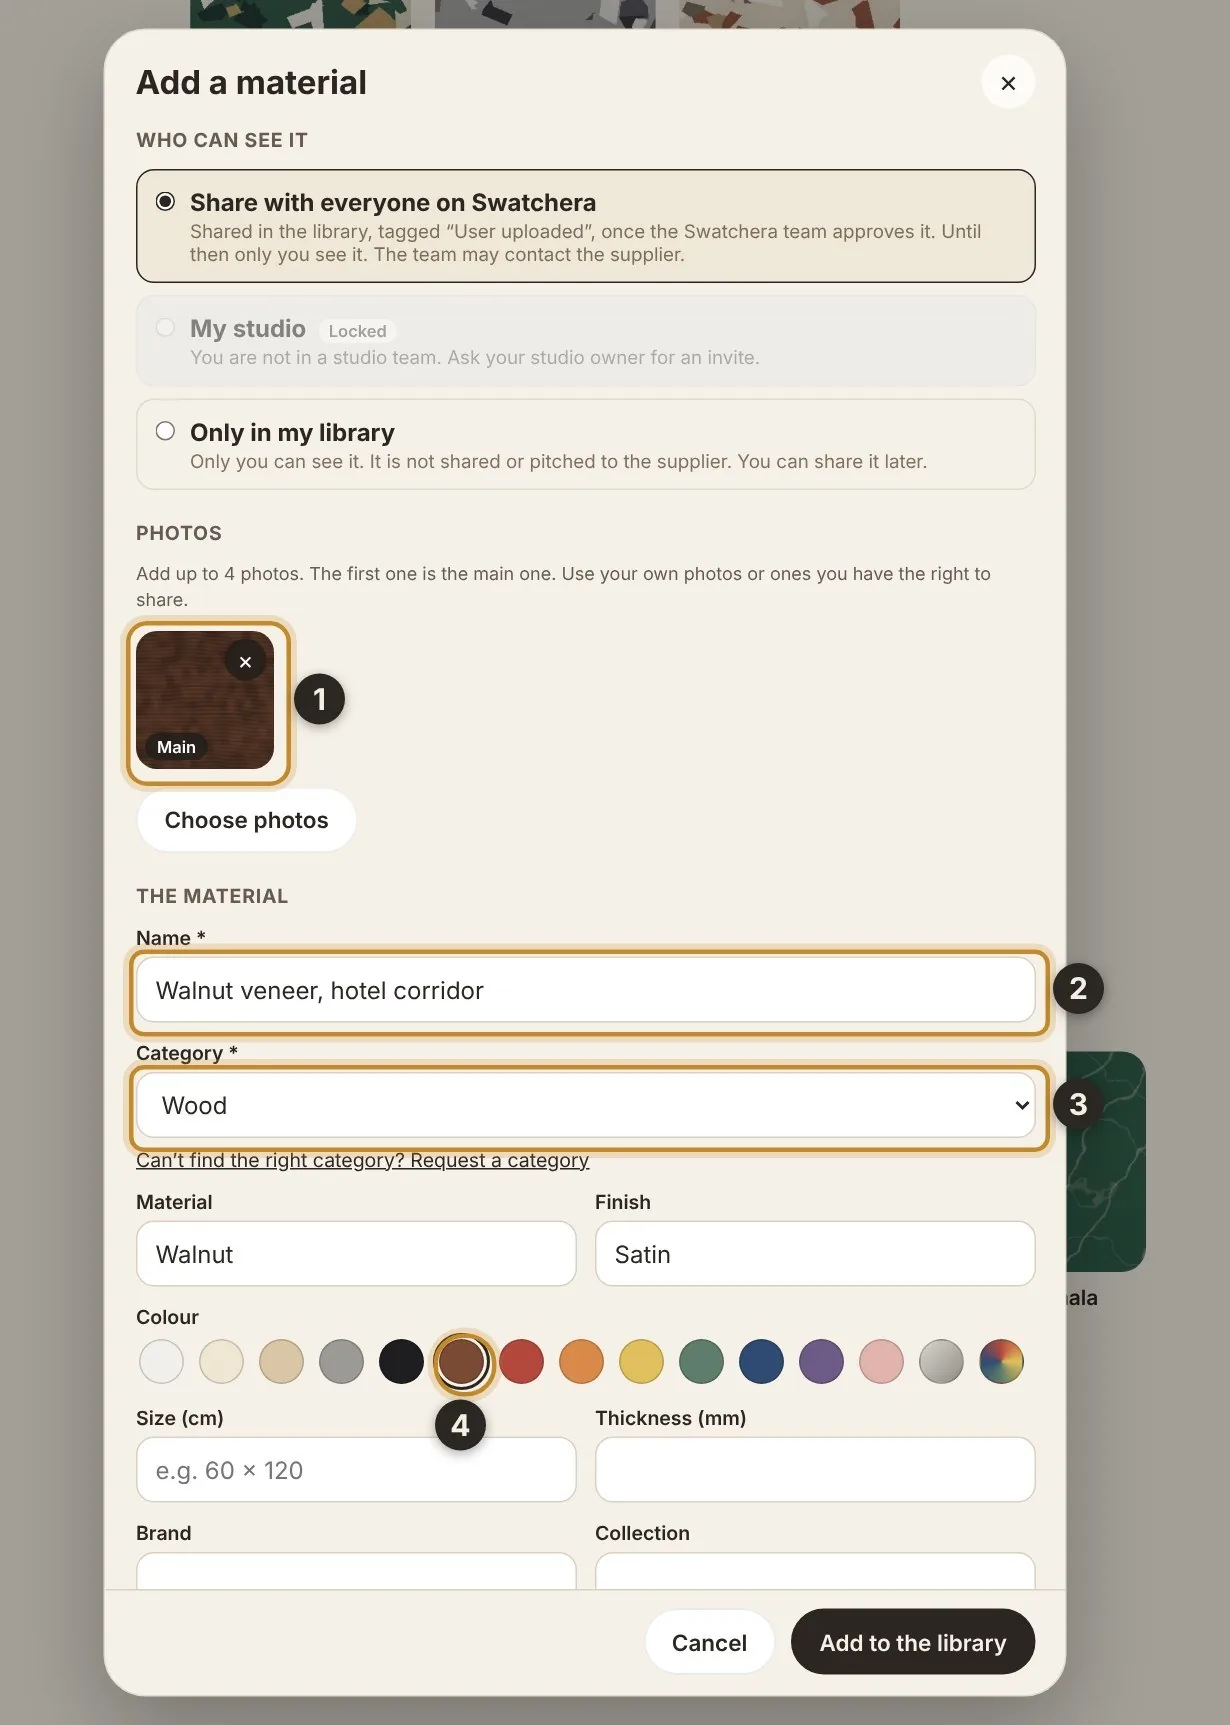
Your main photo.
Name the material.
Choose a category.
Pick a colour. Add finish and size if you know them.
Supplier and specs
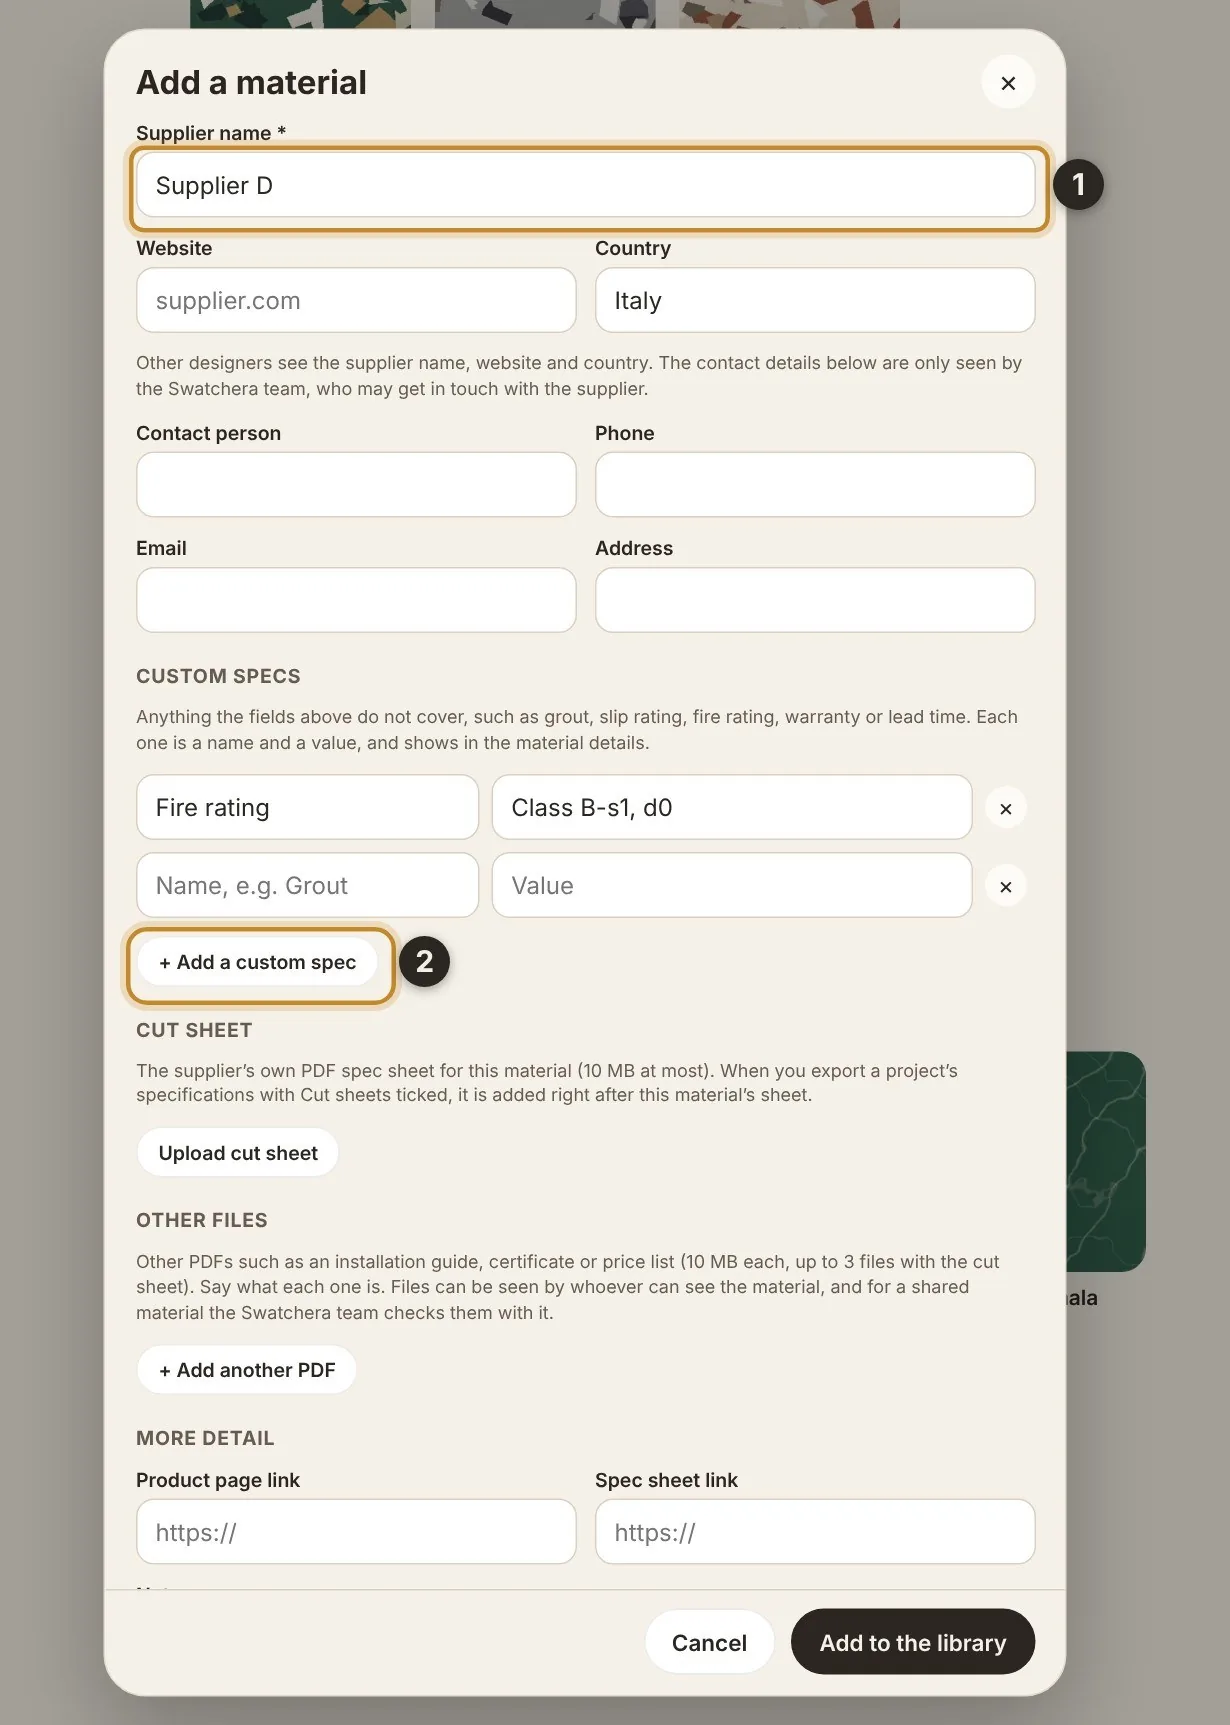
Supplier name (required).
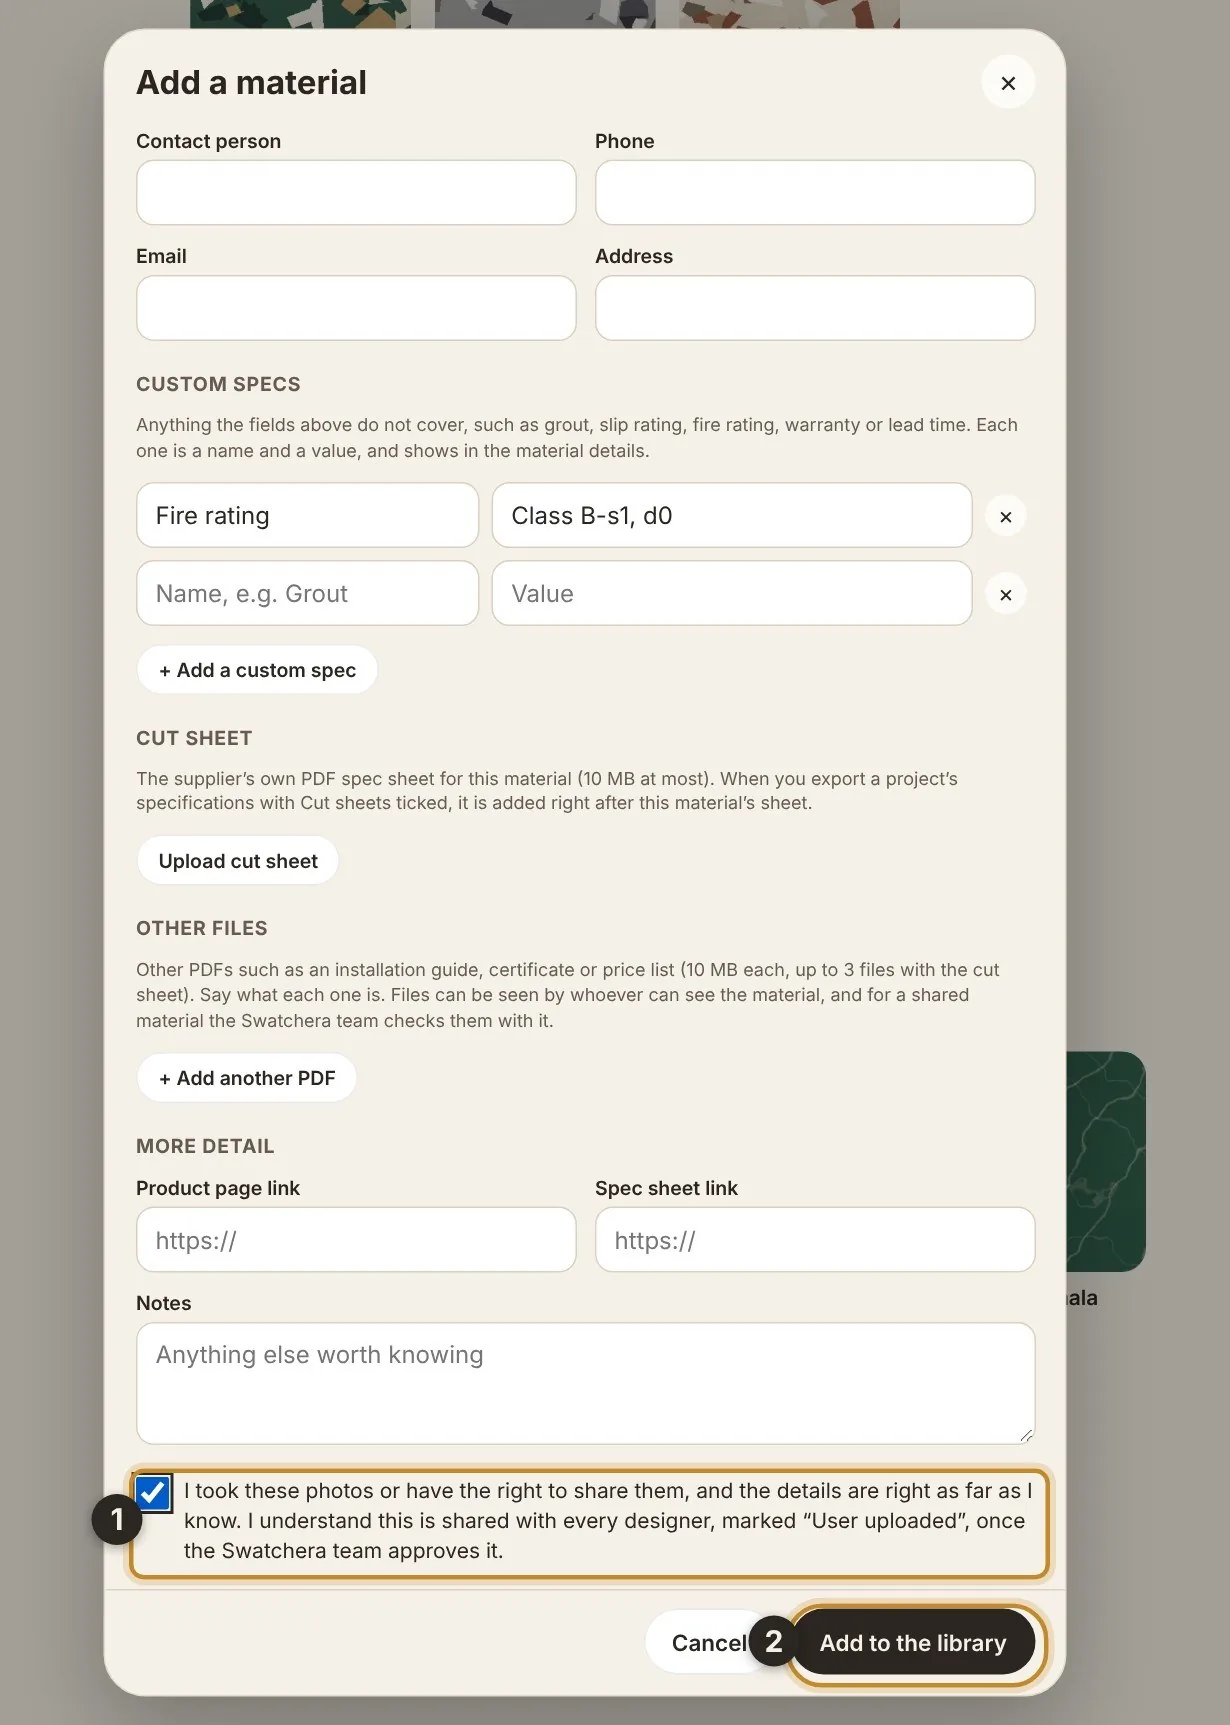
Add extras, like fire rating, as custom specs.
At the end of the form
Tick the box to confirm you have the right to share the photos.
Click “Add to the library”.
Then
Your material opens with a “User uploaded” tag. It is in your Library now.
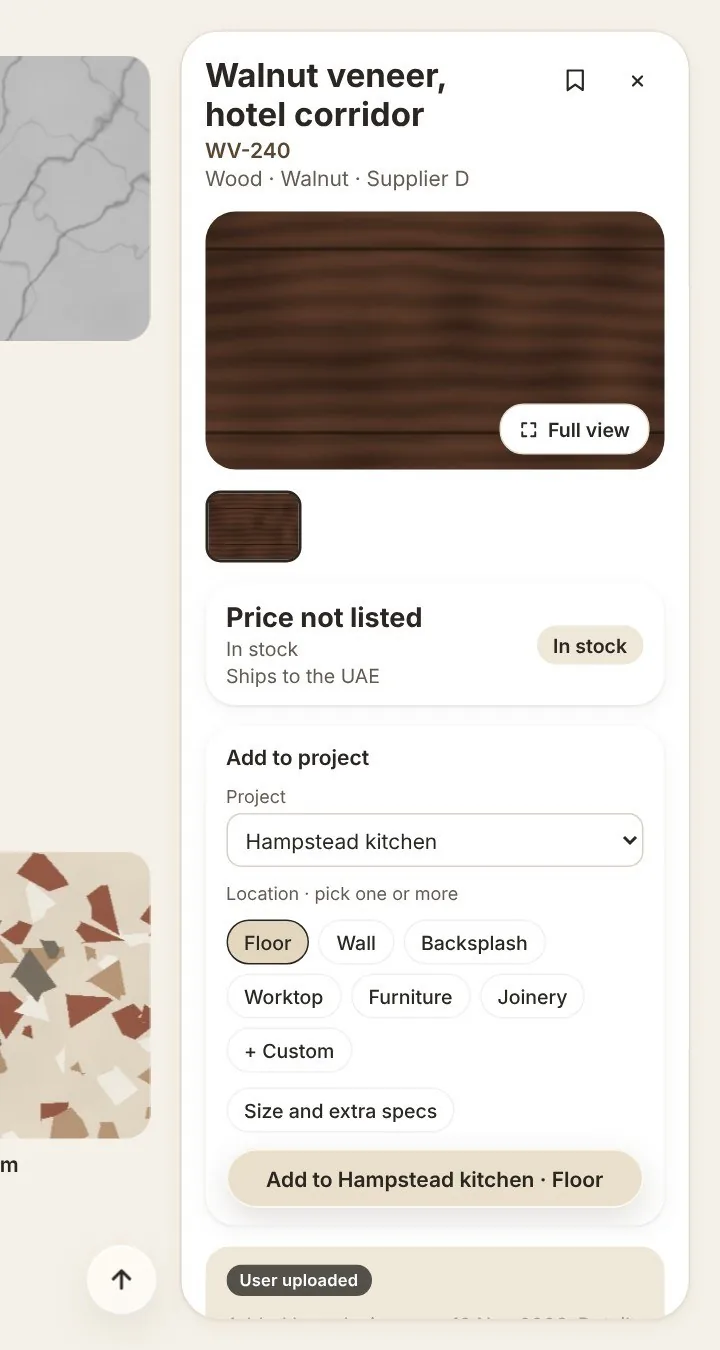
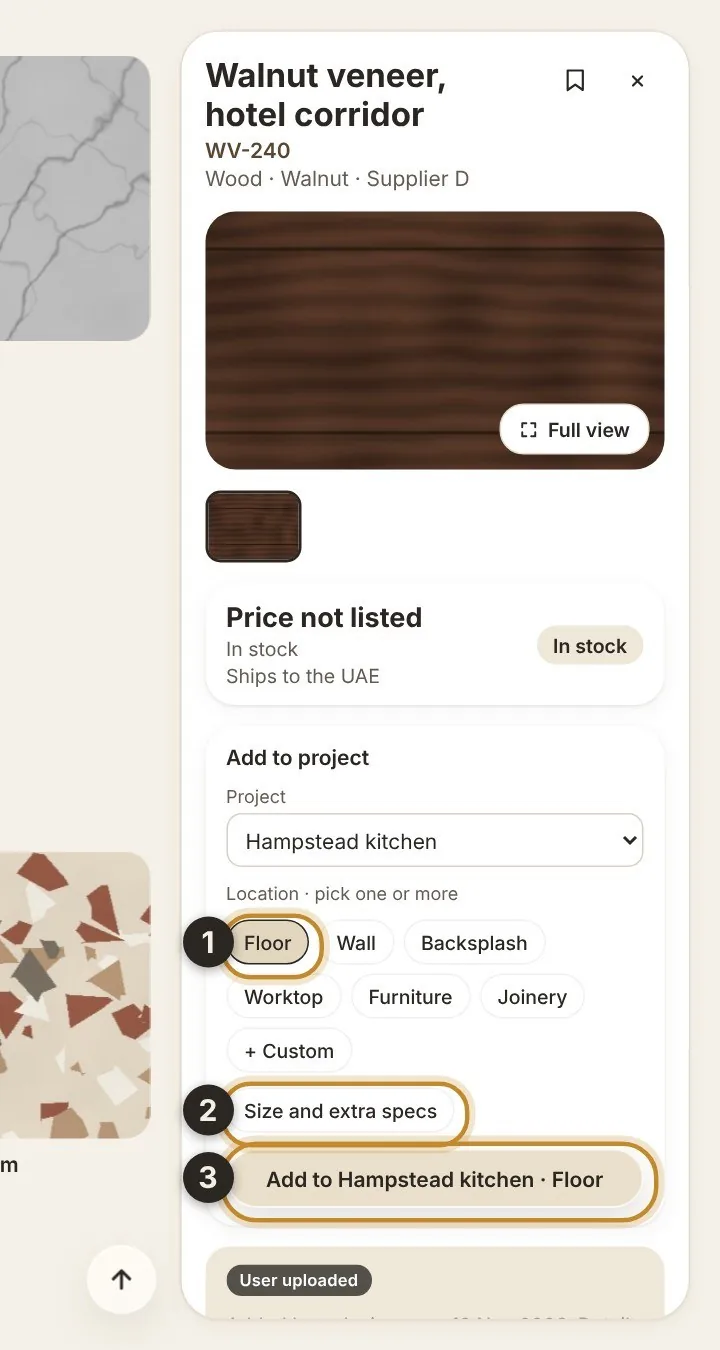
Choose the project and where it goes.
Choose the project, then where it goes: Floor, Wall, Worktop and more.
Optional: add size and extra specs.
Click “Add to Hampstead kitchen”.
Tip: the project has to exist first. Create it from Projects, then New Project.
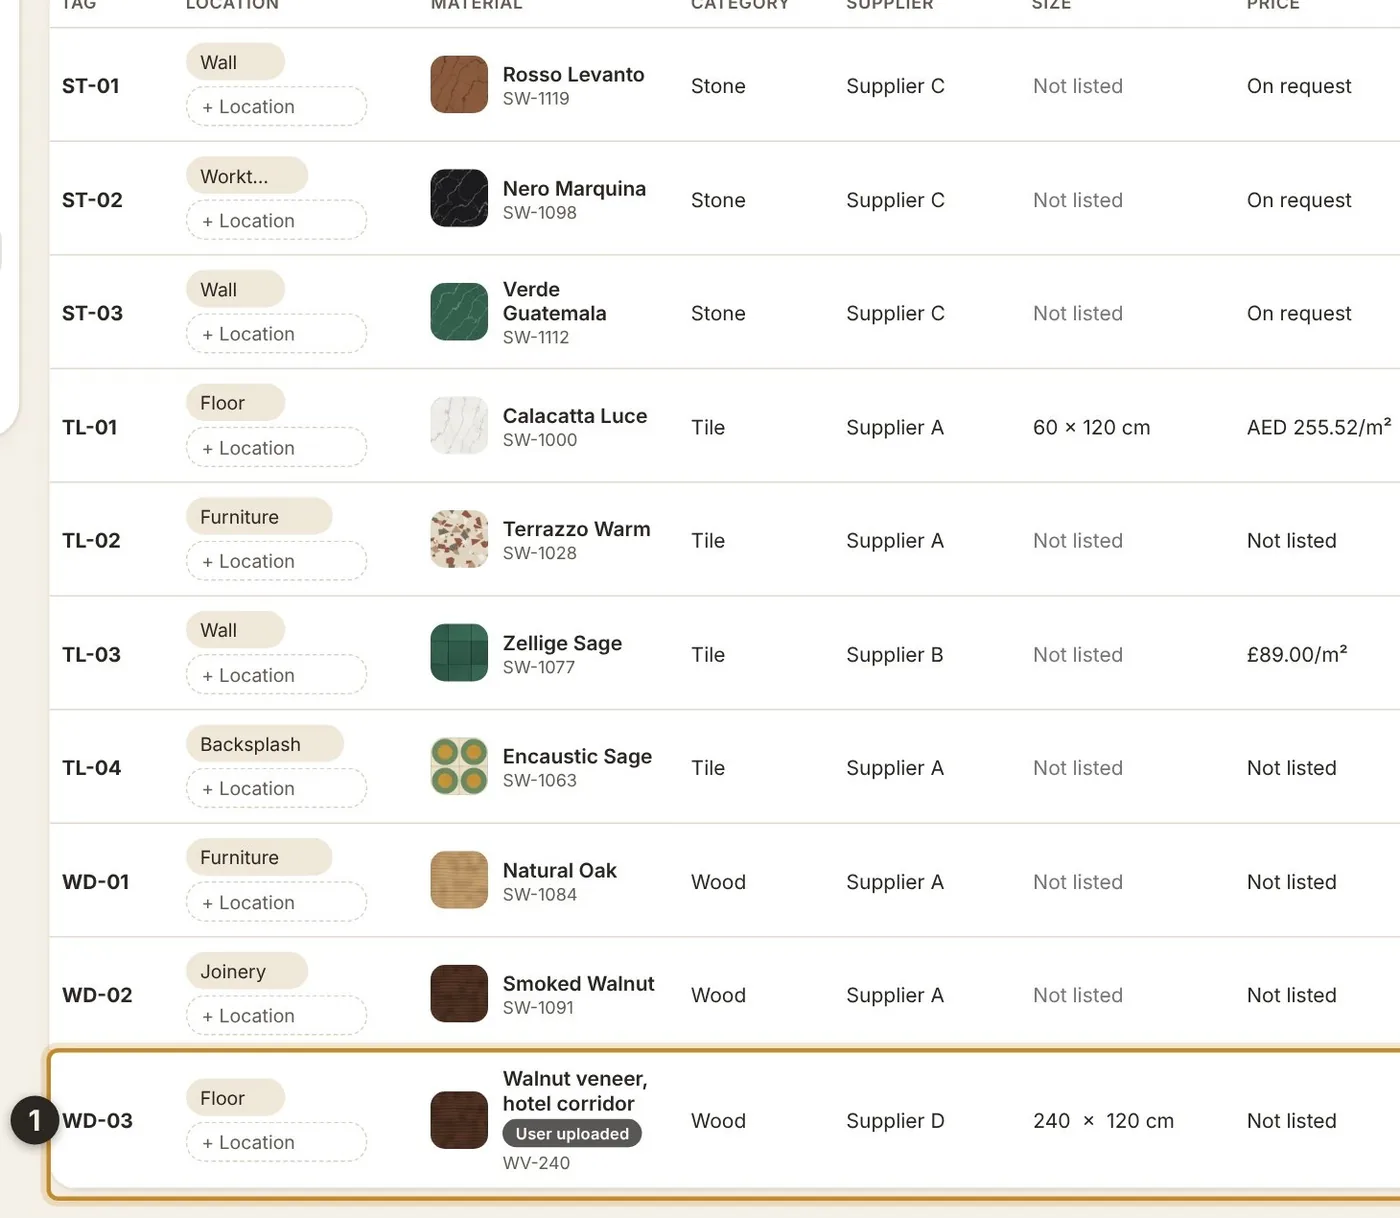
Open the project. Your material is the newest row, with its own tag (WD-03).
The row keeps your “User uploaded” label, its location, size and supplier. It is part of the specification now.
Search, add, then drag it into place.
Your project’s materials are listed on the left of the board.
In the project, click the Material Board tab. Each project has its own board, and the panel only shows that project’s materials.
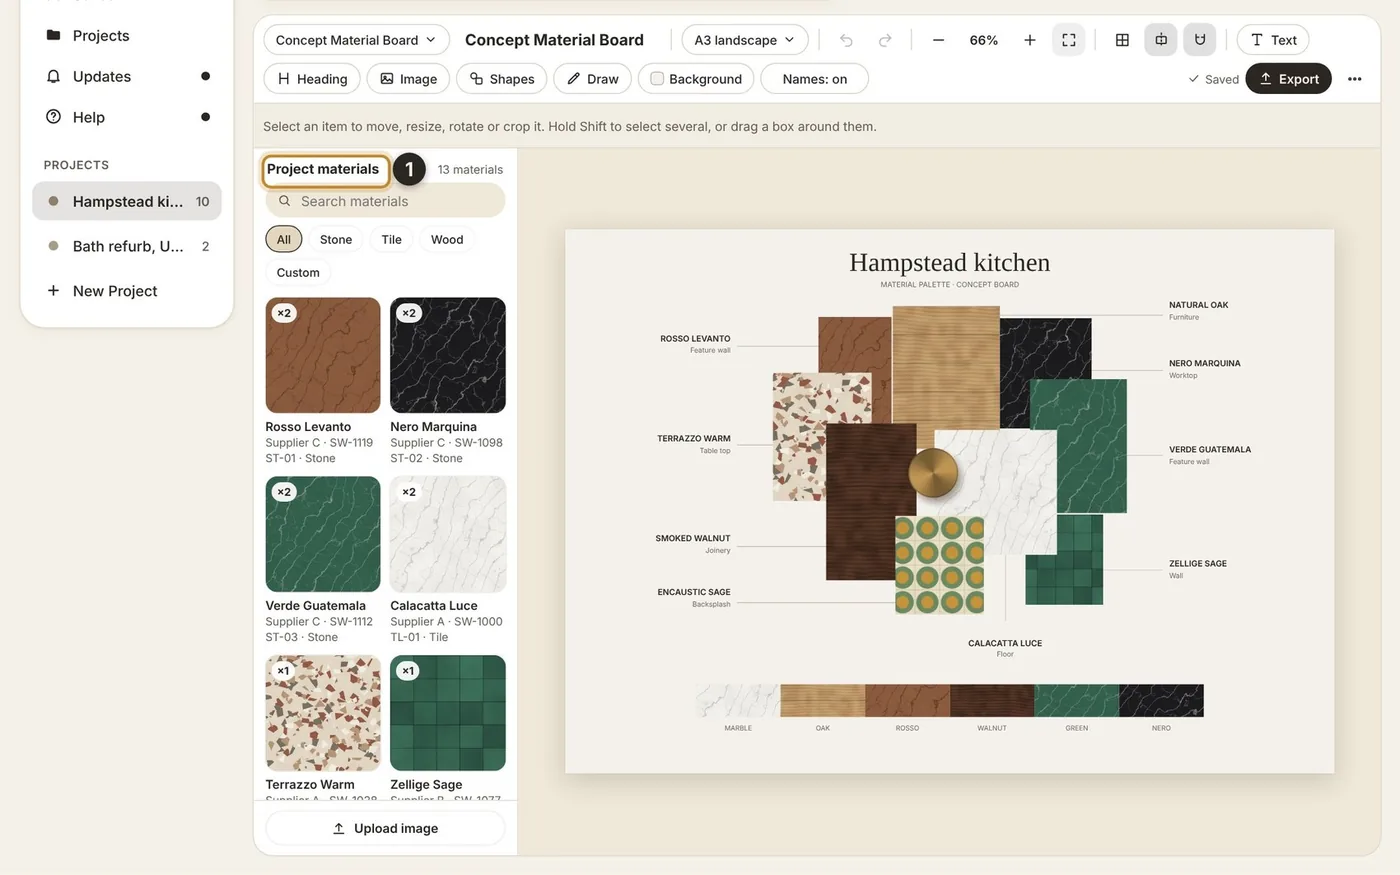
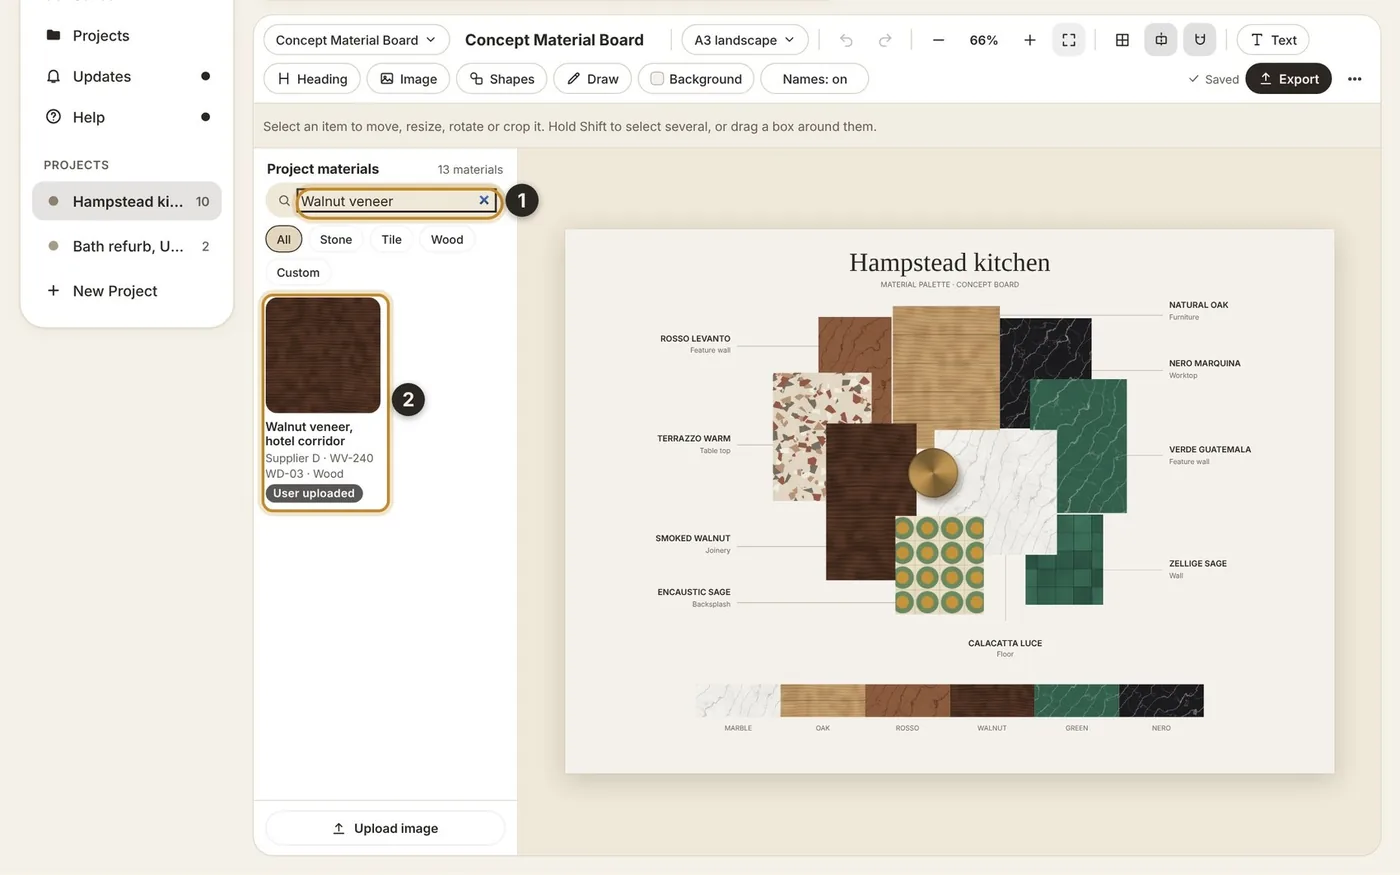
Search the panel for your material.
Click the + on its tile, or drag the tile onto the board.
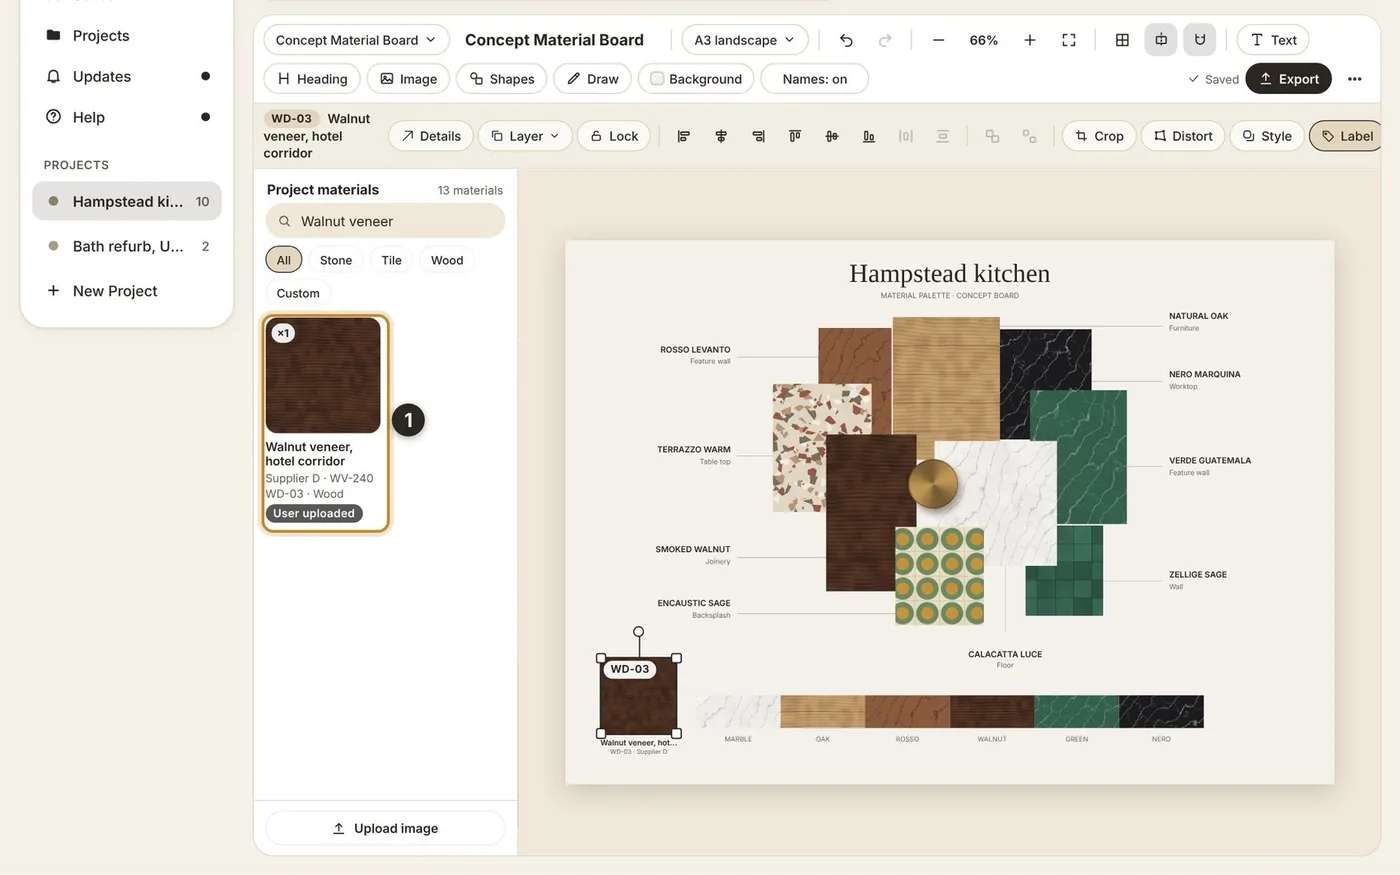
The tile now shows how many times it is on the board.
Drag the material into place and drag a corner to resize it. Its tag and name follow along. The board saves as you go.
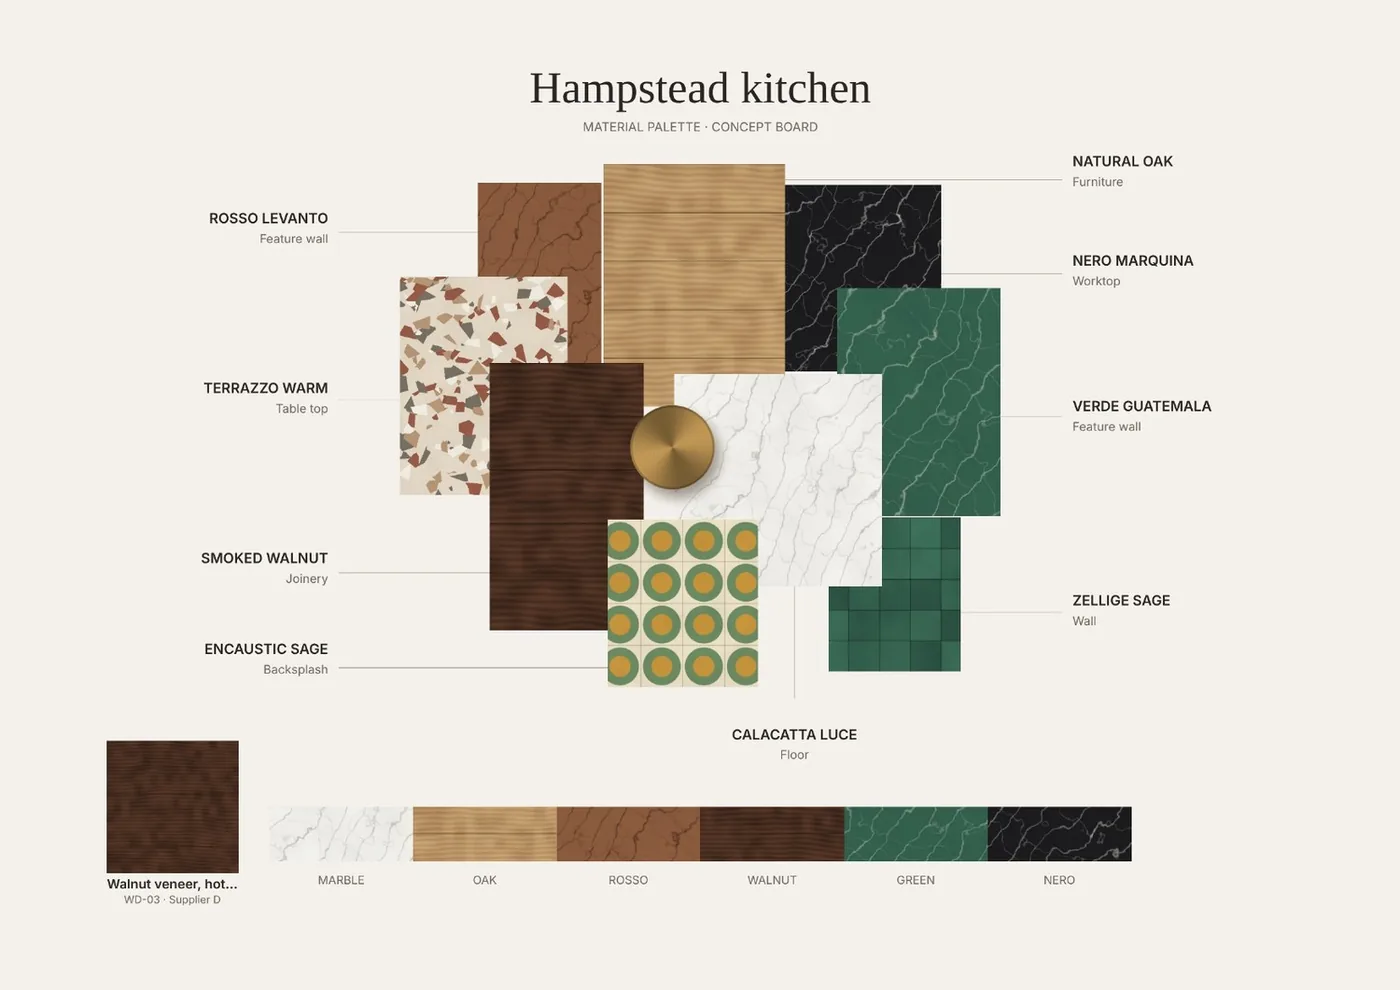
The board as an image or PDF, and the specification as one PDF.
On the board
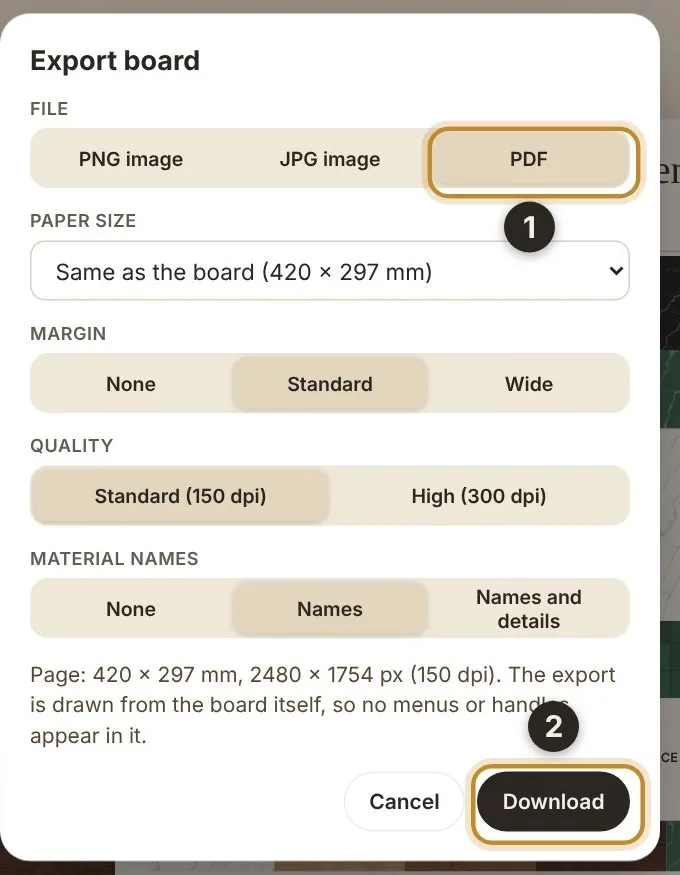
Click Export, then choose PDF. PNG and JPG are there too.
Click “Download”.
Paper size, margin, quality and material names are optional.
On the project page
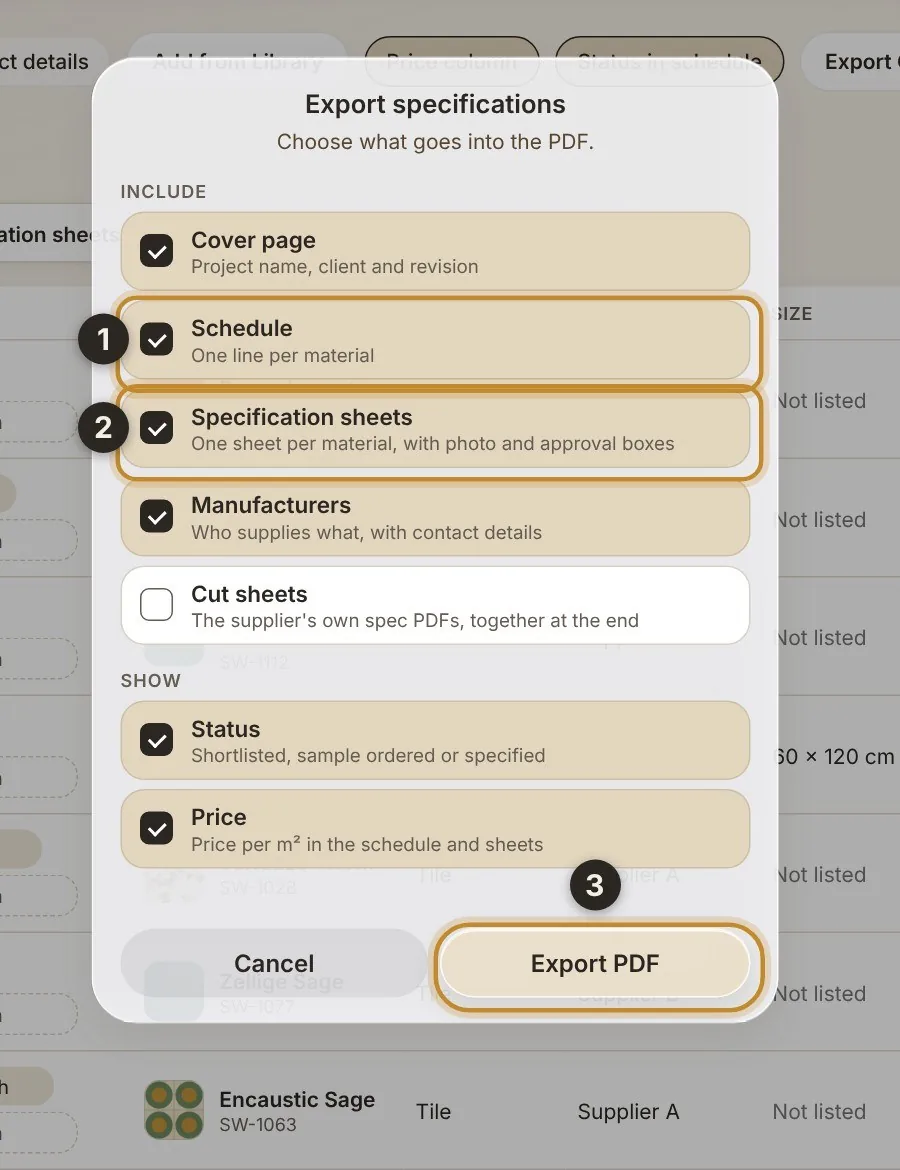
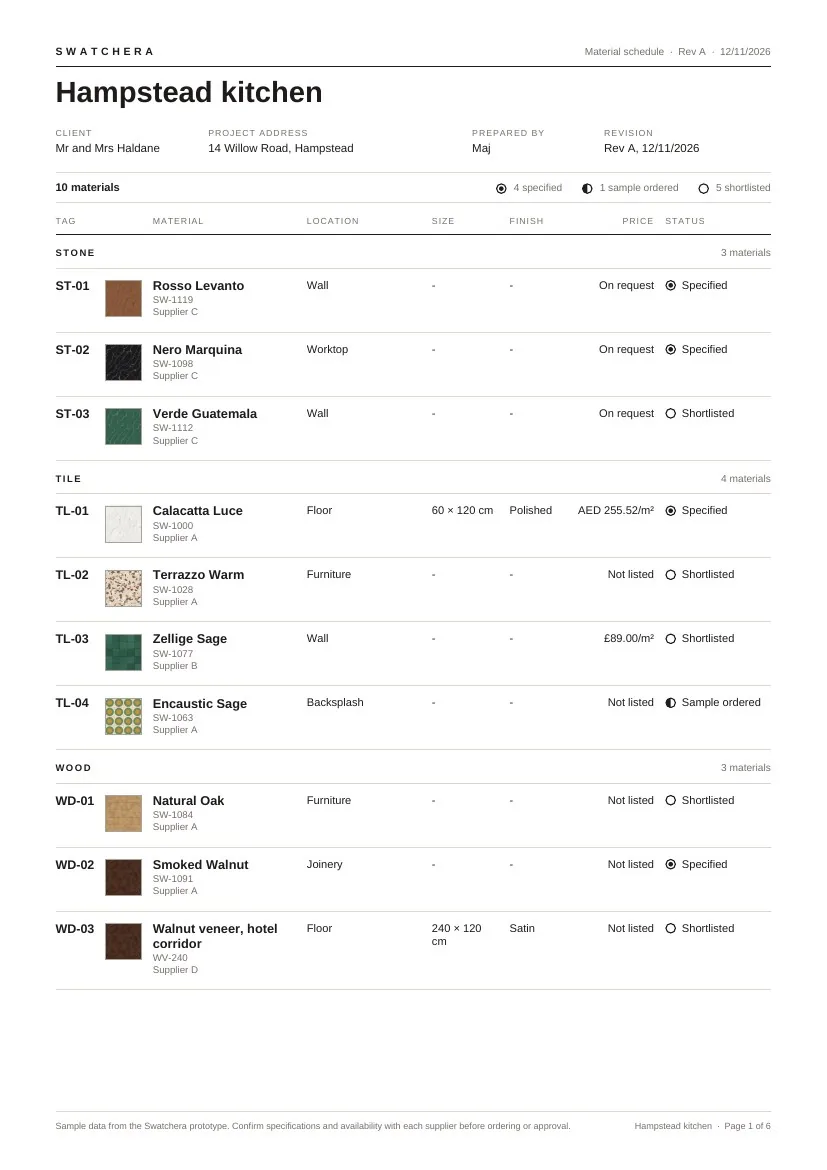
Click “Export Specifications”, then tick Schedule.
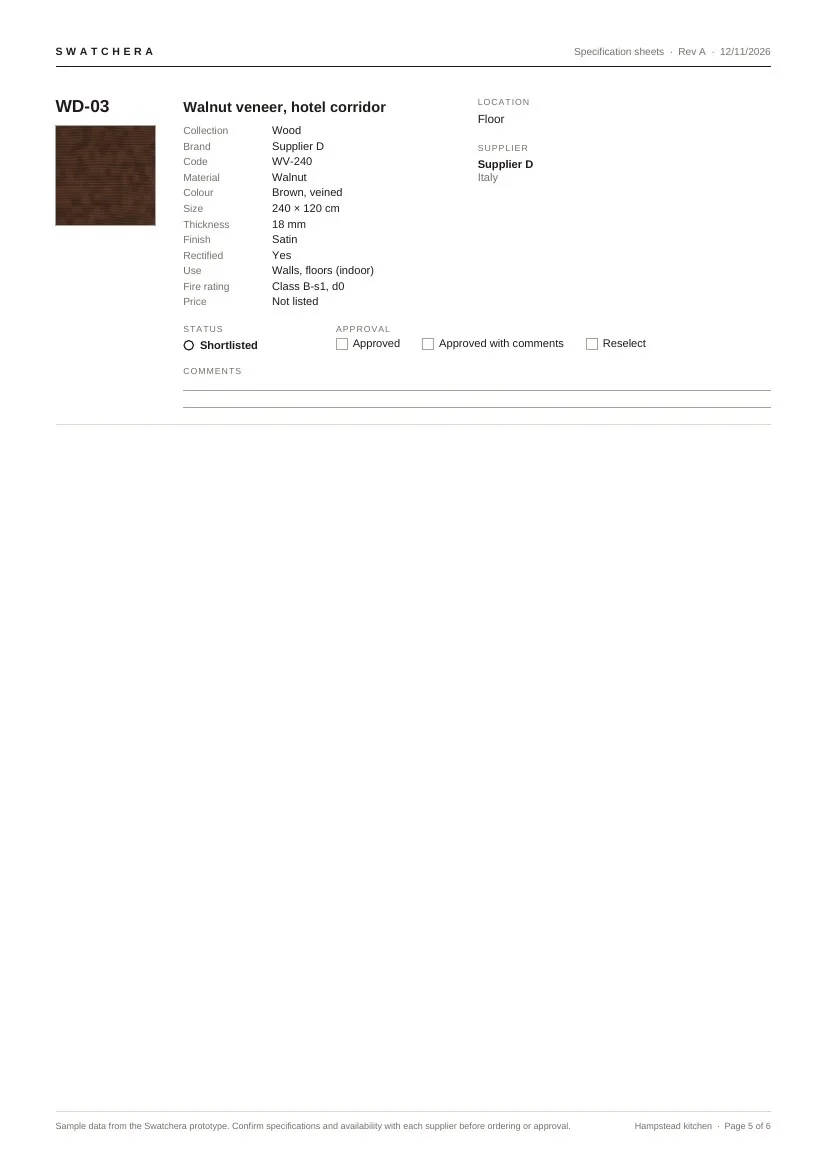
Tick Specification sheets: one sheet per material.
Click “Export PDF”.
Tick Cut sheets to add each supplier’s own spec PDF at the end.
A read-only page, no account needed.
On the project page
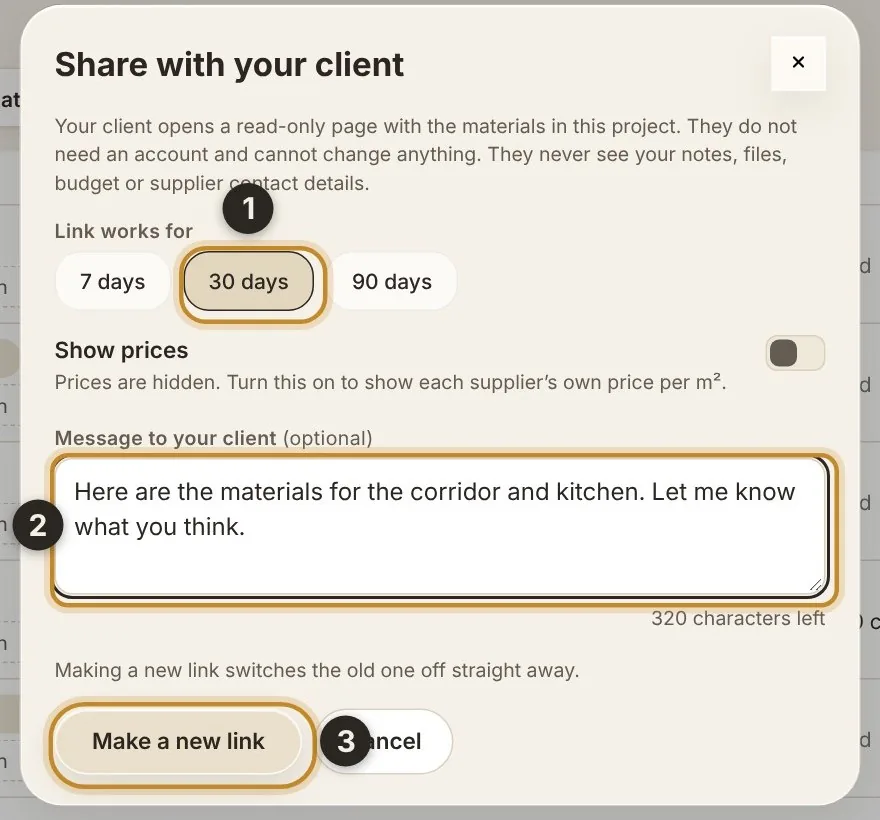
Click “Share with client”. Choose how long the link works.
Optional: add a message for your client.
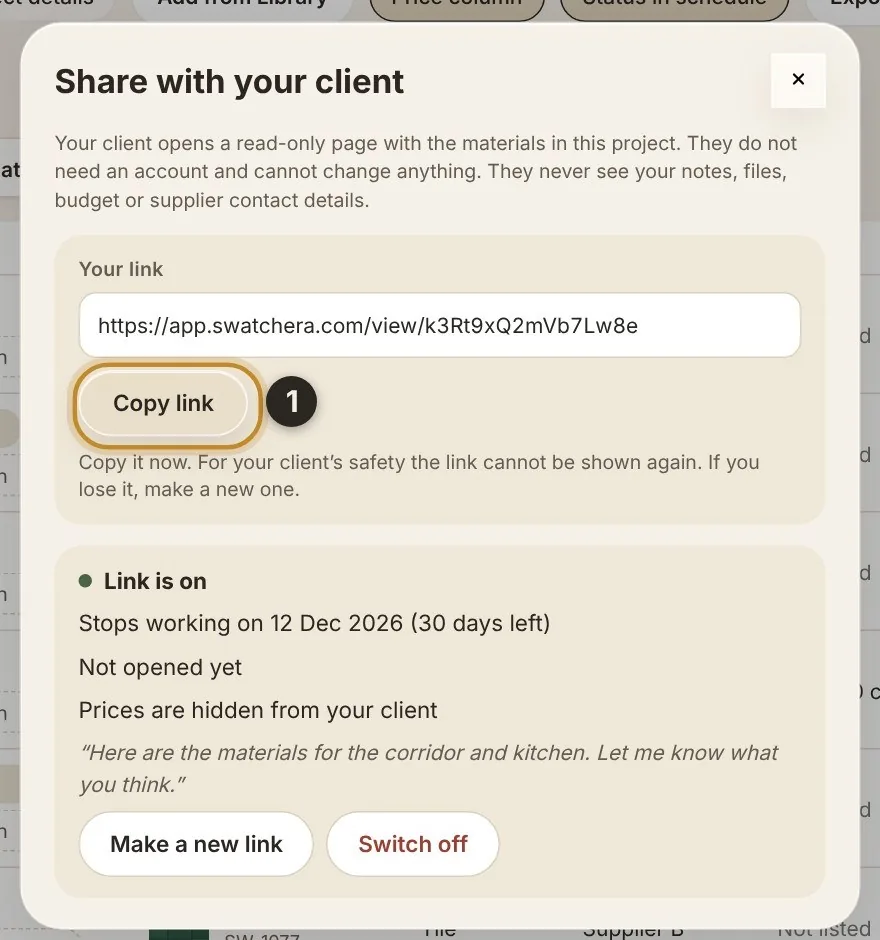
Click “Make link”.
Prices are hidden unless you turn them on.
A read-only page. No account and no sign-in.
Materials with their tags, locations and status, plus your message.
Never your notes, files, budget or supplier contact details.
They can print the page or save it as a PDF.
Good to know.
Shared materials appear in the Library tagged “User uploaded” once the Swatchera team approves them. Until then only you see them. “Only in my library” keeps it private.
Basic holds up to 5 of your own materials. Exports and client links are part of Freelancer and Studio.
You can switch a link off any time. Making a new link stops the old one straight away.
The material board is for desktop and tablet. Everything else also works in your phone’s browser.